I’ve dedicated a lot of effort to reviewing holsters. I enjoy the process of testing them and pushing them to their limits. Yet, despite my rigorous testing, I’ve never put a holster through the ringer as much as I did with the Safariland 6354RDSO.
Over two days of intensive training with Rich Graham and Full Spectrum Warriors, I ran this holster through a gauntlet of pain and training. I had a ton of fun training with the crew at Full Spectrum Warriors and felt I positively put this holster through the ringer.
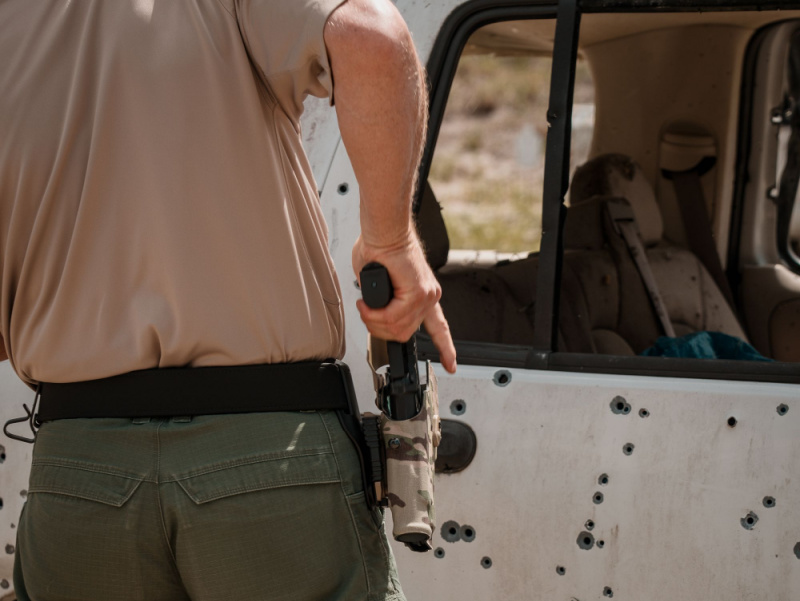
The Safariland 6354RDSO is a duty-type holster. I use the term duty to imply the opposite of concealment. It could be used as a duty holster, but it could also be used for competition or what I call adventure carry. Adventure carry includes riding horses or ATVs, hiking, etc. You know, adventuring where retention becomes handy.
Even though I’m a jarhead at heart, I went with the multicam finish and a mid-ride setup with the thigh strap. The specific configuration I used was for the Walther PDP, and the gun had a light from Modlite and an optic from C&H Precision.
Safariland Holster Retention Levels
On the first day of the event, we got a rundown of what retention means and how Safariland defines retention levels as we built our belts.
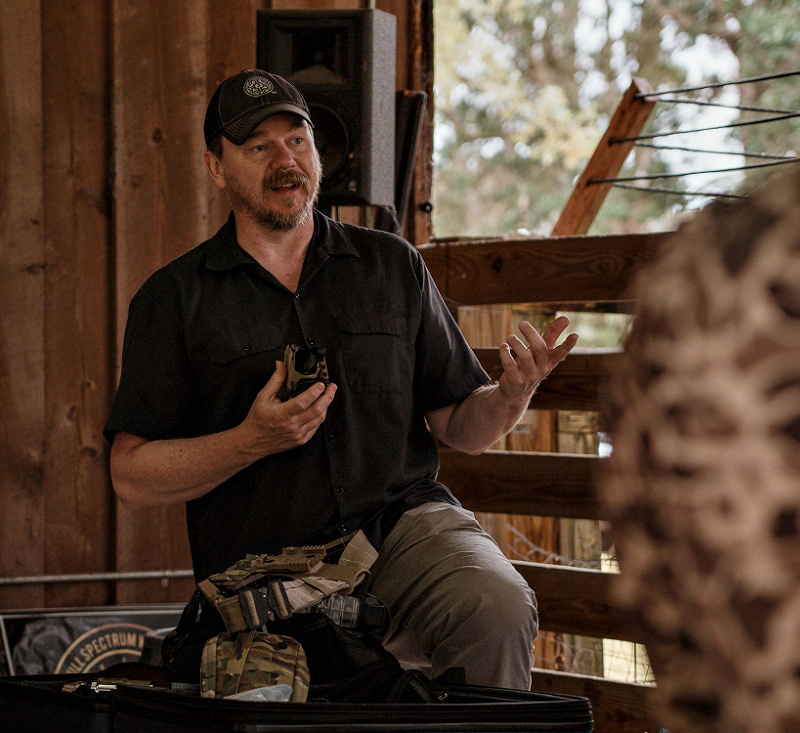
Even as someone who writes for the Safariland blog, I found the presentation informative and it helped me better visualize the definitions and how the holsters function.
Speaking of retention, the 6354RDSO is a Level 1 holster. This means it requires one hand motion to release the gun. That hand motion involves the ALS lever. My ALS lever was protected by an ALS guard that’s intended to keep cretins from trying to hit the lever from the front and draw your gun.
Testing the Retention of the 6354RDSO
After we got our holsters together, we grabbed ‘blue’ PDP clones, and our first class on retention combatives began. I wrote a more in-depth article on the event, so I won’t repeat that here. We partnered up and took turns using the techniques taught to resist grabs and trust the Safariland holster’s ALS system.
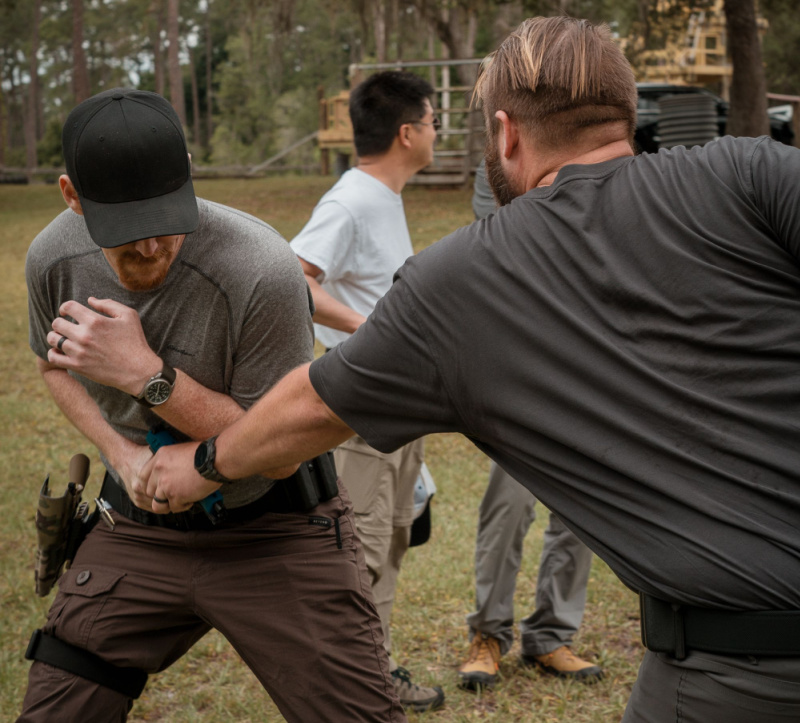
It quickly became apparent that it was extremely difficult, if not impossible, to take the gun from a resisting party. You’d have to ninja up on them and try to do it from behind, which seems quite unlikely.
The training eventually went to the ground, where we wrestled and fought over guns. Even through the sweat, dirt, and blood, if the gun started in the holster, it remained there. Not one of the dozen of us training could get our opponent’s gun out of the holster.
Even during the wrestling and ground fighting, a blue gun never plopped out of the holster, even when we were pushed into the dirt, tackled, and dragged. During this event, we broke a holster. One of the students landed directly on it, but the broken holster locked the gun down, and I still couldn’t steal it from him.
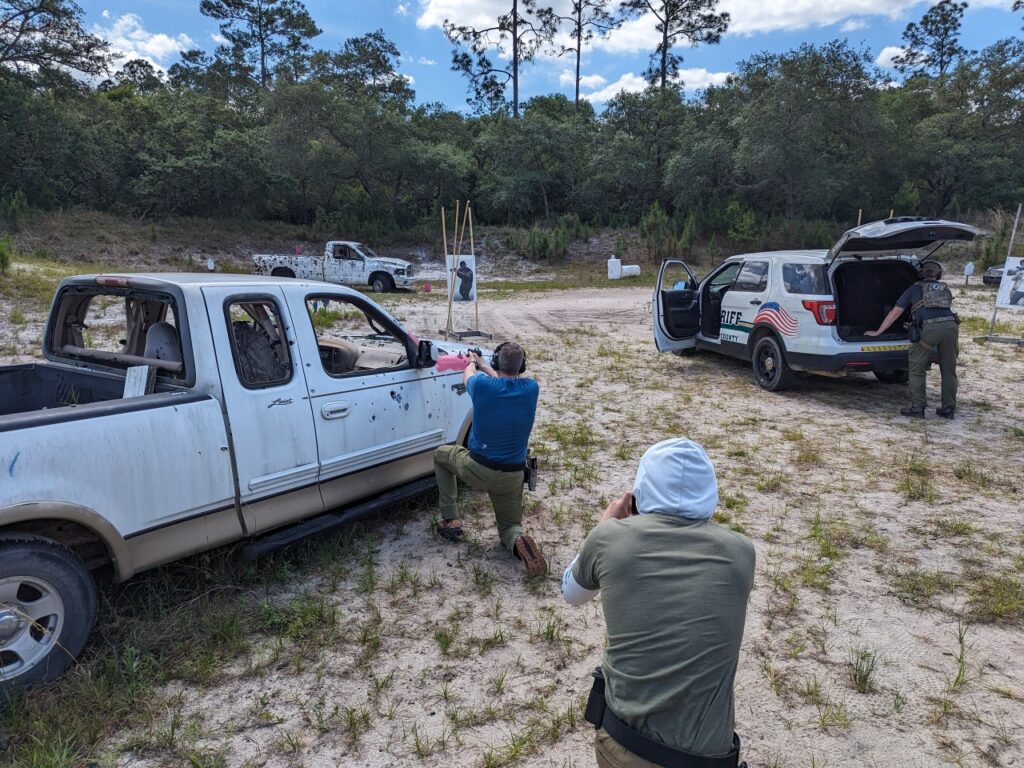
Close Quarter’s Combat Drills
The next event involved a series of close-quarter drills and skills with simmunition guns. These were also PDP clones and worked in our holsters without issue.
We did a variety of drills that involved lots of drawing and corner work and eventually went into room clearing. The training area became a cacophony of clicks and pops as guns were drawn and simmunitions were fired.
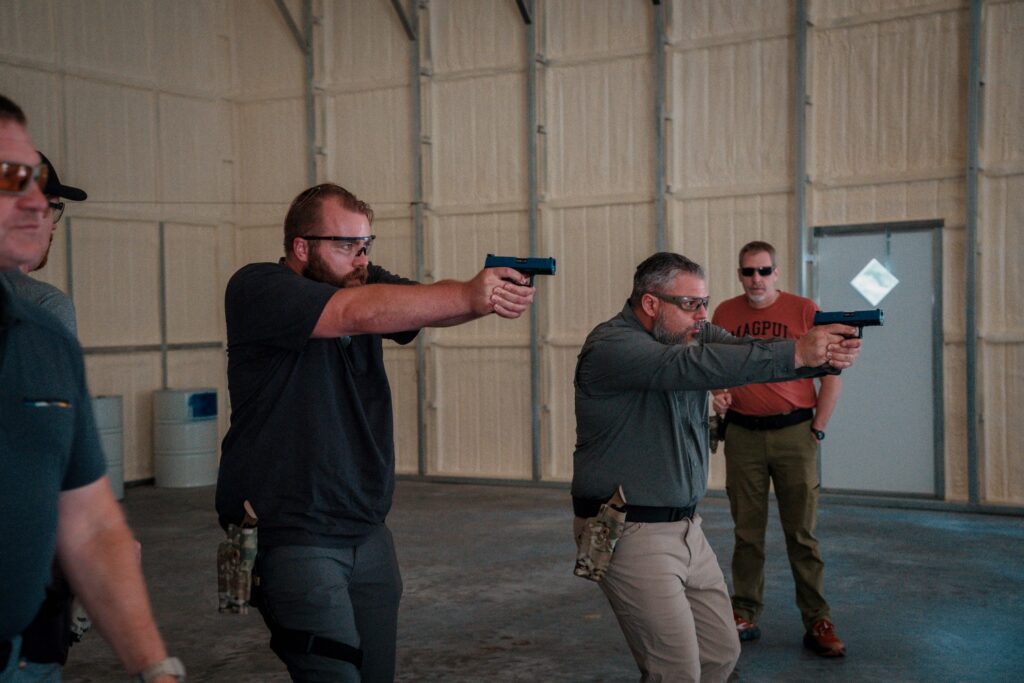
This was my first experience with the 6354RDSO, and in these drills, I got used to drawing and employing the weapon.
The ALS lever became second nature to me as we worked. At first, the ALS guard felt like it was in the way, but over time, I got used to it and eventually forgot it was even there. Getting the gun out of the holster and on target became a reflexive movement that was smooth and quick.
Night Shoot
This extended into the night shoot, where we went live with our PDPs. We did a quick zero of our optics and had some spare time just to shoot as we waited for the sun to go down. It was a fam fire, but it was rather unstructured and allowed us to get some live-fire holster work in.
I scored several 1.25-second draws, which is impressive for a holster I had only started using that day.
As the sun set, we started our night shoot.
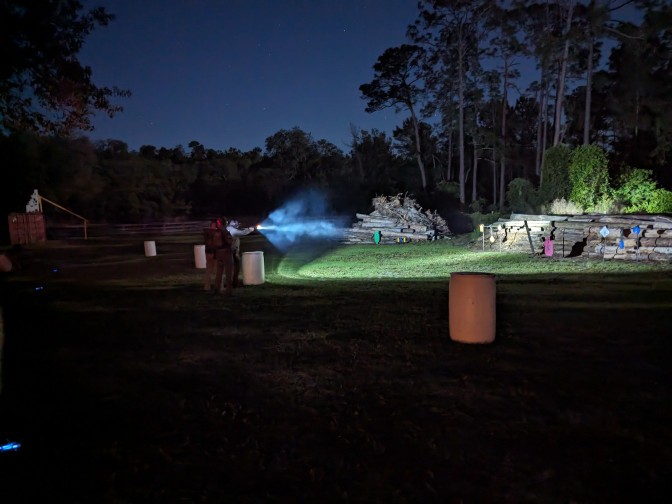
This shoot had several stages, each requiring a draw before starting and most required a weird position. I could confidently draw and engage even in weird crouched positions, behind cover, and over obstacles.
To shoot through some ports, I had to lie on my holster side, and even my 280 pounds couldn’t crack the holster.
In The Vehicles
The highlight of the trip was vehicle training. We shot in and around vehicles and even did a live fire course that involved multiple stages that required lots of driving.
Drawing from inside a vehicle with a partner next to you is an entirely different experience. You have to extend your sense of awareness of your environment and cannot spare a look at your holster to draw your gun.
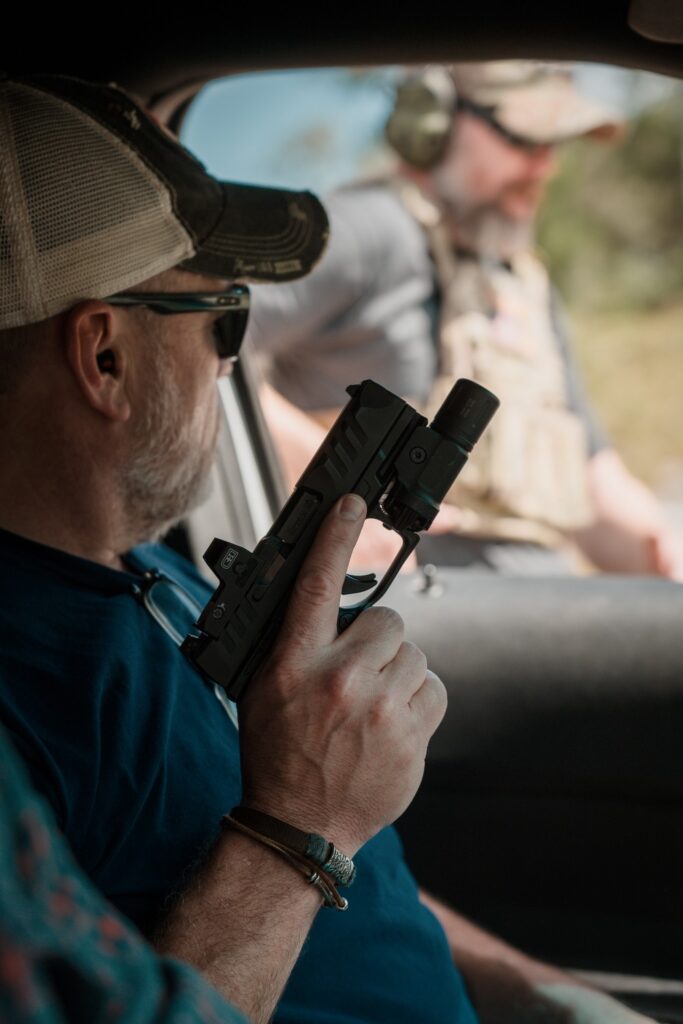
I had no problems drawing from my 6354RDSO and getting my gun into action. I’m a big guy, and almost all vehicles are tight, so my holster is pressed against the center console.
Even so, as soon as my hand got behind the gun, I could free it and get it into action.
A lot of our training involved starting in the vehicle and then escaping the vehicle. For a guy my size, this meant smashing the holster against the car as I escaped it. The bang of the holster on the vehicle was easy to hear, even over gunfire. Yet, I never had problems with the 6354RDSO.
Through the Obstacle Course
Our final event was a live-fire obstacle course. The course had us scrambling under some obstacles and climbing over others. We had to climb up an A-frame-style ramp, dive through a hanging tube, climb rock walls, and scale towers.
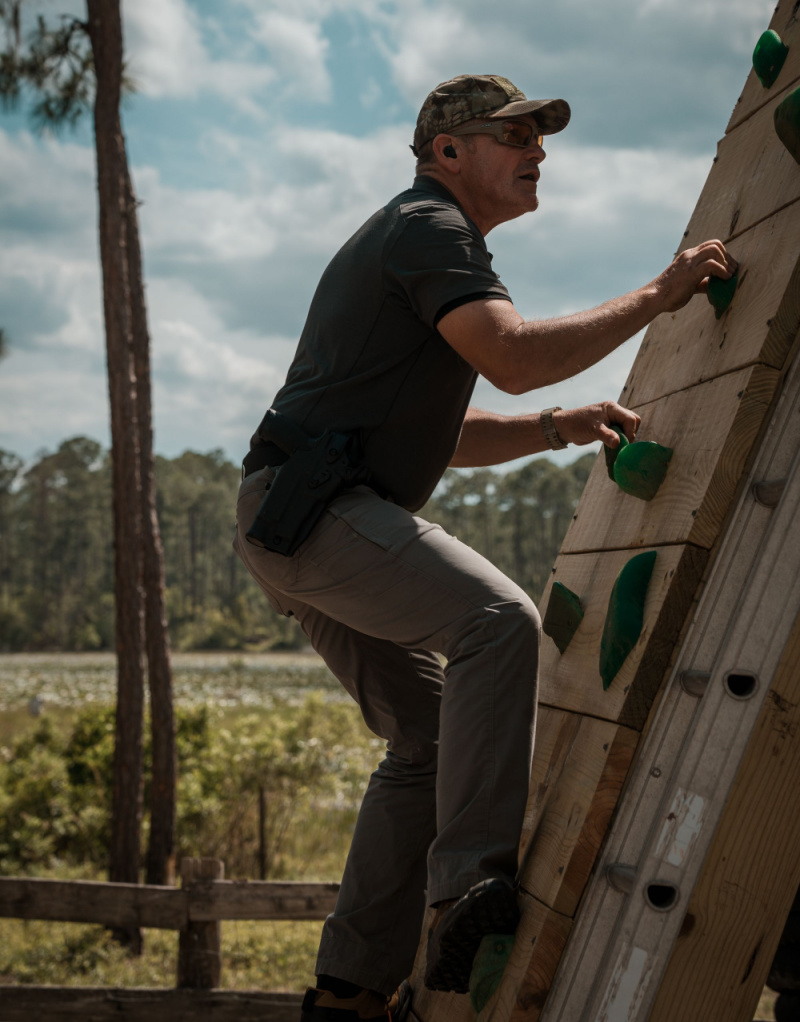
Between obstacles, there were live-fire portions that required a short pause, draw, and the necessary trigger work to move on.
My 6354RDSO conquered it all. The course of fire was tough enough to crack my Otterbox and phone screen, but the 6354RDSO didn’t tap out.
Tough Enough
The 6354RDSO now sits safely at home, free from all the terror Rich Graham can throw at it.
Throughout our two days of shooting, the holster held up to all the abuse thrown at in. It still looks brand new. The gun, optic, and light inside the holster were also protected and spared from any damage.
Good lord knows how many rounds we fired and how many draws I conducted. It was enough for me to go home with a sore elbow and beat-up shoulder.
The 6354RDSO seems tougher than me because I haven’t seen it whine yet. Check it out if you want a good do-it-all all holster with active retention. It can even accommodate all the bells and whistles of a modern handgun.