Ok, it’s easy to justify needing more than one holster, right? Just like guns, you need different holsters for different purposes. And I’ll admit, I’m a little bit of a gear junky as well… So, just like everything else, I have way more holsters than I need, but believe it or not, I use them all!
At first, I threw my holsters in a plastic tub so I could get to them easily. But over the years, I filled the tub, and now it’s a bit of a chore when I need one. Basically, I must dump the whole tub out on the counter and dig for the one I need.
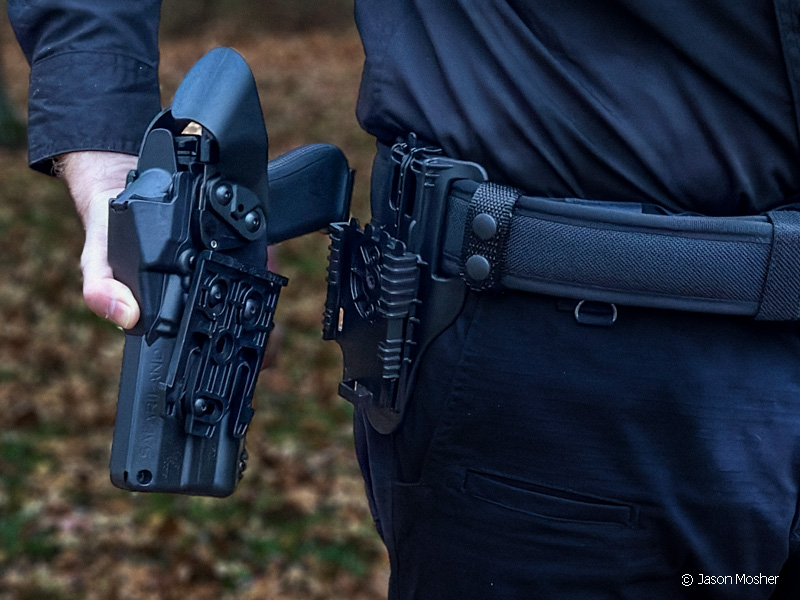
Because of the QLS (quick locking system) developed by Safariland, changing holsters is easy. When I need to switch from my Glock 17 to a Walther PDP, I simply slide the holster off the receiving plate and insert the new one. As I began searching for a better way to organize my holsters, I realized the QLS could help with that, too.
This led to me building a simple little holster caddy out of scrap pieces of wood I had lying around, and using the QLS receiver plate to attach my holsters to the caddy. Here is a quick rundown of how I built it.
Building a Holster Caddy
I’m sure there are a lot of cooler, better ways to build something that organizes your holsters. But my goal was to make something that was affordable, easy, and functional. I’m not a professional carpenter by any means, but I repair/build just enough around the house that I had some scrap pieces of lumber.
Here is a short list of the material I used for this little caddy:
- (1) Bottom shelf. 1X12 cut to 21 inches
- (2) sides. 1X12 cut to 28 inches
- (1) center upright. 5/8” plywood cut to 21 inches wide and 27 inches tall.
- (4) small caster wheels (these can be found at any home improvement store)
- Small package of wood screws
- (12-16) Safariland QLS Receiver Plates
You can use just about any type of wood screws to assemble the caddy. I used some Kraig Jig screws because I had them handy. One thing to note is that most wood screws have a curved head that is made to sink into the wood. This can cause thin boards (like 1X material) to crack. You may need to pre-drill and countersink your holes first. Kraig Jig screws have a flat head that does not push into the wood as you tighten it, but they do stick out on the surface more than others.
Cut, sand, assemble
As we walk through the process of building the caddy, keep in mind that you can make it from other sizes of boards. I happened to have a leftover 1X12, so I used it. Decide what size you want your caddy to be. Mine was intended to roll under the counter in my armorer’s workshop, so I made it a total of 29 inches tall and 22 1/2 inches long.
Decide what size you want your caddy to be, and you can adjust the sizes of the boards accordingly.
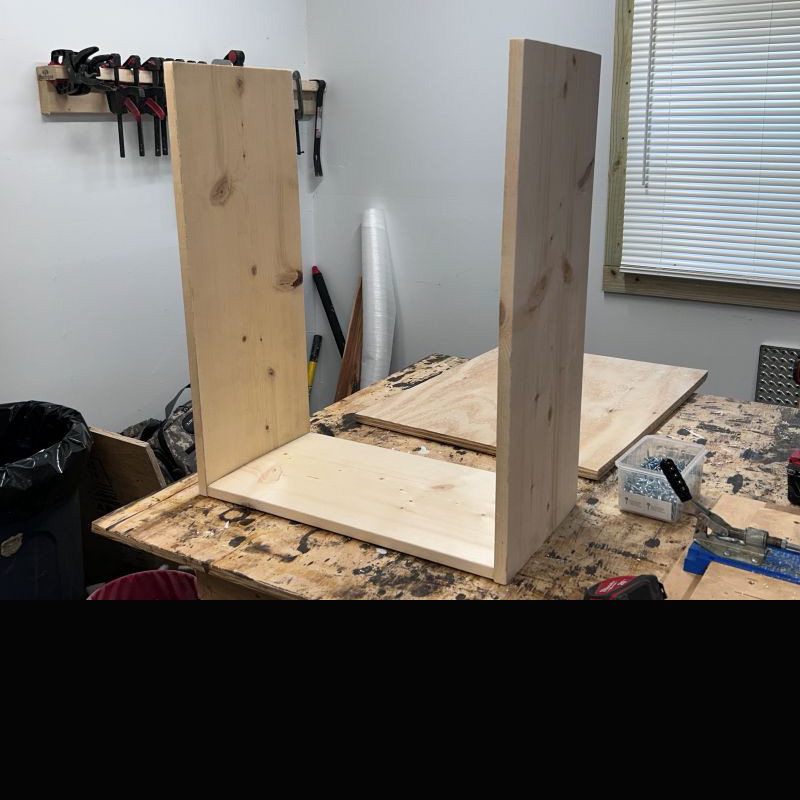
The first board I cut was the bottom shelf. This is what everything else is attached to. You can cut the two sides next, but keep in mind they will go outside of the bottom shelf. 1X boards from the lumberyard are not actually 1 inch. They are 3/4 inch wide, so your caddy will be 1 1/2 inches wider than your bottom shelf.
For the center upright, you can use a piece of plywood like I did, or make an upright out of smaller boards. If you want it to be a little cheaper and lighter, 1/2 plywood will also work. I just happened to have a scrap piece of 5/8 in my garage. This piece should be cut to the same length as your bottom shelf and 3/4 of an inch shorter than your sides.
Once your boards are cut, I recommend sanding them. Regardless of whether or not you plan to paint or stain it, this will make any type of finish go on better.
Assembling the holster caddy
Once this is done, you can assemble the caddy. I started by screwing the sides onto the bottom shelf. You can center the upright on the bottom shelf or make it off-center. Because I used 1×12 boards for the bottom and uprights, I wanted to get as many holsters mounted as possible.
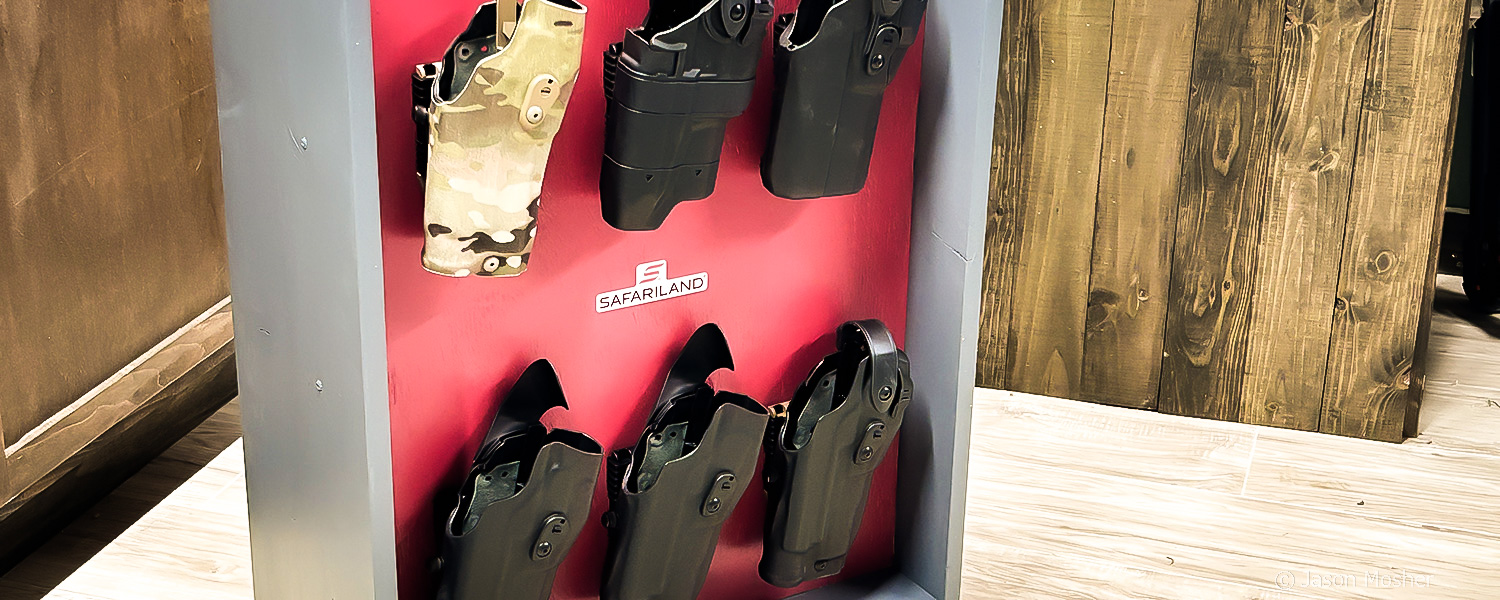
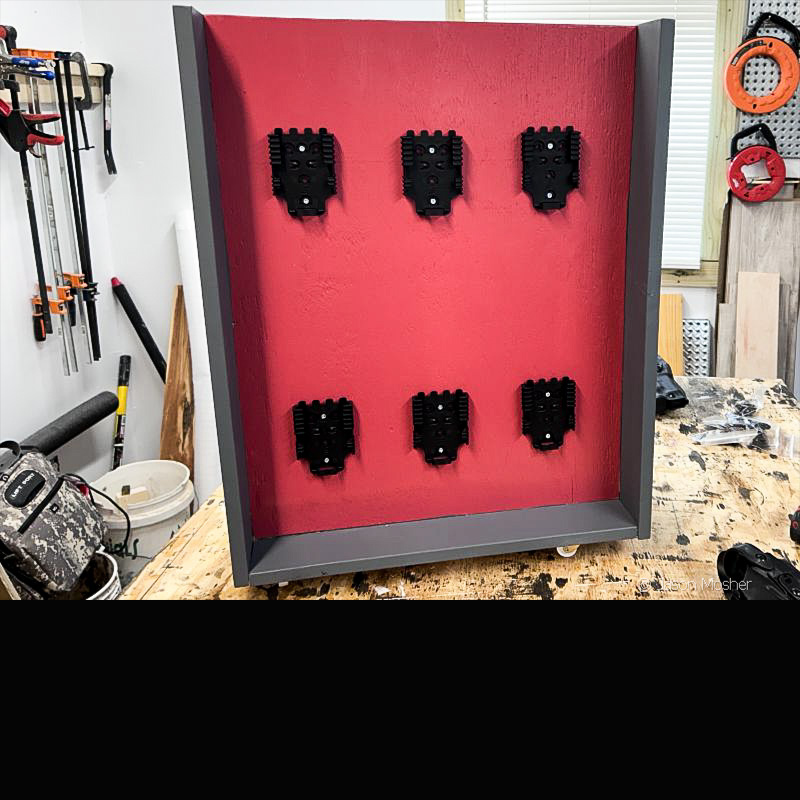
The center upright is where the QLS receiver plates will be mounted. But by making the center upright off-center, it gave me room on one side to mount two QLS receiver plates to each side. I mounted the center upright at 4 inches from the edge. This left 7 inches on the other side. If this sounds confusing, check out the photo. You can see how one side has more room than the other side.
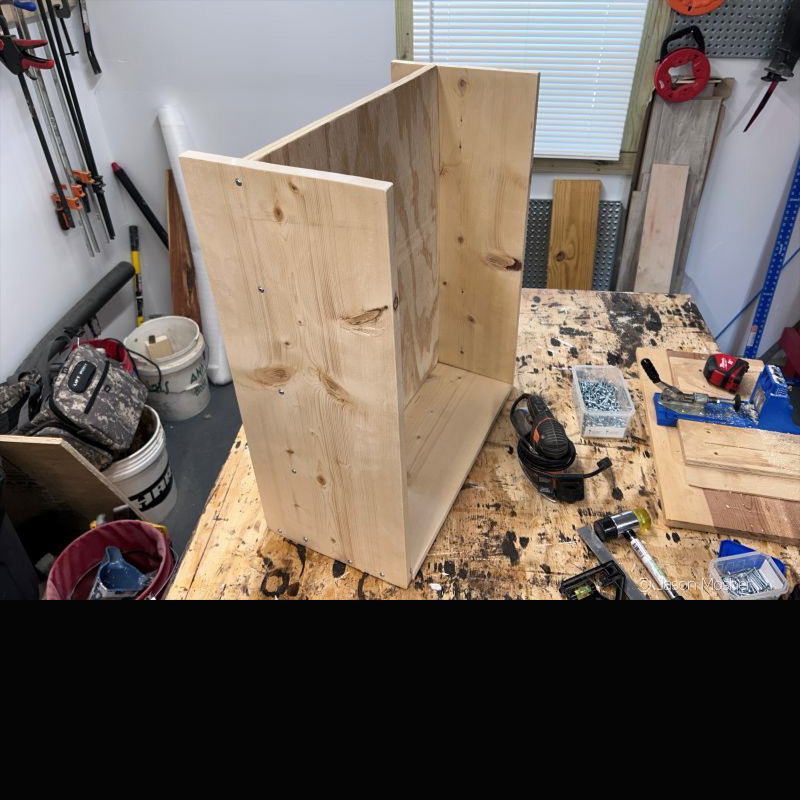
Once you screw the center upright on (the screws go through the bottom shelf, into the upright), you can install the sides. Line the bottom of the side up with the bottom of the bottom shelf. I used four screws to go through the side panel and into the bottom shelf on each side. Then I placed five more screws through the side panel and into the center upright on each side.
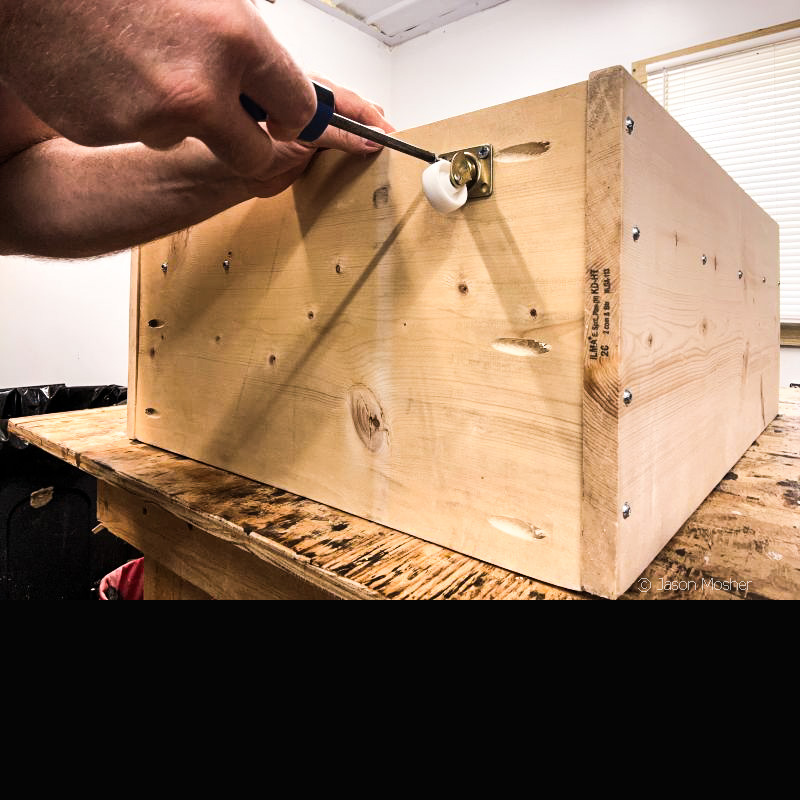
With it assembled, you can install the casters on the bottom. I found some at Home Depot for $3.50 each. They are two inches tall, so I took that into account when deciding how tall I wanted the caddy to be overall.
Paint or stain
Once you install the casters, you are ready to paint or stain the caddy. Again, I was trying to use as many materials as I could without buying anything. Red was the color I painted the benches in my workshop, so I used that and some grey decking paint I had left over. I kind of like the contrast of the center upright being red, so it worked out great.
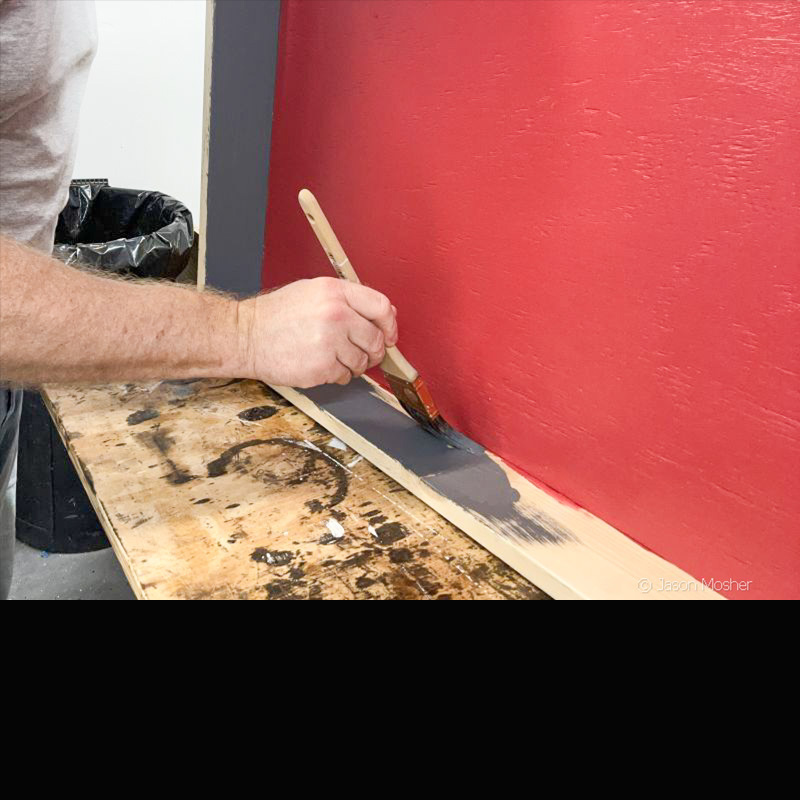
If you plan to stain the caddy, you will also need to give it a couple of coats of varnish or polyurethane when you’re done.

Installing the Safariland QLS receiver plates
This could be the most expensive part of building a holster caddy. Each QLS receiver plate can run about $23.50. You can also buy the whole system that comes with a receiver plate and a holster fork. This is recommended if you do not already have the QLS fork on your holster.
And don’t forget, just because you have the caddy built doesn’t mean you must install as many receiver plates as it can hold. Add them a little at a time if needed. The point is, you will now have a place to do it as you grow your collection of holsters.
When you mount the receiver plate to the caddy, hold a holster up to it and make sure the holster has plenty of room around it. You will need to pinch the holster forks behind the holster to get it off, so leave room for that.
I bought a small pack of #6 1/2 inch screws to mount the plates. It only took two screws per plate to mount it securely enough to hold the holster on. If you over-tighten the screw, the plate will warp just enough that the holster won’t slide over the plate. So make sure you stop as soon as the screw comes into contact with the receiver plate.
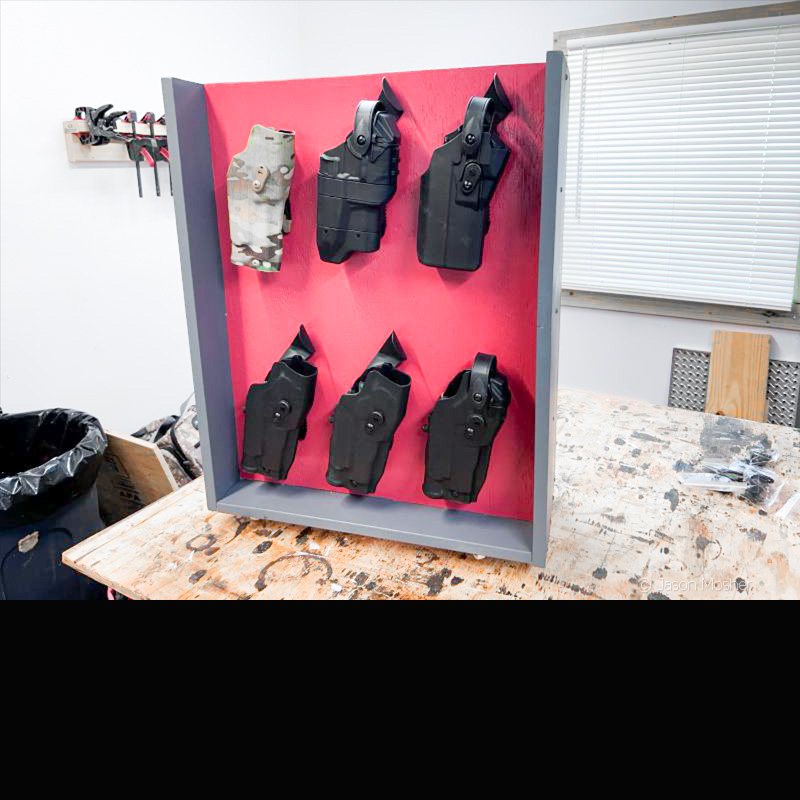
To leave enough room to get the holster on and off, I made two rows of three on each side of the upright. This allows enough room for 12 holsters. But I was also able to mount two receiver plates to the side panels on the deeper side of the caddy. This will give me a place to mount up to 16 holsters.
Add your own touch
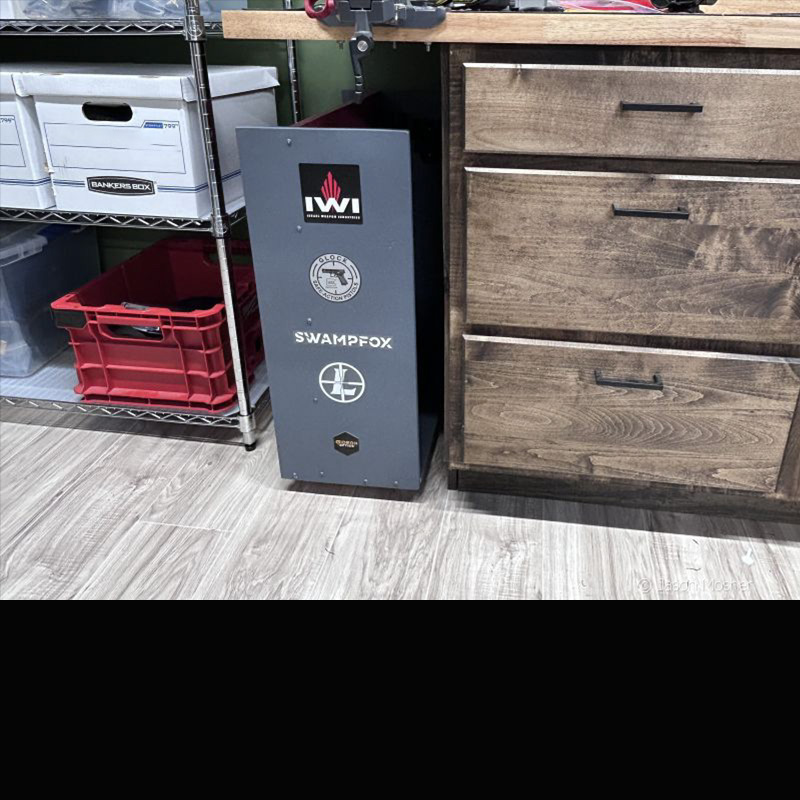
Besides customizing the size and color/finish, you can also add stickers or whatever decorative hardware you want to the caddy. If you’re like me, you have a box, drawer, or bag full of stickers that have something to do with the gun industry, right? I’m not sure why people in the gun industry started sending out stickers with their products, but I like it.
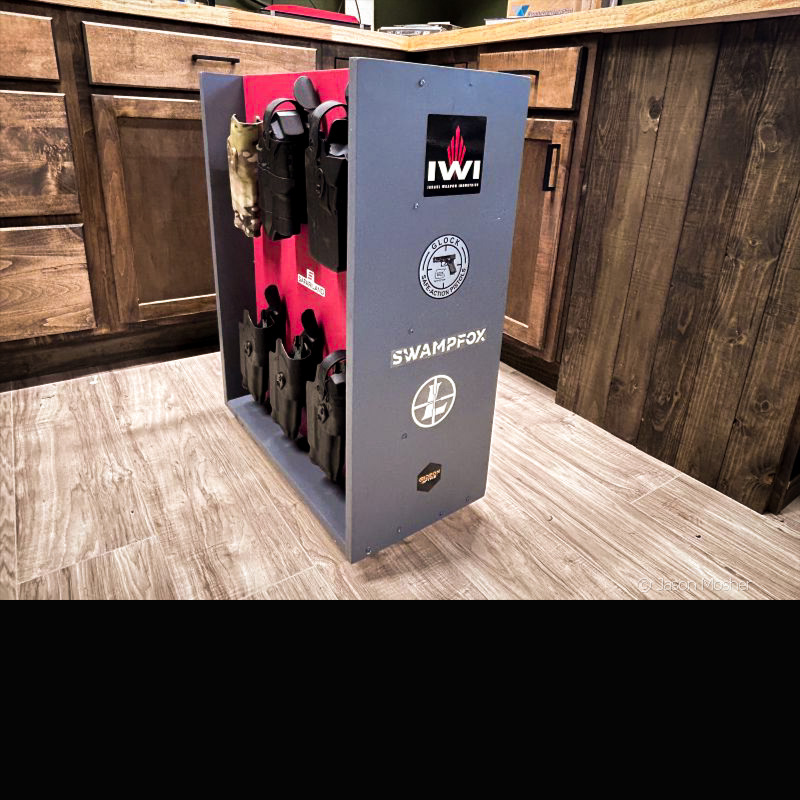
They end up on my laptop, gun cases, kids’ foreheads, wife’s water cup, and anywhere else I can think of. I picked out a few that I had not used yet and stuck them to the outside of my caddy just for fun.
When it was all said and done, I spent about $10 and some scrap supplies (not counting receiver plates) making my caddy. Now my holsters are easy to get to, and I can grab the ones I need without digging through a tub.

After making this one, I want to make a larger caddy for my other gear. Maybe something that will hold a vest, helmet, mags, and other gear. But that will be for another article, some other day. Until then, I can enjoy my little holster caddy that fits perfectly under my workbench.