My eyes will often glaze over at the discussion of point shooting. When someone says the line, “You won’t see your sights in a gunfight,” I typically stop listening. That is, unless we are talking about close retention shooting.
That’s the only time I’m aware of that point shooting has a purpose. Point shooting is unaimed fire based on the idea that you can hit the target effectively without aiming. In most cases, it’s nowhere near as effective as just using the sights.
Except in situations where you can’t use your sights because the threat is so close that you can’t extend your arms enough to aim the gun.
The threat might be on top of you and physically preventing you from extending.
Hell, you could be on the ground with the bad guy on top of you, and you need to draw and shoot. Or, they might be closing the distance and extending fully might put the gun close enough for them to grab.
In these situations, point shooting, or more appropriately, close retention shooting, becomes invaluable.
Close Retention Shooting: The Support Hand
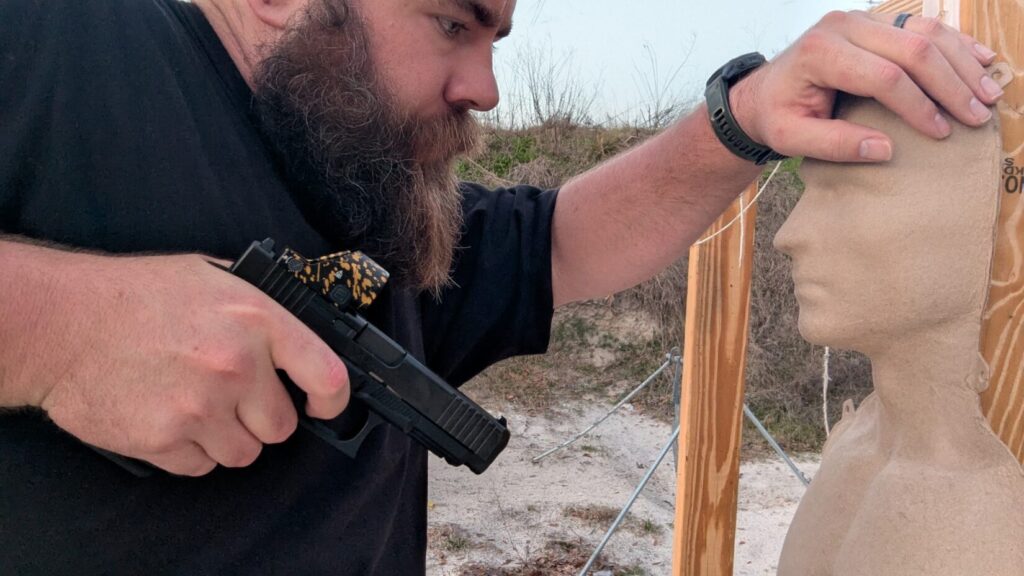
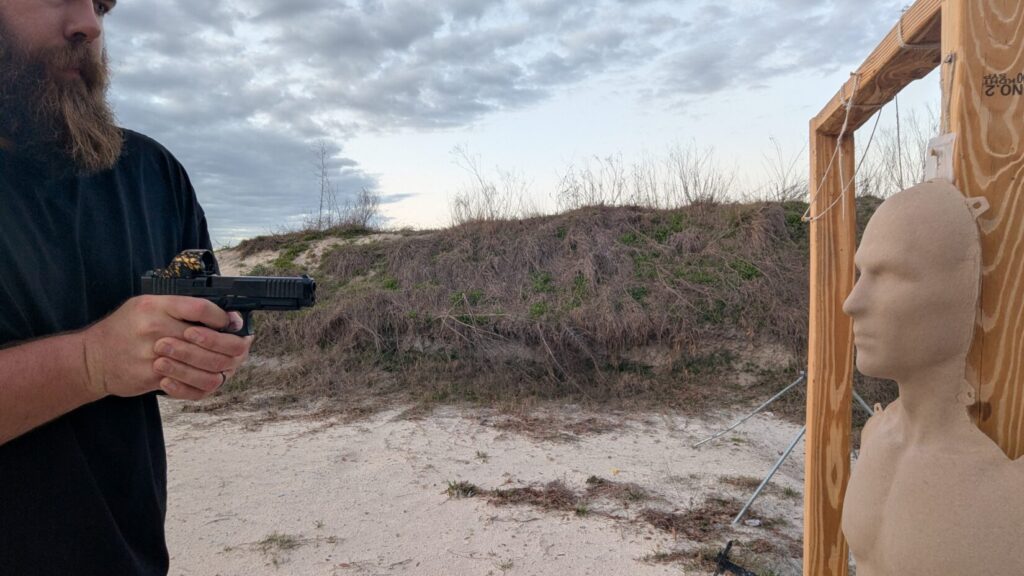
As the name implies, this is both a retention and a shooting position. The gun is kept close to the body due to the lack of distance, and to keep the gun out of the bad guy’s hands.
There are several ways to shoot from close retention. I’ll talk about my preferred method, but like most methods, it relies on a few core concepts.
First, when I draw, safety is still paramount. If I’m close enough to a bad guy to use close retention, I’m likely going to be engaged with my hands. I might be blocking blows, throwing blows, or tangled up.
What I want to watch for is the position of my support hand. If I’m blocking blows or tangled up and decide to employ a handgun, I have to get my support hand out of the way. The last thing I need to do is put a hole through my own arm or hand.
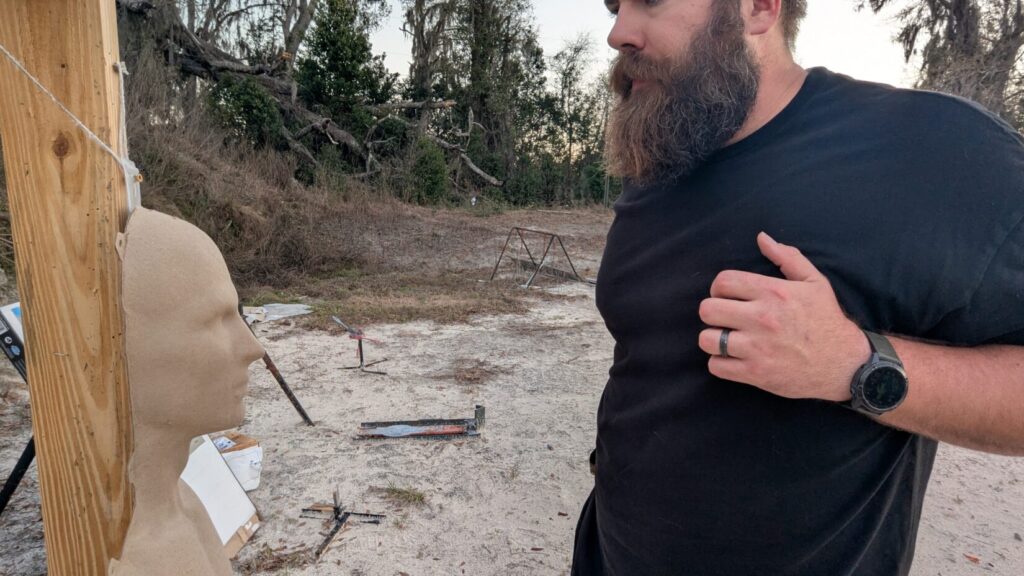
Optimistically, I want to retract that arm and get it close to my torso. In training, I aim to have my support hand wrist touch my upper pectoral area by the time I draw my handgun. That’s what I want to happen if possible.
However, in reality, the bad guy gets a say in the fight.
We might be locked up, or the only thing keeping you from hitting your back is that support hand. If that’s the case, we want to try and keep the support hand high on the threat and orient the gun lower with the support hand.
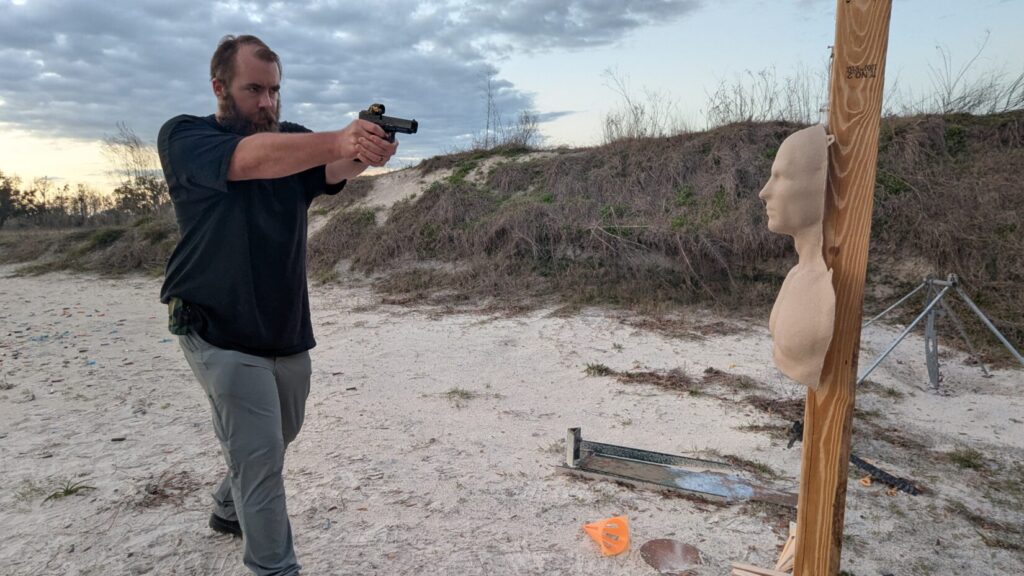
The Shooting Hand
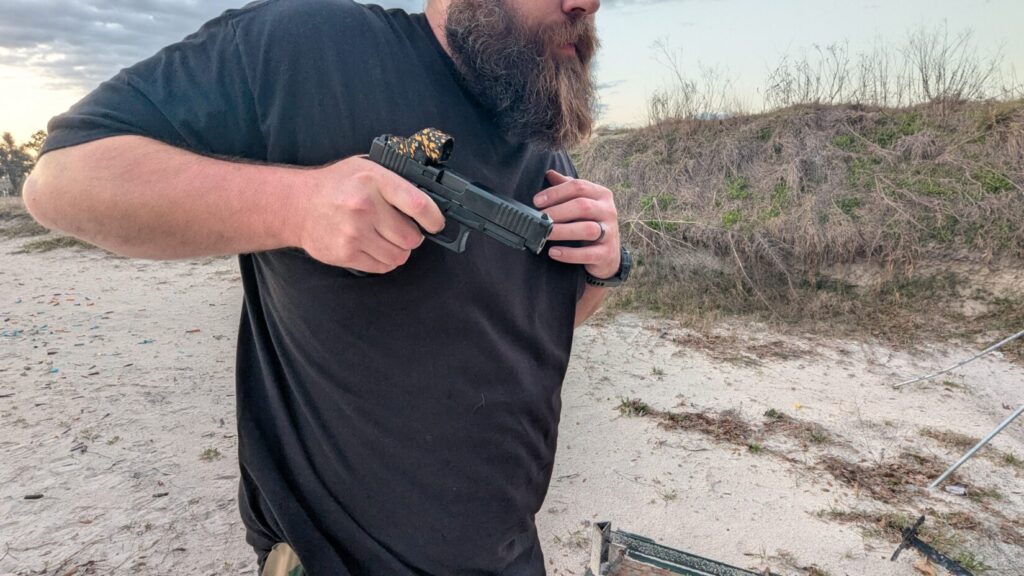
When I draw for close retention, I think about being a marionette. Specifically, my elbow is attached to a string. When I grab the gun, the string pulls my elbow up, which clears the gun from my holster. I want to lock my arm and wrist in a straight line.

Then the string pulls my elbow up and rearward, almost like I’m trying to hit a guy that’s behind me. It should be as high as possible. It’s not super comfortable for my old man shoulders, but once it’s uncomfortable, we know it’s high and back enough.
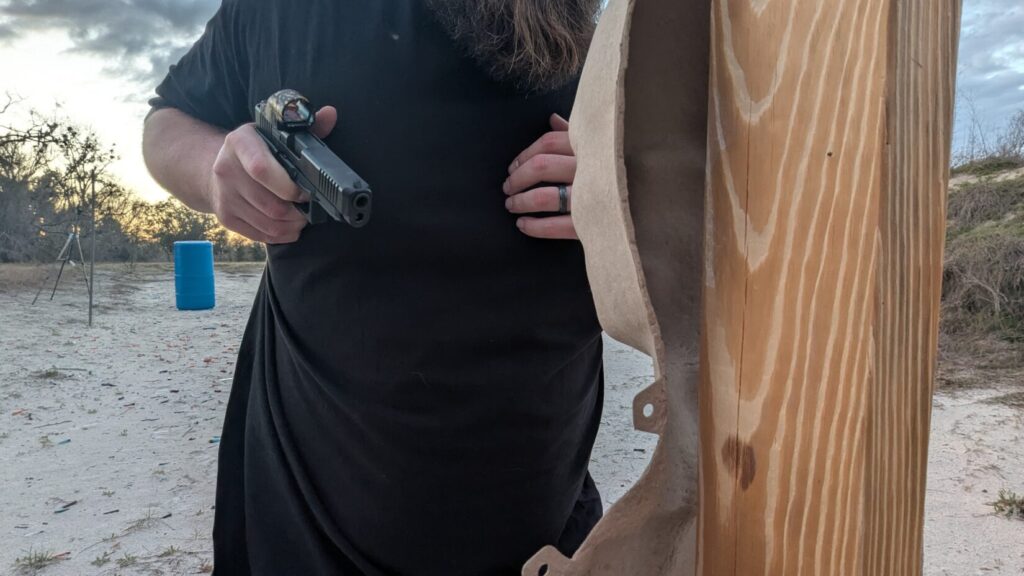
My wrist will be positioned against my body. If your wrist and arm stay straight, the gun is naturally oriented at a downward angle and toward the target. If it’s pointed upward, you’re doing something wrong.
Firearm Operation Considerations
I like this wrist-to-body method because I have two physical reminders that I’m doing it right. My wrist is against my chest, and my shoulder hurts. To me, it requires less thinking and more feeling.
Beyond that, with a semi-automatic, we have a moving slide to consider.
Interrupting this moving slide can create a malfunction after the first round is fired. When my wrist is against my body and the gun is oriented upward, I know there is nothing in that slide’s way.
Aiming
We aren’t using the sights, and at this extreme close range, we are making an educated guess. Since that’s the case, our gun is oriented downward; a miss is much less likely to hit someone innocent behind the threat. It’s more likely to hit the ground.
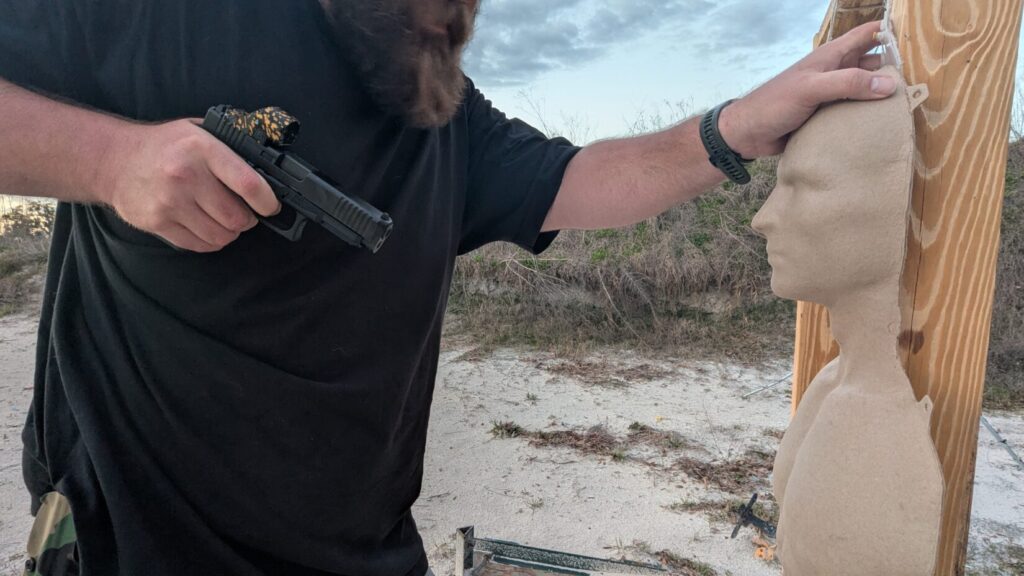
This does mean we are trading good shot placement for safety. We typically want to hit the upper torso, but we sacrifice that for safety reasons of both firing the gun and maintaining control over it.
Follow Through
After striking the threat sufficiently to allow you to break contact, we get to a critical step: follow through. If possible, create distance between you and the threat while maintaining your awareness of the target. Distance is decisional currency.
Escape may be the best bet, but if your attacker is not subdued, you might have to keep fighting. If you can create distance, you can potentially extend and fire accurate upper torso shots.
With that said, the situation dictates. If you’re being pursued, you may not be able to extend fully, or maybe you shouldn’t extend fully to maintain control over the gun.
Bringing the gun centerline close to the body with both hands on it might be the move. Here, we can visually see the gun and target, and aim to a degree. It’s not superbly precise, but with a two-hand hold and a visual of the target and the gun, we can make effective hits at close range.
Only bring the gun as far forward as it’s safe to do so to retain the gun.
Get Trained
Like all firearms training, close retention shooting is dangerous. If you’re serious about your skills at close range, you should seek training from qualified professionals. The best in the business is going to be ShivWorks. They have entire classes and drills dedicated to close retention shooting.
Training under the eyes of a qualified instructor is the best way to build these critical lifesaving skills.