If you’re new to mounting a scope on a rifle, it can be a frustrating experience, to say the least. Rifle scopes, rifles, ammo, and everything in between are not cheap. And getting them to work together can be difficult if you miss a few simple steps.
If a scope isn’t mounted correctly, you might find yourself chasing your zero at the range. This causes you to make one adjustment after another, and it never seems to quite line up. Even worse, if you do manage to get something close and then need to adjust the scope’s position, you’re back to square one.
And so, if you’re new to mounting a scope on a rifle and want to learn the process, this is a great place to start. We will walk through each step of the process.
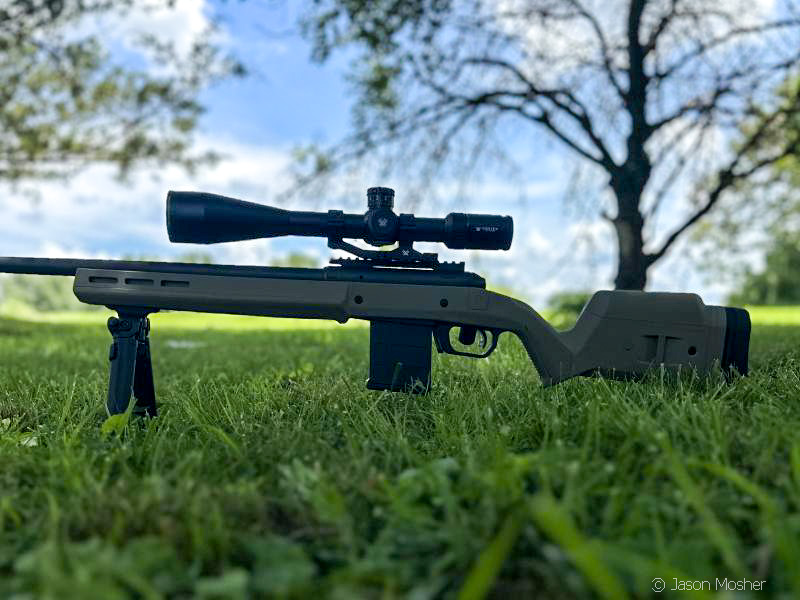
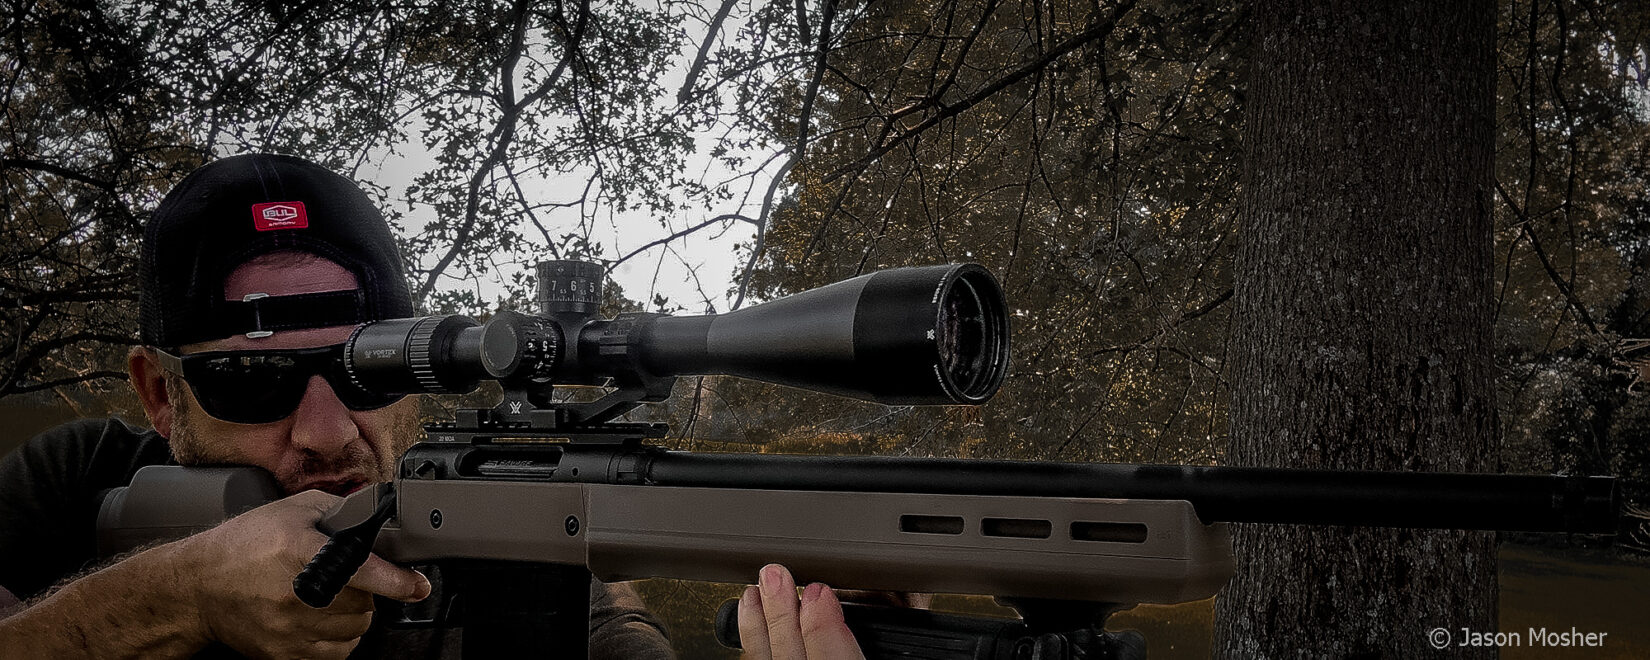
For this project, I am mounting a Vortex Golden Eagle HD 15-60x52mm scope to a 6.5 Creedmoor Savage Model 110 rifle with a Magpul Stock.
To connect the two, we’re using a Vortex SPORT Cantilever 30mm mount. Vortex Optics also provided one of their PRO Leveling Kits and a Vortex Pro Torque Wrench, so a big shout-out to them.
I will also be using the Real Avid Master Gun Workstation, which provides a stable platform and allows for fine leveling adjustments. This tool isn’t required, but if you plan to work on your hunting or precision rifles very often, this thing is worth the money.
Preparation and Initial Setup
Before we begin, it’s important to have a clean and organized workspace. Make sure your rifle is unloaded, and the chamber is clear.
With the rifle safely secured in the Real Avid Master Gun Workstation, take a moment to familiarize yourself with all the components. Lay out the scope, the cantilever mount, the leveling kit, and the torque wrench.
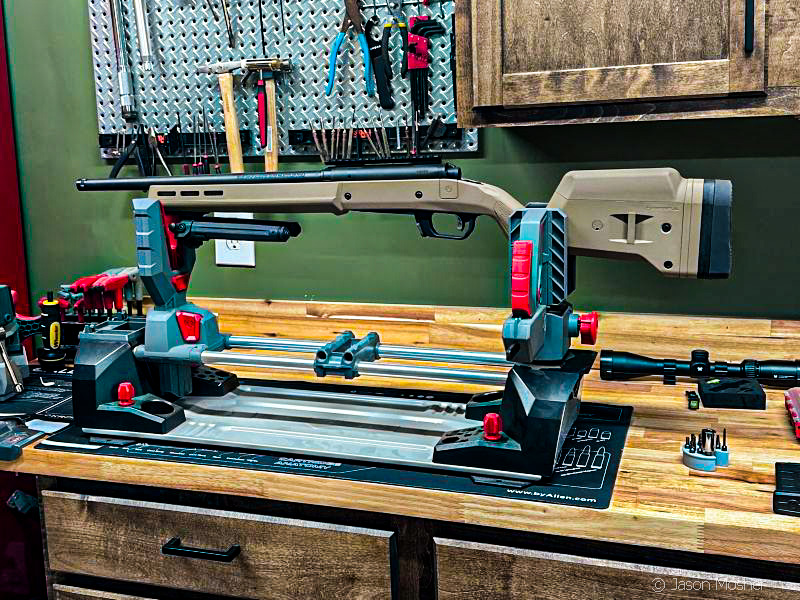
The Real Avid workstation is a key tool here. Its adjustable clamps and locking mechanisms will hold the Savage 110 securely, preventing any movement during the installation process. Before placing the rifle in the vise, it’s a good practice to use the workstation’s built-in leveling knob to get the entire platform as level as possible. This creates a solid, stable base to work from.
Mounting the Base and Rings
With my rifle in the workstation, I can make sure it is level using the level from the Vortex kit. It is made to attach to a Picatinny rail, so it’s easy to snap it on and make the adjustments.
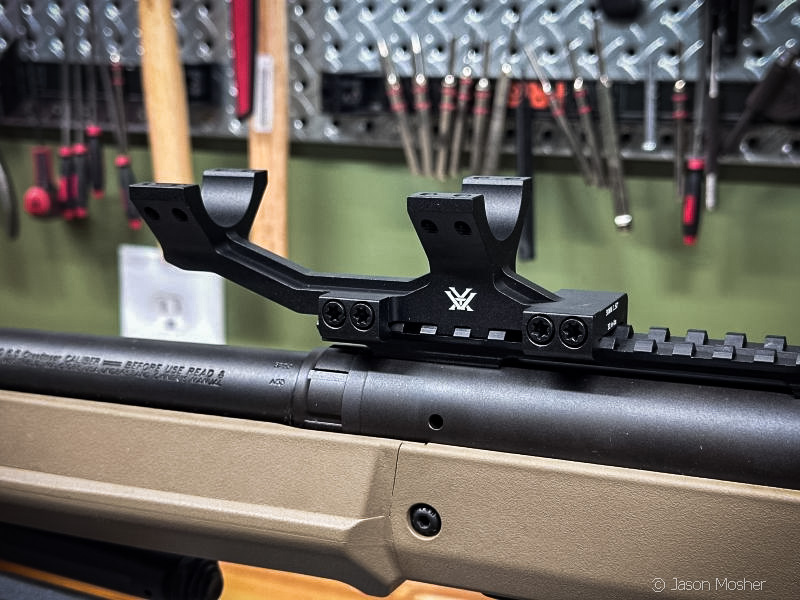
The next step is to attach the mount to the Picatinny rail of the rifle. A cantilever mount is an excellent choice for bolt-action rifles as it pushes the scope forward. Because of the way it’s made, it allows the scope to move forward more than it could with standard scope mounts.
If you have not purchased a scope and mounting rings yet, pay attention to the tube size and the style of mount you want to use. Most scopes will list the ring size on the back of the box.
When selecting a mount, you also want to make sure it is tall enough that the scope is not touching the rail of your rifle. The larger the scope is in diameter, the higher it may need to set off the rifle.
After you place the mount on the rail, you may need to do some adjusting later on. But for now, I am going to place the mount as far forward on my rail as possible.
When you place the mount onto the rail, the mounting bolts should be on the left side of the rifle. Using the Vortex Pro Torque Wrench, tighten the base clamp screws. The recommended torque setting for most Picatinny rail clamps is between 25-30 in-lbs, and in this case, it calls for 30. Tighten the screws in an alternating pattern to ensure even pressure.
Next, prepare the scope rings. The Vortex SPORT Cantilever Mount has integrated rings. Remove the top halves of the rings by loosening the screws. This will allow you to place the scope into the mount.
Setting the Scope and Eye Relief
Gently place the scope into the lower halves of the rings. Replace the top halves of the rings and loosely tighten the screws, just enough to hold the scope in place but still allowing forward and backward movement. Now, it’s time to set the proper eye relief.
Shoulder the rifle as you would when you are shooting. Your head should be in a natural, comfortable position on the cheek rest. Adjust the scope forward or backward until you see a full, clear sight picture through the eyepiece. I will note, this should be done with the scope set to the highest power (zoomed in all the way).
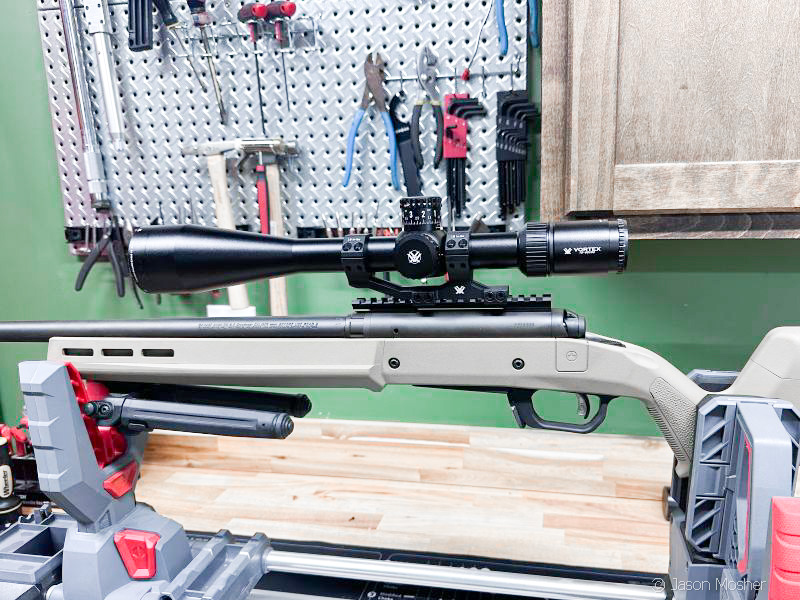
There should be no black halo around the image. It’s a good idea to cycle the bolt to make sure there is adequate clearance between the bolt handle and the scope’s eyepiece. Once you’ve found the sweet spot for eye relief, make a mental note of the scope’s position in the rings. I often place a piece of tape on the scope so I can put it back if it moves any.
After checking my eye relief, I ended up moving the mount back (towards the stock) just a little.
Leveling the Scope
With the eye relief set, the next critical step is to level the scope’s reticle with the rifle. An unlevel reticle can cause your shots to drift left or right at longer distances. For this, we’ll use the Vortex PRO Leveling Kit.
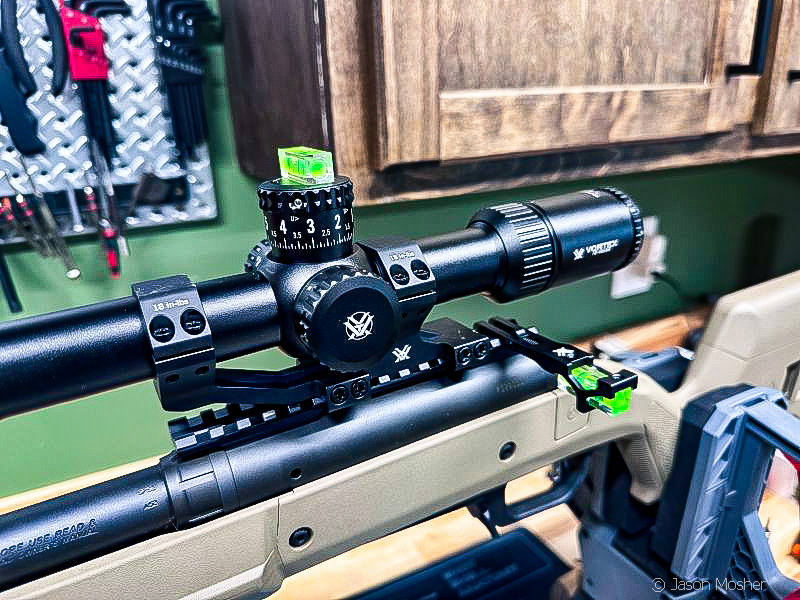
First, place the level with the Picatinny mount on the Picatinny rail, just behind the scope. Next, place the larger level on top of the scope’s elevation turret. Now, rotate the scope within the rings until the bubbles on both levels are perfectly centered. This indicates that the scope’s vertical crosshair is aligned with the rifle’s bore axis. Be careful not to move the scope forward or backward while making these rotational adjustments.
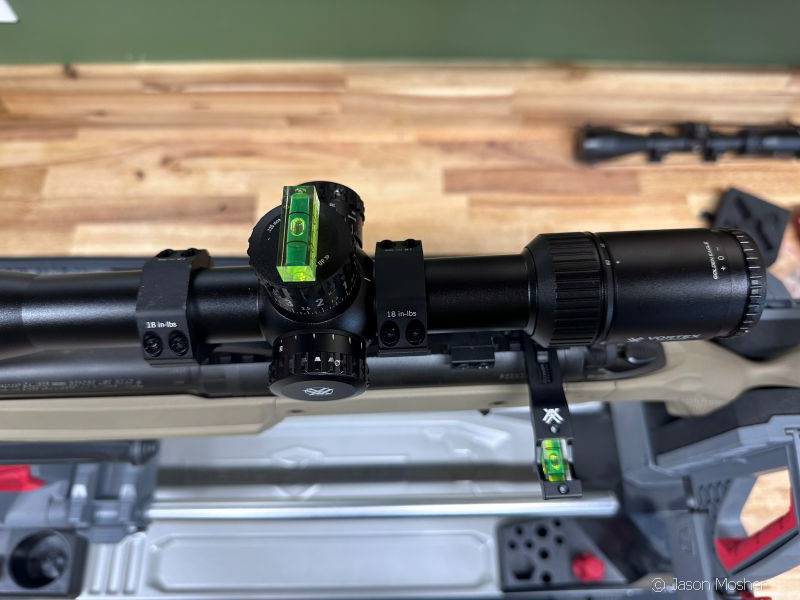
Once you are satisfied that the scope is level, it’s time to tighten the ring cap screws. Using the Vortex Pro Torque Wrench, tighten the screws in a diagonal pattern, a little at a time, to make sure you have even pressure.
The recommended torque for Vortex rings is typically between 15-18 in-lbs. Do not overtighten them because this can damage the scope tube. As you tighten, keep an eye on the bubble levels to make sure the scope doesn’t rotate.
Ready to sight in your rifle
With your scope mounted, you are ready to sight in your rifle. We won’t get into sighting in a long-range rifle today, but we are now ready for that step.
As you can see, there is more to installing a rifle scope than slapping it on the rifle and tightening it down. But it’s also not a complicated process either. Just make sure you have a good workspace and the right tools before you attempt it. Other than that, the process is fun, and for me, even relaxing. Now I just need to get it sighted in, and it will be ready for hunting season!