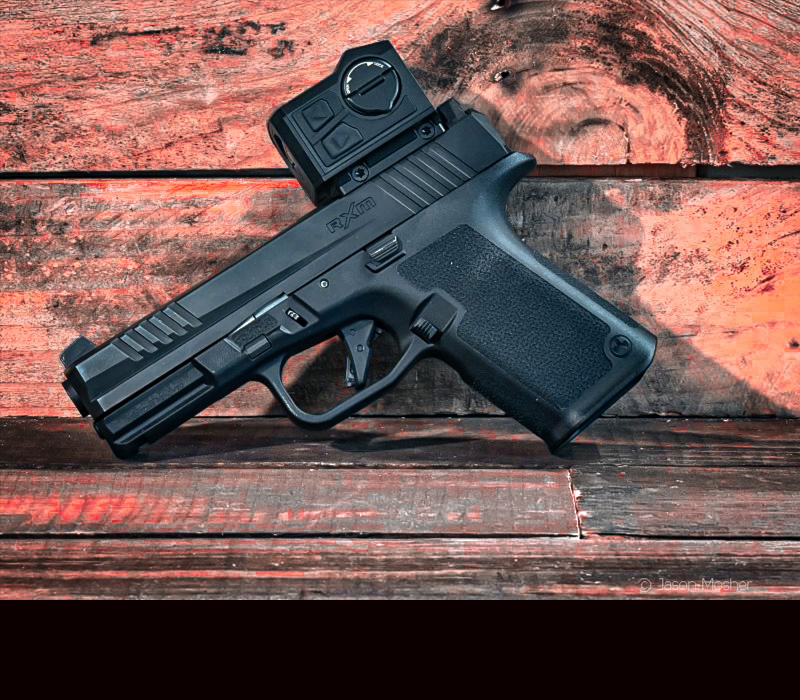
In my first review of the Infitac Fast Mini FML19, we covered the basics of the thermal optic. This included mounting it to a Ruger RXM, powering it up, and operating the touch-screen menu. Using a high-tech thermal imaging optic is a little different than your standard reflex sight. While I touched briefly on the “zeroing” screen, I wanted to cover a little more of this process during our first session at the range.
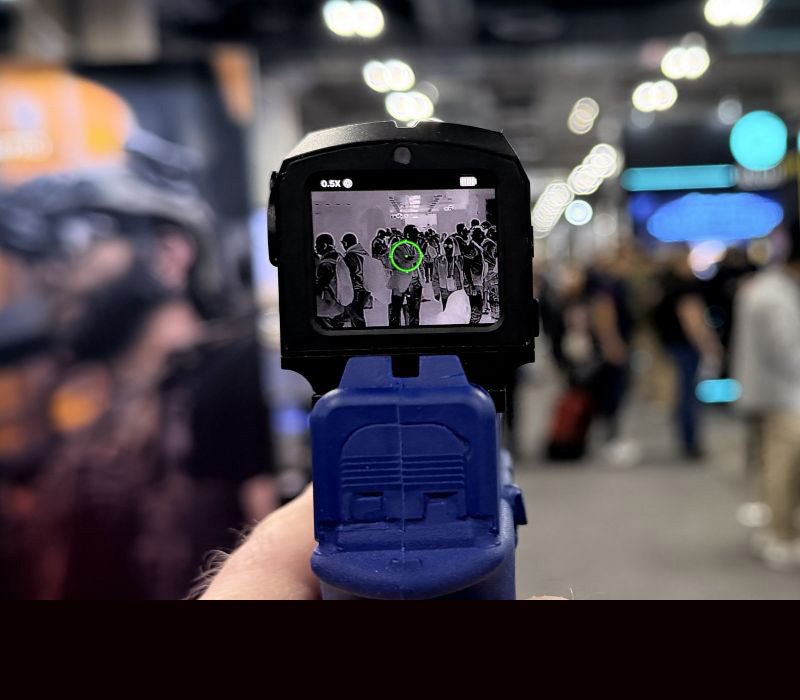
It’s always a good day when you can spend it on the range, and the FML19 made it even more fun. It also got some attention from other people on the range. There were several who noticed a bright blue screen on the back of my optic as they walked by. Having a thermal imaging screen on a handgun is not a common thing to see, but it’s kind of cool.
And so, in this article we will cover zeroing in the FML19 optic and how it handled on the range.
You see energy, not reflection
In physics, heat is the transfer of energy from a warmer object to a cooler one. Thermal energy is the energy an object possesses due to the motion of its atoms.
A thermal optic works by capturing Infrared Radiation (IR), which is invisible energy emitted by all objects based on their temperature. A standard camera and the human eye see reflected light. But a thermal device uses a specialized germanium lens to focus this radiation onto a microbolometer. This is a high-tech sensor that measures tiny differences in heat. This sensor acts as a digital thermometer, assigning a specific color or shade to different temperatures to create a visual “heat map” of the environment.
Because it detects emitted energy rather than reflected light, a thermal optic requires zero illumination, allowing you to see through total darkness, fog, or light brush by highlighting the thermal contrast between a target and its surroundings.
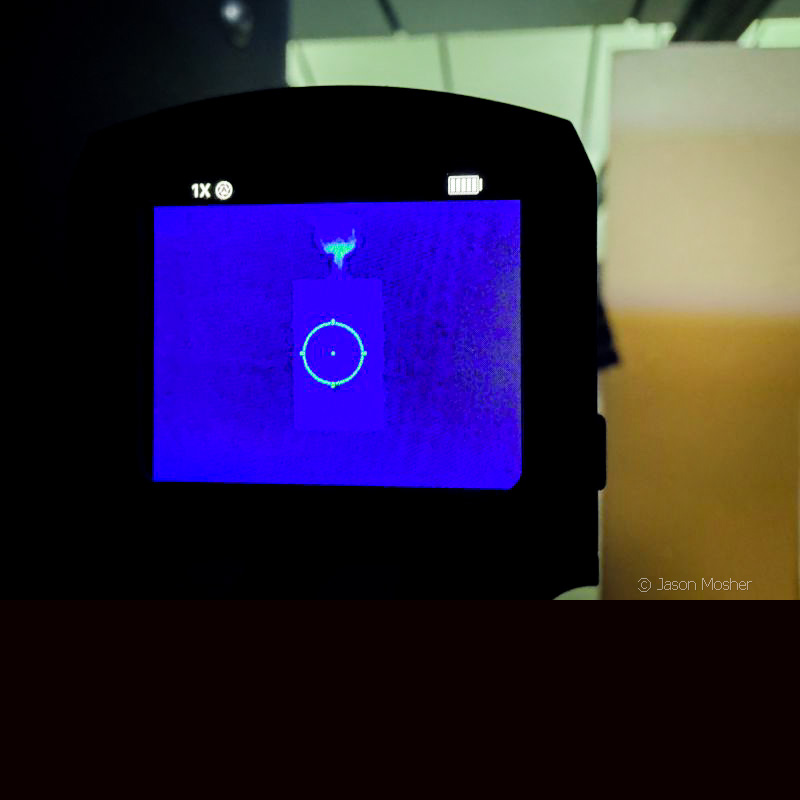
This is why the screen may be “blank” looking when there is nothing in front of it giving off any heat. It’s also why you see different shades of yellow, red or orange when seeing an image on a thermal screen.
Why does this matter at the range?
Basically, you need something warm to see it on a thermal optic. A standard target may not show up on your screen, which makes it a little hard to zero the optic right? While I could see the outline of my target, it was not enough to zero the optic. This is why Infitac provides a couple of thermal sticky pads with your optic.
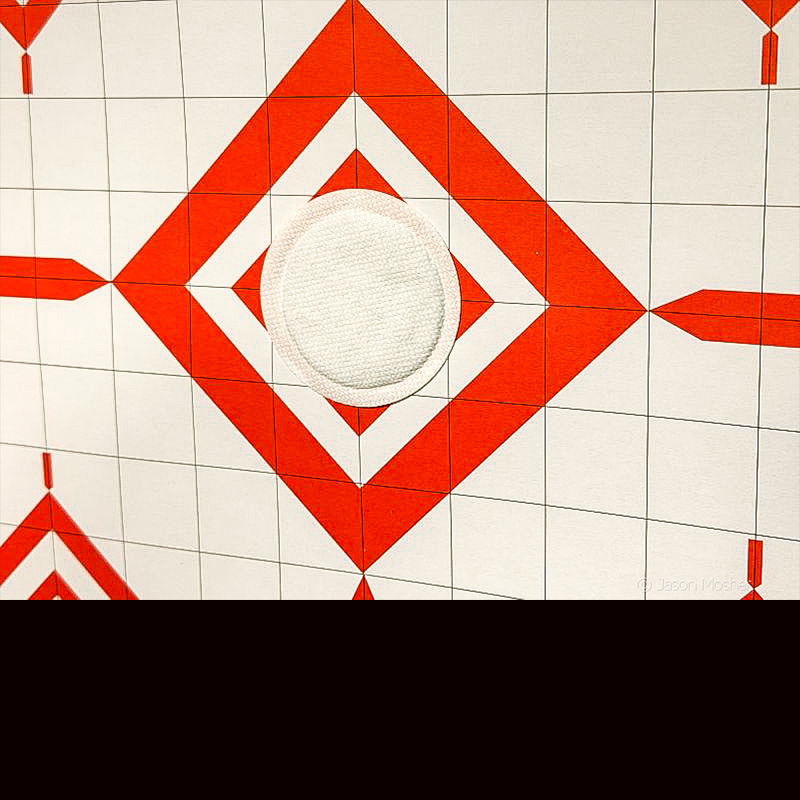
These small sticky pads react to the air when they are opened and begin to heat up. To use one, simply remove it from the package, peel the back off and stick it on your reference point of the target. In other words, it becomes the “bullseye.”
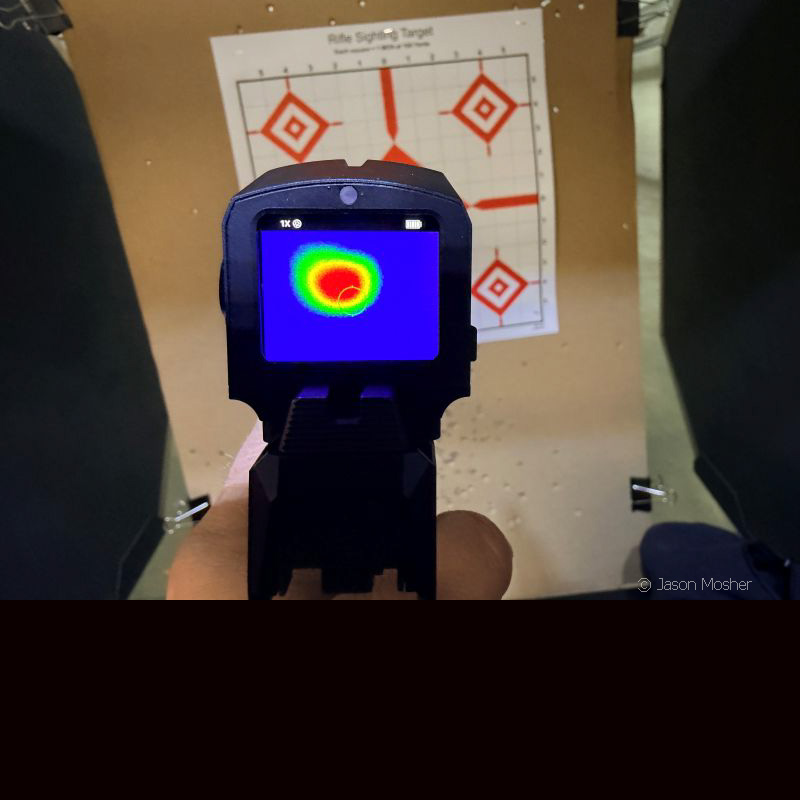
The pad is warm enough to show up on your FML19 thermal optic right away, but it gets warmer after a couple of minutes. Once it’s fully warm, you won’t see much else on your screen but a bright yellow circle.
Once you have a thermal pad on your target, you are ready to zero the FML19. I used the first thermal pad to zero the optic and the second one to shoot at a further distance. Thermal pads are not hard to find so if you need more for future range sessions just order them ahead of time.
Zeroing the Infitac Fast Mini FML19
It’s nice to be able to zero a handgun optic without needing any tools at all. I’m used to using a small wrench or screwdriver to adjust the windage and elevation of the optic.
To zero the FML19 however, you just use the zeroing screen on the menu. Start by entering the menu/settings mode by holding down the bottom button on the side of the optic. The first screen that comes up will be the brightness menu. Swipe right one time and you should see the “zeroing” screen. Once you are there, touch the screen anywhere to enter the settings mode.
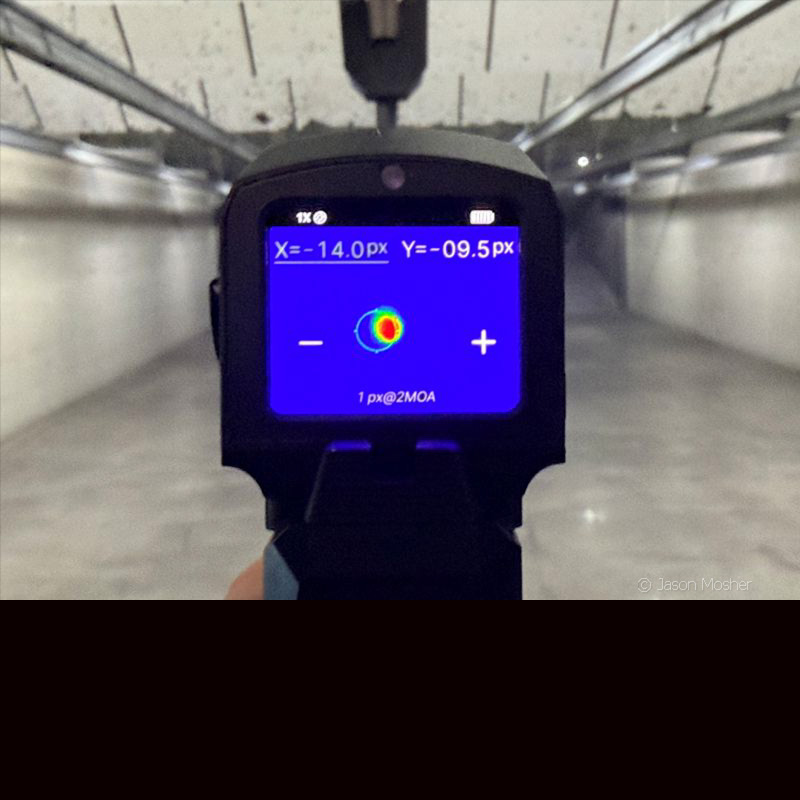
Once enter the settings mode, you should see a screen with a plus and minus symbol. One the top left and right of the screen, you will see an “X” and “Y” as well. The X = horizontal movement and the Y = vertical movement. You can touch either the X or the Y to dictate which movement you are trying to make. Whichever is selected will turn green.
The “-“ will move the pixel either down or left depending on your selection (X or Y), and the “+” will move the pixel right or up. You can also use the buttons on the side of the optic in place of the plus and minus buttons on the screen.
Move the pixel to where your bullet hit
Once your thermal pad is on the target and your optic is on the zero screen, fire a shot at the target. Next, use the plus and minus buttons on either the X or Y setting to move the small pixel to where your bullet it. This will look like a small dot moving on the screen independently from the reticle. Now swipe up to save the reticle position and return to the previous menu. Fire another shot at the target. If it still does not match, repeat the process again until it does.
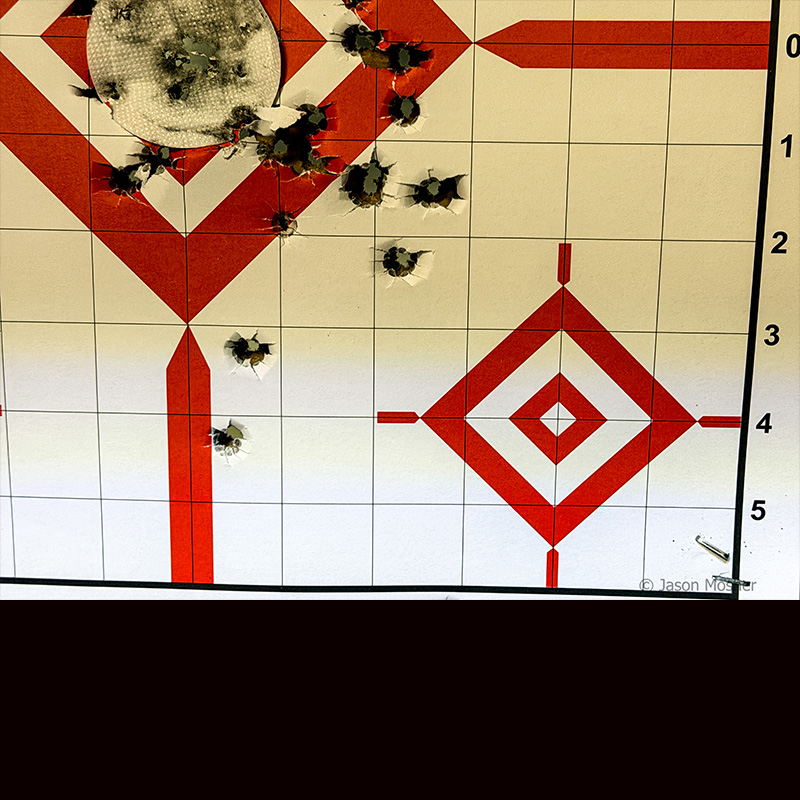
A pistol gun-rest would be best for this process, but I didn’t think to bring one with me to the range. I’ll also admit I didn’t follow the instructions exactly because I wanted to play with the settings a little.
Once my target was up, I fired a shot and then moved the adjustments around to see how they worked. I got a little too far to the right for a few rounds but then moved it back to the left and up to center. You can see in my first target (above) how the pattern slowly moved to the center. After a couple of adjustments, however, it hit right on the thermal pad.
Zeroed and ready to go
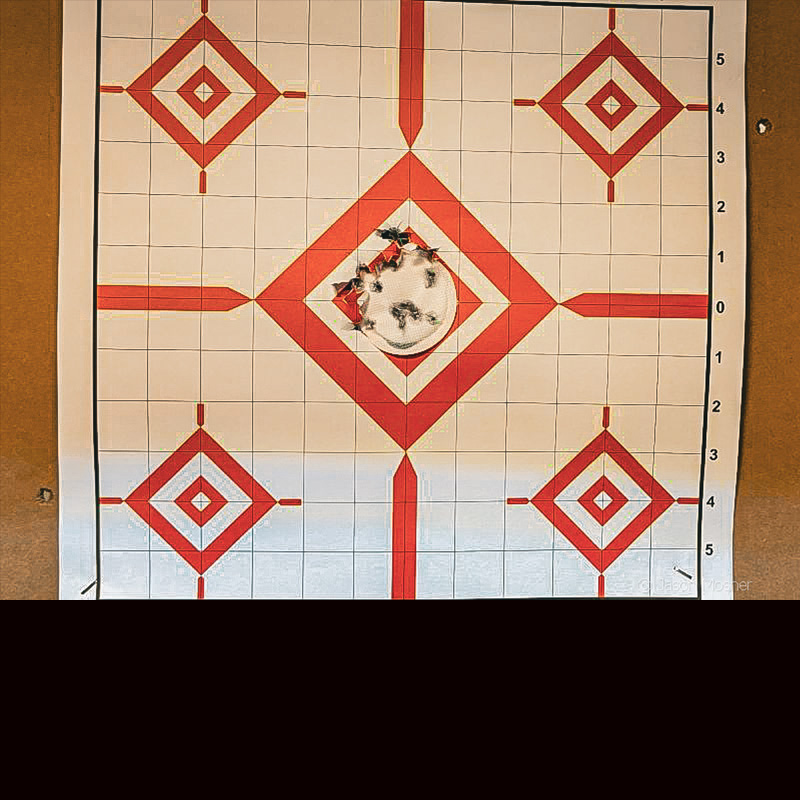
Once this process was done, I put up a new target and thermal pad and moved the target back some. I placed the target at 10 yards to sight it in and then moved it back to 15 yards for the second target. For the first target, I used 9mm Blazer 115 grain FMJ, then I switched to 124 grain Federal Premium Law Enforcement Tactical HST for the second target—both sourced from Ammunition Depot.
Federal Premium HST is an excellent round for self-defense and extremely reliable. It is designed to pass through harder objects and expand when it hits softer objects. It’s premium ammo so maybe not something you want to do a lot of target practice with, but I wanted to use it on my first target after zeroing it in.
One of the things I was worried about was the larger thermal sight causing more recoil on the RXM. To my surprise however, I couldn’t tell any difference at all.
Another thing I found interesting was how much easier it was to hit the target using a thermal optic. As I raised my gun towards the target, the bright orange/yellow spot on the target made it super easy to point and shoot. While you can’t see much when there is no warm object in front of you, a person or animal will be impossible to miss.
And the verdict is?
Range time was big success and the Infitac Fast Mini FML19 is an awesome optic. As I continued shooting throughout the afternoon, I used the different screen options by swiping down and changed the brightness setting some. Because everything is touchscreen, changing anything on the gun is extremely easy.
With the two rechargeable batteries it’s easy to keep this optic ready to go at all times. My first battery was almost dead when I left the range, so I swapped it out for a new one and put the other one on the charger.
After using this optic for a while now, I’m not sure how I got by for so long without one. Like I said in my first article, it’s not a replacement for a standard reflex optic, but it’s a valuable addition to your arsenal of tools. I like the idea of having one set up for daylight hours, and a gun set up with the FML19 for nighttime hours.
Either way, you need to check it out the next time you are shopping for an optic.