Red dot optics have slowly become the standard for modern handguns. I can’t think of a modern semi-auto handgun that doesn’t allow you to mount an optic these days. Since most of my pistols wear optics, I figured it would be good to learn how to properly use one. I recently attended a one-day Pistol Red Dot Fundamental by War Hogg Tactical and that’s where I learned the five-shot red dot drill.

The War Hogg course, led by the knowledgeable owner Rick Hogg, is structured comprehensively and effectively. It starts with presentations and gradually progresses to controlled pairs, reloads, draws, and more.
The culmination of these skills is a five-shot red dot drill. This drill, a significant application of the skills we had honed, is not the day’s final activity. I love the drill so much that I wanted to share it with you and direct you to the War Hogg course.
Enrolling in the War Hogg course is a step towards enhancing your shooting skills. It will equip you with the necessary skills to run the five-shot red dot drill quickly, accurately, and efficiently, thereby improving your overall shooting performance.
The Five Shot Red Dot Drill: Supplies Needed
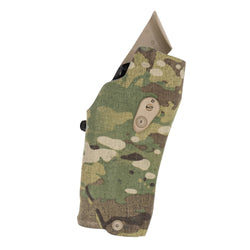
We’ll need a gun with a properly zeroed red dot and three magazines. We’ll need a holster and magazine pouch to hold all your junk. When I ran this drill, I used the Walther PDP with an Aimpoint Acro P-2 and carried the kit in my 6354RDSO. You’ll need fifteen rounds for each run, and each magazine will be loaded with five rounds.

Your target should be an eight-inch circle. We used paper plates that were an appropriate size. Each run will use one target, and you will swap between runs. Your range needs to have five, seven, and 10-yard lines. To top things off, don’t forget your shot timer and your eyes and ears.
Shooting the Five Shot Red Dot Drill
We’ll begin at the five-yard line. You’ll start with your handgun holstered but loaded and ready. At the beep, draw and fire five rounds as fast as possible into the eight-inch circle. Then, you will immediately speed-reload your gun and assume a ready position.

When completed, holster the gun and note the time it takes to make the first shot, the time between shots, and the overall time. You also need to check the target for misses and notate any missed shots if necessary.
We’ll go back to seven yards and essentially repeat the drill. At the beep, we’ll draw and shoot five rounds at the eight-inch circle as fast as possible. When the gun’s empty, you’ll immediately speed reload and assume a ready position.

Again, we’ll note the times and any missed shots as necessary.
Finally, we’ll go back to 10 yards and repeat the Five Shot Red Dot drill one more time. Draw at the beep and let those five rounds fly as fast as you can safely. You won’t have a spare magazine to reload, so don’t worry about that. Ensure the gun is clear, and then holster it.

Now, once more, you’ll go through your timer, record the times, and note any misses.
Review The Data
There is no par time for the five-shot red dot drill. The point isn’t to get stuck on beating one particular time but to see incremental personal improvement. Your goal is to beat your own time, and not just one time, but every time. You recorded six different times for each stage of the drill.
You have your first shot, each split, and the final overall time. With that data in hand, you can review and refine your skills. You can very easily see where you lag behind. I have a great draw to fire, but my splits for shots two and three are slower than those for four and five.

I’m shooting as if I’m accelerating a car when I should be able to get the same splits and have the same confidence in hitting that trigger for every shot.
That data point tells me what I want to work on. We also see variations due to increased range. I have about a tenth of a second difference between each range. This means I might not need more work at longer ranges to get those times even. Using a notebook and data allows for efficient self-diagnosis and allows you to see repeated improvement.
What The Drill Works
Don’t call it a cadence drill. If you attend the War Hogg course, Rick will explain why he doesn’t call it a cadence drill and doesn’t like it. This isn’t designed to be a cadence drill. It’s designed to teach you how to shoot quickly, accurately, and effectively.

It’s working a lot on the basics, like recoil control and sight tracking. Optimistically, after the first shot, the dot should look like a red blur moving back and forth over and over again. A good shooter will be able to squeeze the trigger and score a shot as soon as the slide comes to rest in the forward position. The five-shot red dot drill aims to train you to be that type of shooter.
An eight-inch target demands you control the gun and exercise that good recoil control or you’ll drift off target very quickly. We also get to exercise skills like reloading, drawing, and our presentation. The five-shot red dot drill provides a ton of training potential in just five rounds of ammo.
Drill On
They say you don’t know what you don’t know, and I didn’t realize how much I didn’t know about handgun red dots until I took the War Hogg pistol red dot class. It upped my game and gave me a ton of new things to practice and train with. The five-shot red dot drill is one of my new personal favorites. I’m dedicated to driving down my time, cutting split times, and seeing only a big red blur as I shoot.
Check out War Hogg Tactical, and pick up the Firearms Training Notebook so you can begin logging your training.


