We live in an increasingly violent world and spend a lot of time in a seated position, either in our vehicles, at work, or in a restaurant. This month’s skill builder focuses on pistol shooting from a seated position. This skill will also carry over to our upcoming vehicle tactics articles.
The key difference with this drill is that you must put in dry-fire work beforehand. Make sure you’re not sweeping or flagging your legs during the draw sequence before heading to the range. As you develop your skills, don’t sacrifice safety for speed. Speed will come with proficiency.
At War HOGG Tactical, we use our real-world experience combined with a building-block methodology of instruction. Remember, you always want to get to your feet as quickly as possible when the situation allows. Standing gives you mobility options, and you are not stuck in one place trying to engage a threat. Try to always treat the flat range like the real world when you train.
Equipment Needed
- Your normal range and firearms equipment
- Live Fire Range
- Dry Fire Training Area
- Shot Timer, we recommend the PACT Club Timer III. Click the link to learn how to use a timer effectively in your marksmanship training.
- The Firearms Training Notebook – available on Amazon
- Recording device and tripod or holder
- Target of choice
- Folding chair
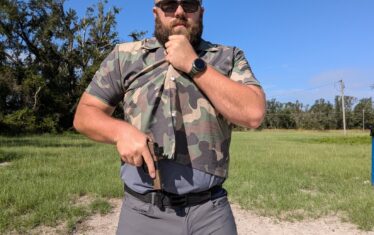
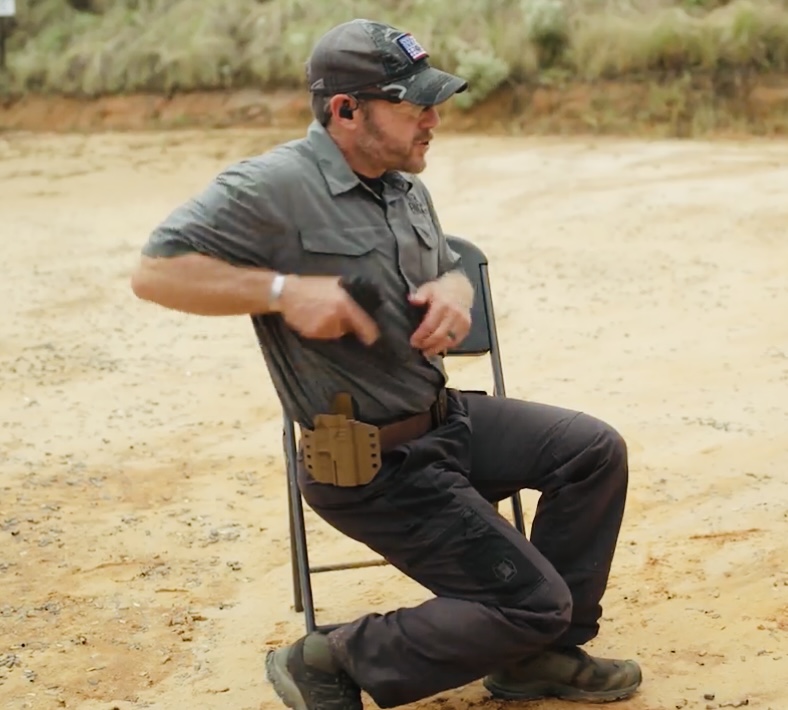
Strong-Side Draw
To start, I recommend drawing from the strong-side holster to build a solid foundation. This can be tricky depending on the chair you’re sitting in. In some chairs, the butt of the pistol may make contact with or get caught on part of the chair. If that happens, a slight body shift to the side or forward can fix the issue.
I also like to carry strong-side in a vehicle. This allows me to start my draw from the holster while removing my seatbelt at nearly the same time, without worrying about the belt interfering.

As you start to master the strong-side draw, you can look at drawing from concealment in the appendix position. Be aware: the appendix position increases the chance of flagging your legs. With dry-fire practice, proper holster placement, and good trigger-finger discipline, it can be done safely.
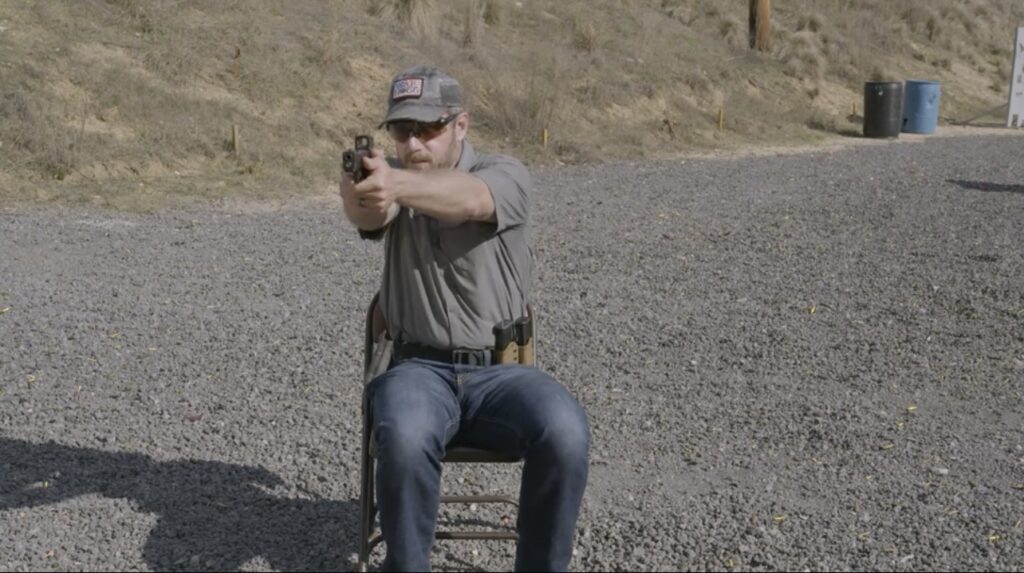
Stability in the Seated Position
You will find that shooting a pistol from a seated position is a pretty stable platform. Instead of your feet as the base, your butt in the seat is your base. It is very easy to manage recoil in this position as long as you have a good, solid grip on the pistol.
If possible, don’t remain seated—get to your feet quickly to restore mobility. Sometimes, such as at a restaurant with your back to the wall or a table in front, standing may not be possible. Start observing your seating choices in daily life and ask yourself: Can I get out of this seat quickly to regain mobility?
Shooting at a 45 or 90-degree angle
Sometimes the threat won’t be straight ahead. In these cases, I like to use my feet to help pivot in the seat. This also translates directly into vehicle tactics training.
Depending on which side the threat is on, use the opposite foot to assist in the pivot. This builds a stable base and keeps your firing platform strong. Just be mindful of foot placement so you’re not flagging yourself during the draw sequence.
Reholstering
In my opinion, there’s no rush to reholster. You may still be seated, or you may have already stood up. Either way, when it’s time to reholster:
- Look at your holster.
- Reverse your draw sequence, ensuring your finger is off the trigger.
- Place your thumb on the rear of the slide as you reholster to ensure the gun doesn’t get bumped out of battery.
The situation will determine the appropriate time to reholster your pistol.
range Work
Sometime near the beginning of the month, depending on how comfortable you feel drawing your pistol from a seated position, head to the range for live fire. If you’re not yet ready to draw from the holster, you can still get valuable practice. Start with the pistol already out, pointed downrange, then sit in the chair and fire from that position.
If you are comfortable drawing, I suggest incorporating 10 draws from the seated position—hands above the waist and hands below—using your shot timer. Record your times, marksmanship data, target used, and distance in The Firearms Training Notebook. Use the notes section to capture lessons learned. Example: pistol hung up on seat.
Develop your dry-fire plan using The Firearms Training Notebook, and toward the end of the month, head back to the range to measure your improvement.
Have Accountability
Accountability matters in shooting performance. You can do it alone, but having a partner, group, or tribe helps keep you on track.
If you don’t have that network, you can join ours. Share your marksmanship growth with us through the On The Range (OTR) Patreon “CREW” member’s page or our On The Range Podcast “CREW’ Facebook group page.
Mark Kelley of Kelley Defense (my co-host and co-author) and I host bi-monthly interactive Zoom calls with our Patreon CREW members. We break down each shooter’s skill builder, and we’ve even reviewed members’ training videos live, giving immediate feedback on ways to improve.
Conclusion – Put In The Work
If you want to improve your marksmanship, you have to put in the work. That means creating a solid dry-fire plan, tracking your progress in The Firearms Training Notebook, and using tools like a shot timer and video recordings to elevate your training.
Do the work in dry fire, and you’ll see the results in live fire.
Train Hard, Stay Safe, and see you “On The Range”
—Rick