
In part IV of this series, we showed you exercises for developing fire discipline. This article outlines a classic hostage rescue skill builder. You could also use it as a fire discipline booster shot.
The Concept behind the Inverted-T
Inverted-T drills are based on a two- to four-rescuer room entry for pressing the threat on a hostage taker.
We would only do a dynamic entry on a hostage taker with very good reason. Either the kidnapper has started killing hostages, or you have reason to believe they’re about to.
Maybe they set a deadline for something you can’t deliver. “If Jessica isn’t here with a limo to take me to the airport in the next 30 seconds, I’m gonna start capping people!”
Or, it’s 0200, you hear glass breaking down the hall, a scream muffled by the home invader’s palm, and the kidnapper saying, “I’m taking you through that window, whether you want to go or not. Let go of that dresser, or I’ll break your fingers!”
Are you going to wait for the police? Or are you going in that door?
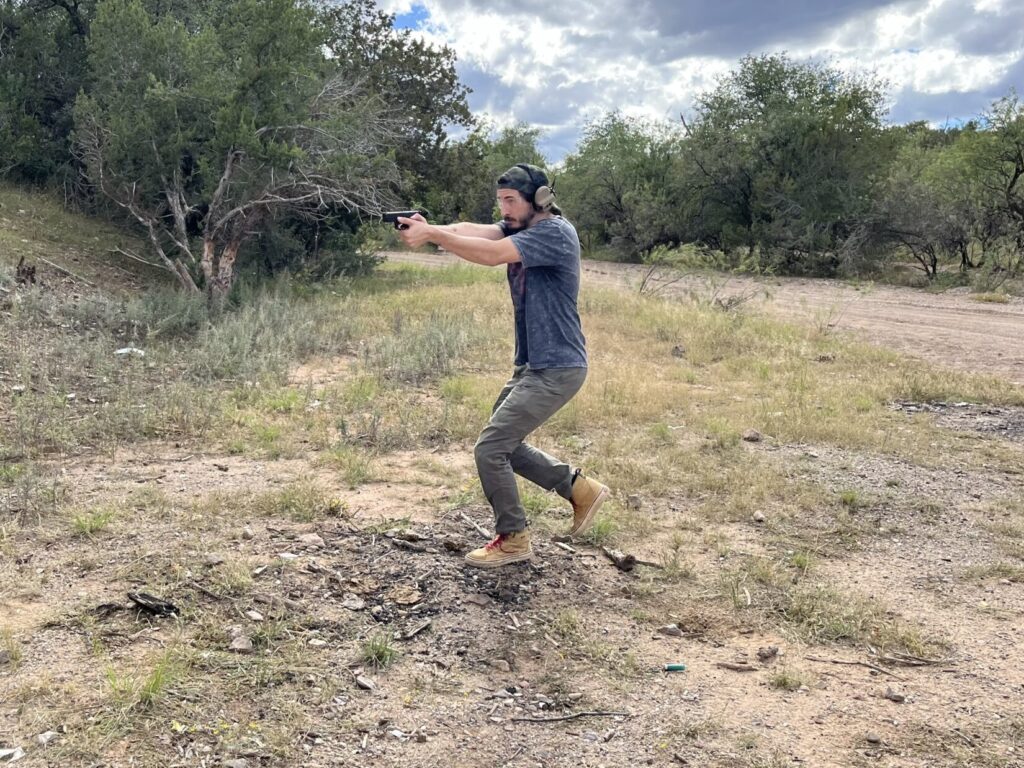
Before you cross that threshold, it would help if you’ve had some quality training. Your odds of a successful resolution go way up if you also have at least one partner, spouse, or significant other that you have trained with.
Two rescuers are not just twice as good. If they have trained together and have a plan, two can be several times more effective. One partner can act as a distraction while the other flanks.
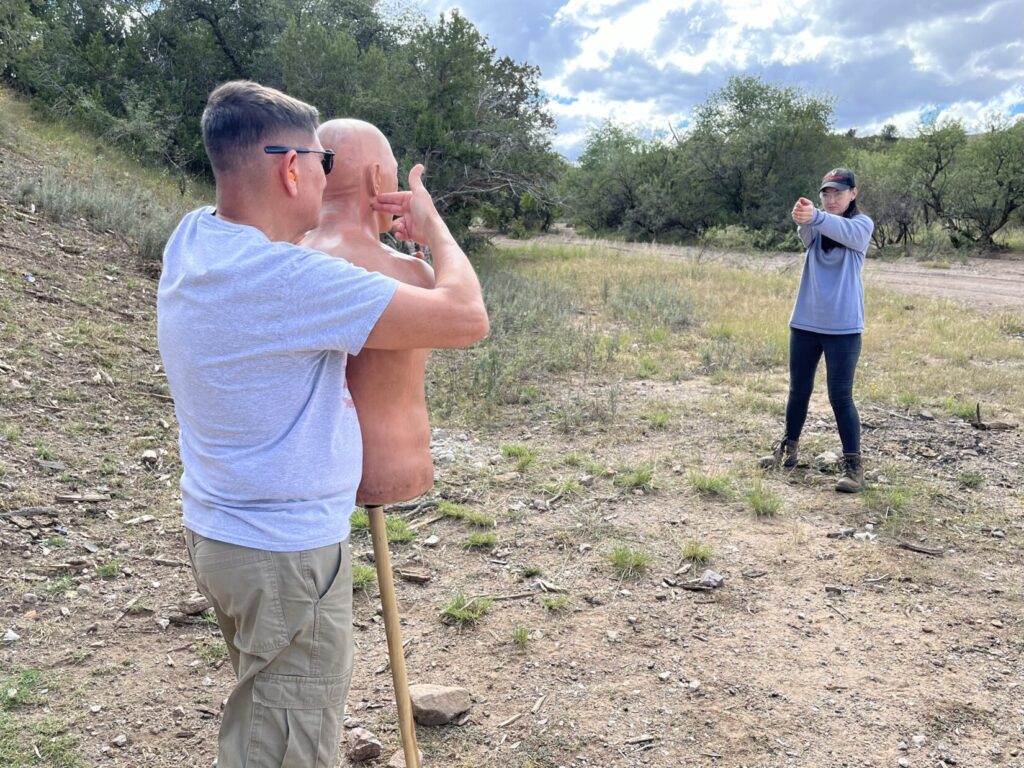
Walk through this drill “dry” (without firearms or ammo) beforehand, using “finger pistols” and role players. That will make it much easier to conceptualize what we’re simulating and trying to accomplish with the inverted-T targets.
What We Can Predict About Hostage Takers
Something like five out of six hostage takers are right-handed. That means that more often than not, they will hold a knife or a gun in their right hand, while holding their human shield with their left hand.
But it could go either way. When you cross that threshold, go toward whatever side the hostage is on.
You read that correctly.
If the hostage is on your right, go toward your right. Yes, that will put the hostage even more between you and the hostage taker.
The first person in the door should do everything in their power to get and hold the hostage taker’s attention. If it’s dark, put a flashlight directly in his eyes.
Whether it’s dark or light, #1 uses their voice. If anything, the kidnapper will turn their human shield even more between themselves and that first rescuer in the door.
Good.
That opens up a clearer shot for the second rescuer in the door, who went the other way.
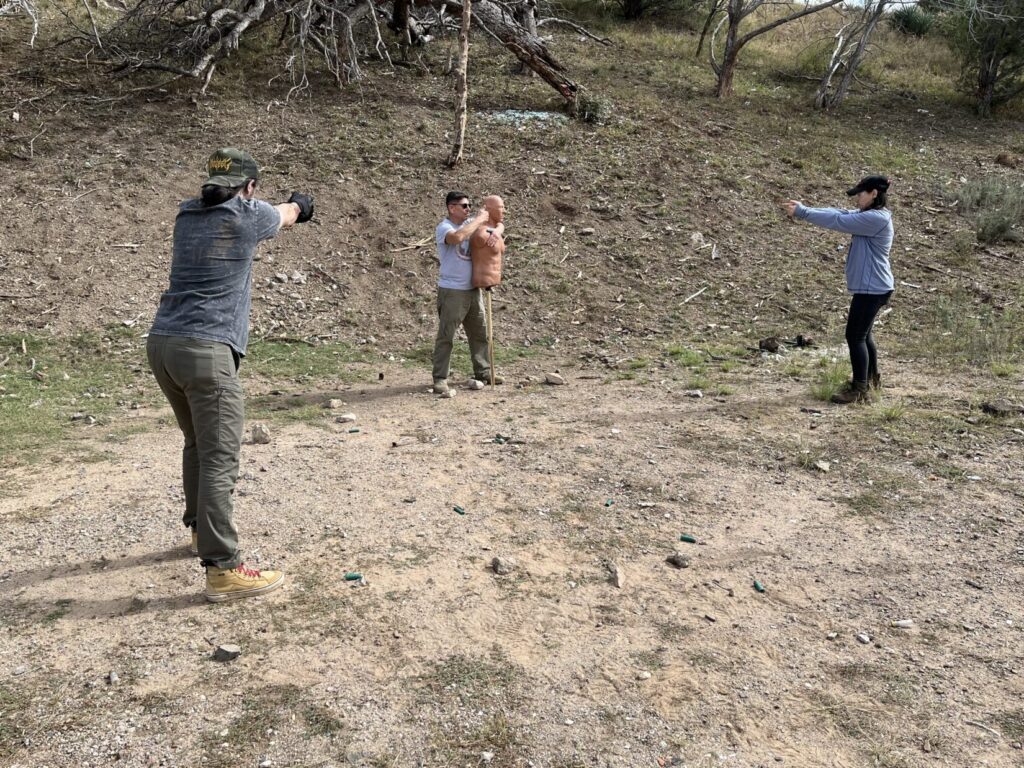
These drills are not for those who do not already have reflexive, subconscious muzzle discipline. Do not attempt to replicate them with students who are brand-new to guns, nor without trained, qualified range supervision. Before you train for a kinetic rescue, know your state’s use-of-force law and get qualified training.
Setting Up the Inverted-T
Use of Force is best trained with live role players and some sort of simulators, such as lasers, Simunition FX, UTM, Airsoft, or blanks. The inverted-T is a way to approximate a hostage taker that can be taken from an off-angle to either side, using live ammunition instead.
You will need a range with a U-shaped backstop. Berms that will contain bullets launched at about 45 degrees left or right of downrange are a must.
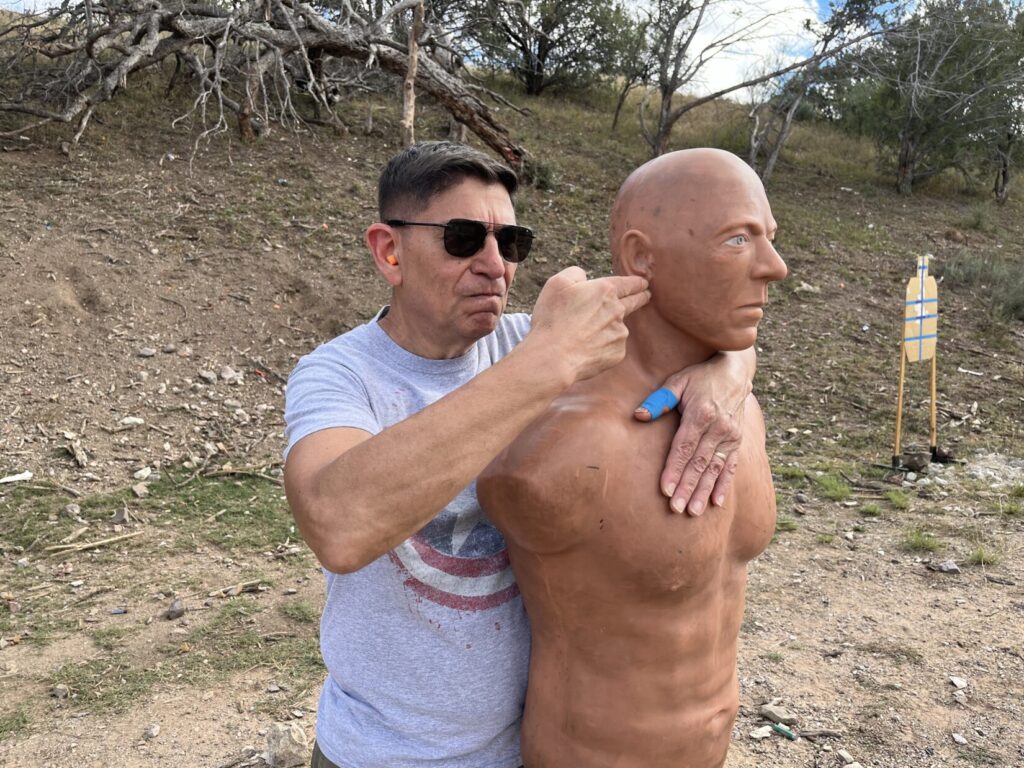
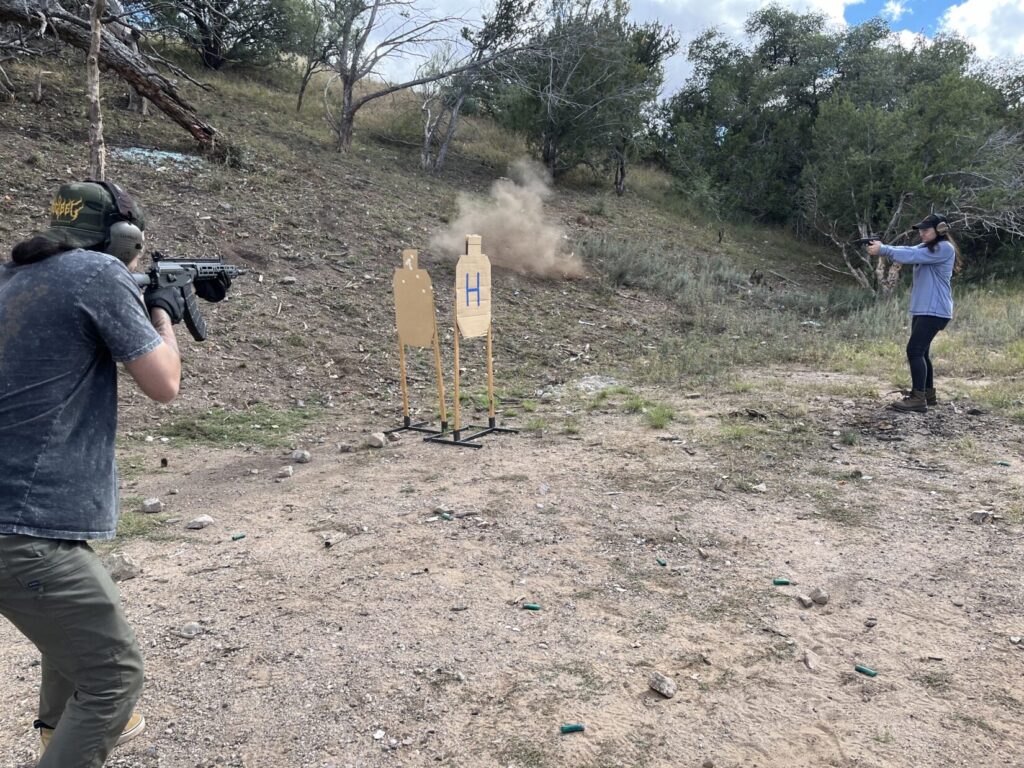
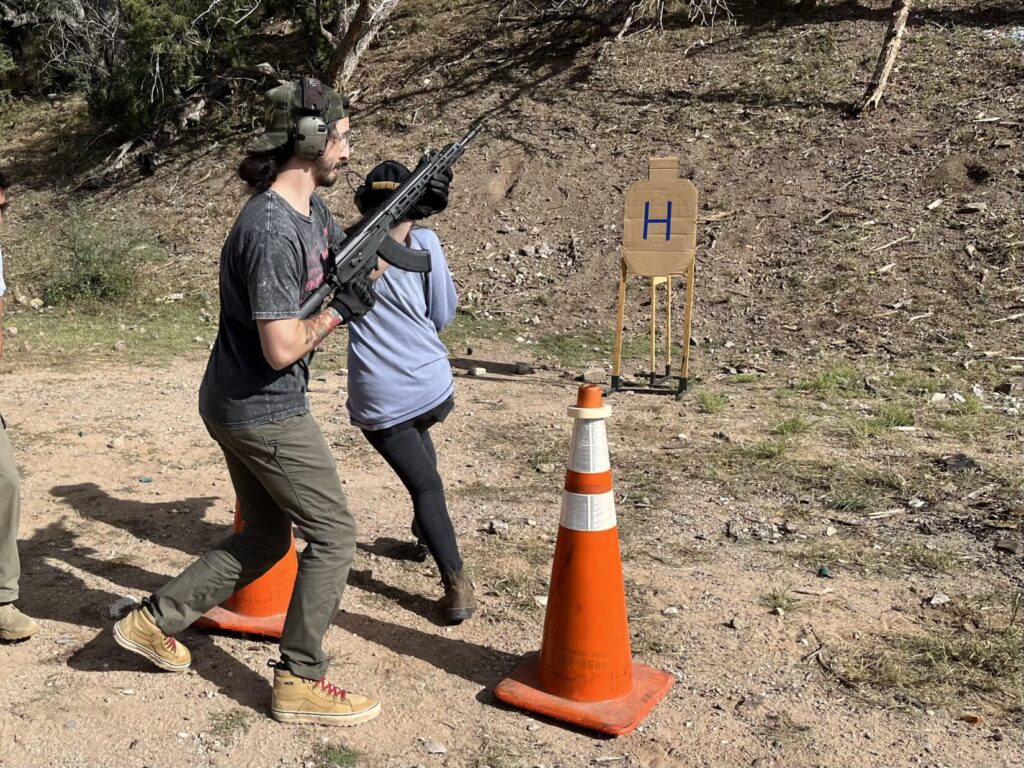
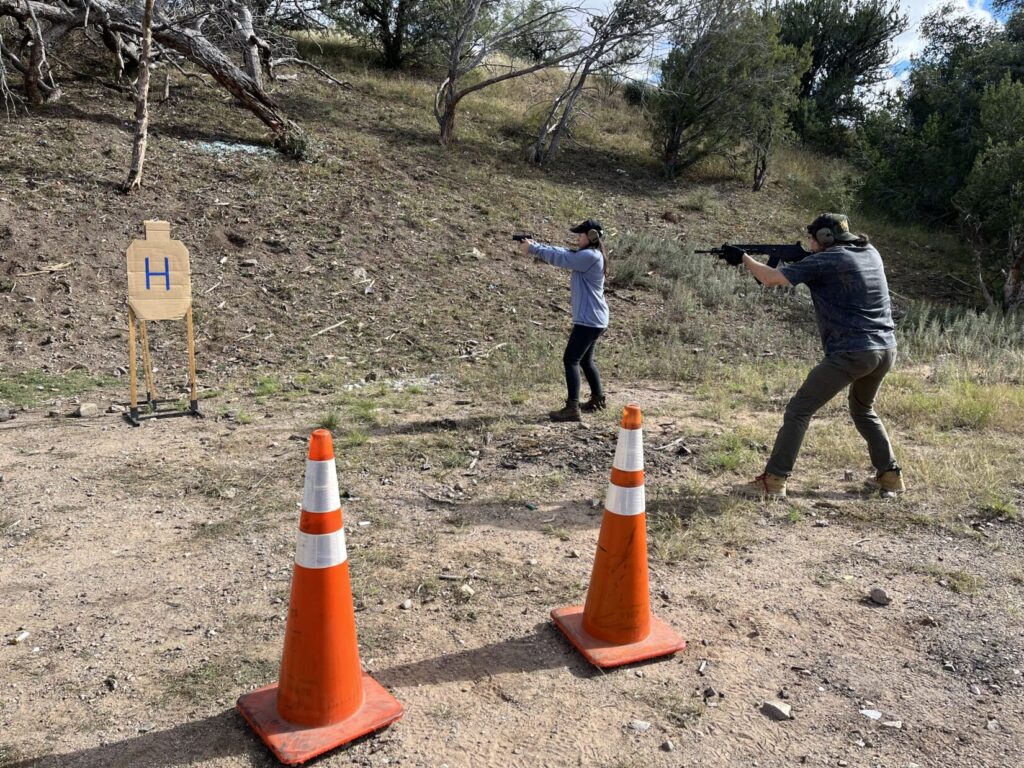
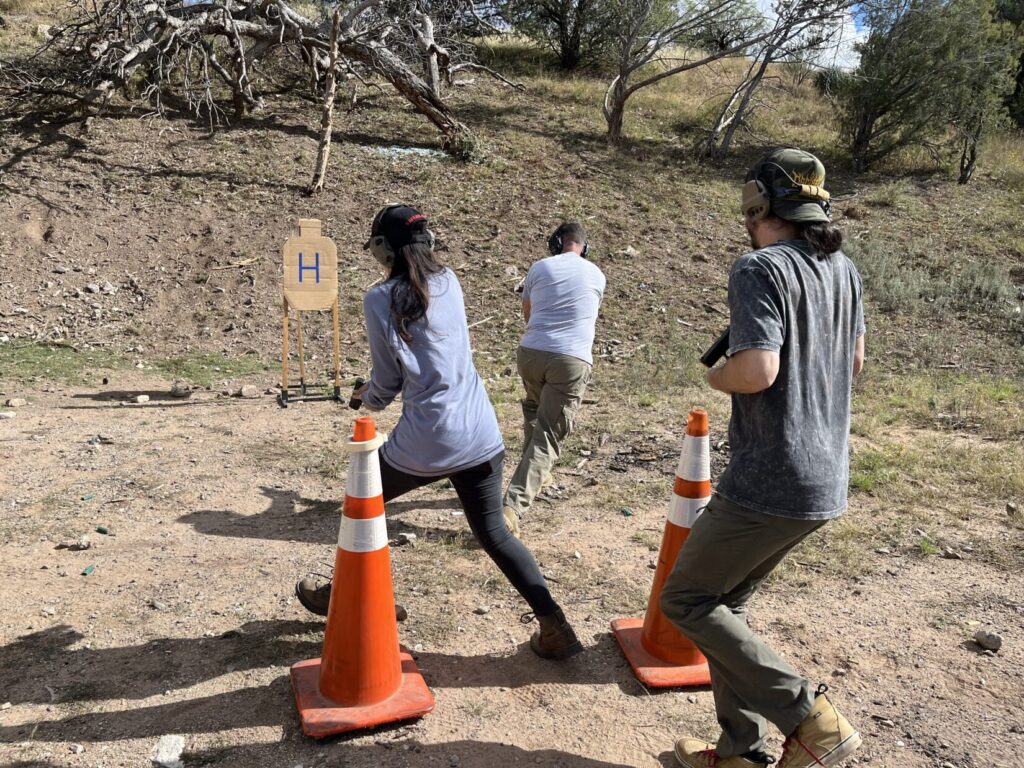
Set one target up facing uprange. That target, marked with an H in these photos, represents the hostage.
Place another target behind it, perpendicular to it.
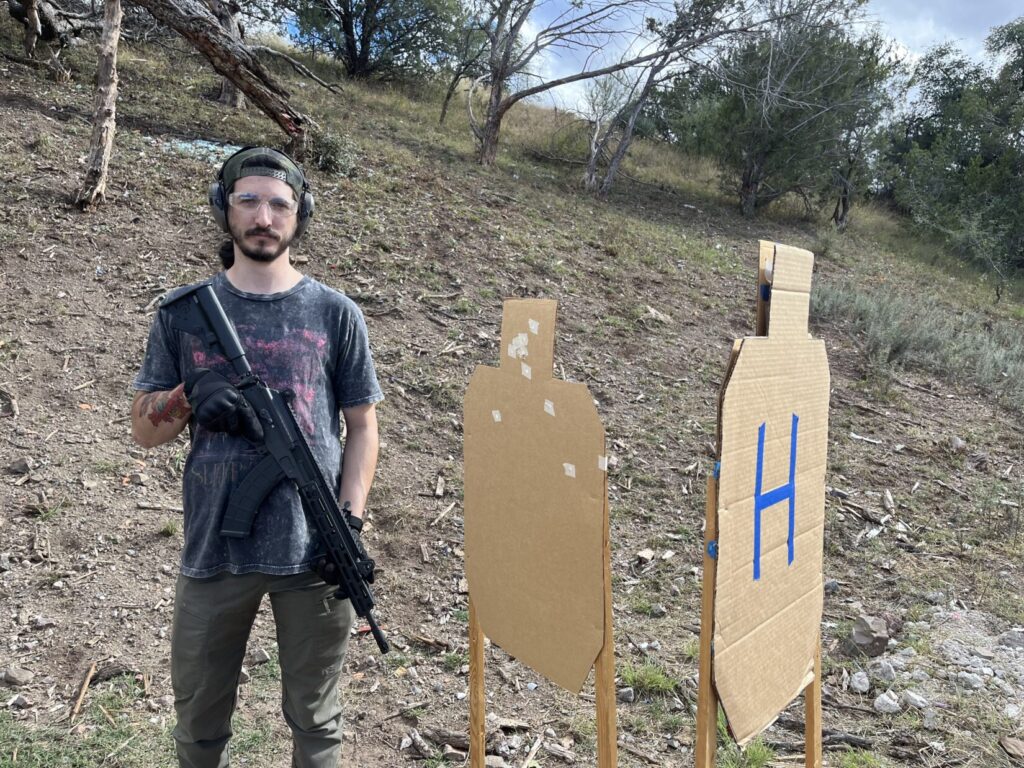
The target configuration should look like an upside-down T from above. The back target, the bottom of the uppercase T, represents a hostage taker. It should be hidden behind the hostage target when viewed from uprange, but visible from left or right if one moves laterally.
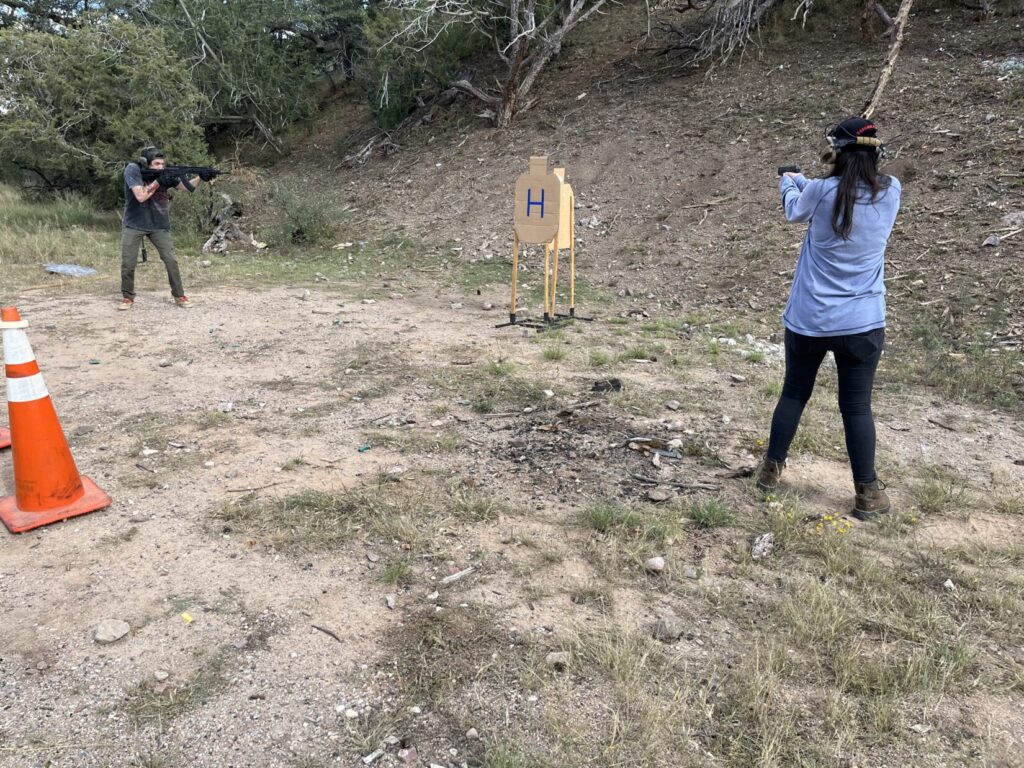
Set up something resembling a doorway. It can be a pair of cones, or a pair of target stands, about two and a half feet apart, the width of a typical interior door.
Crossing the Threshold
Start with a pair of trainees. Set them up, one behind the other, on the left side of the “door.” During subsequent runs, alternate which side of the door they start on.
Later, you can have up to four rescuers. Closest to the door is #1; the trainee behind that person is #2, and so on. Those behind #1 need to be especially mindful of muzzle direction throughout the drill.
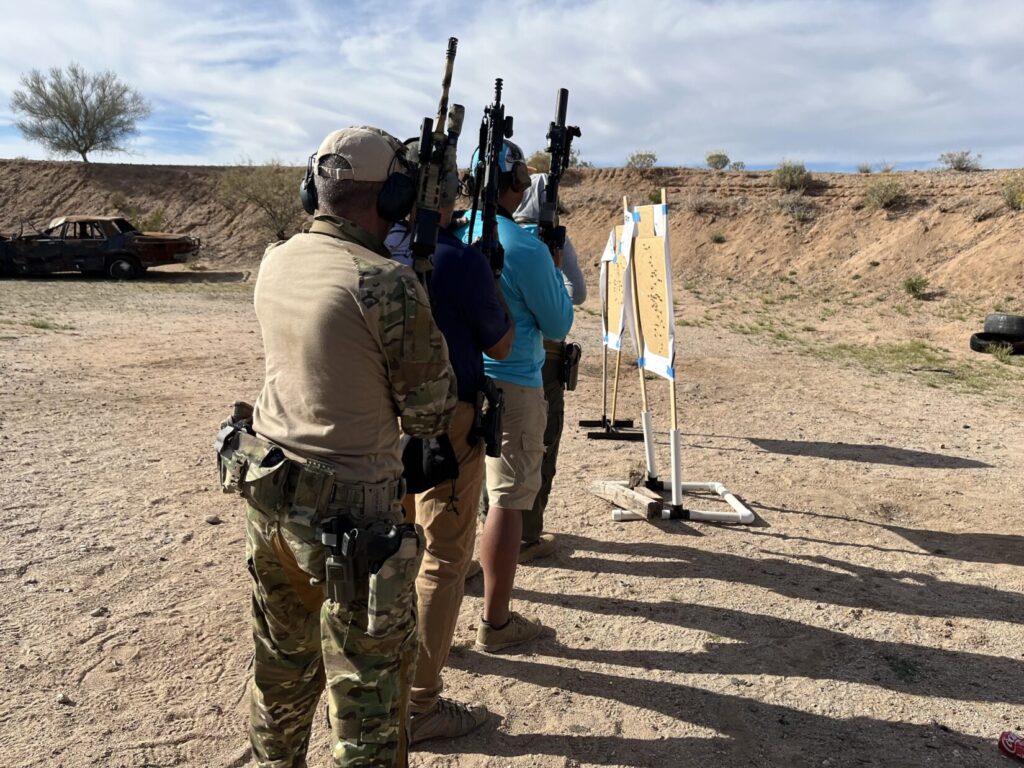
Have them stand far enough back that #1’s muzzle does not telegraph around the door frame. When the last person in the stack is ready, they squeeze the shoulder of the person in front of them. When that rescuer is ready, they squeeze up until #1 knows they’ll have support when they go in.
Start by having #1 go to the right inside the “room.” When they stack to the left of the door, #1 goes diagonally, straight across the threshold.
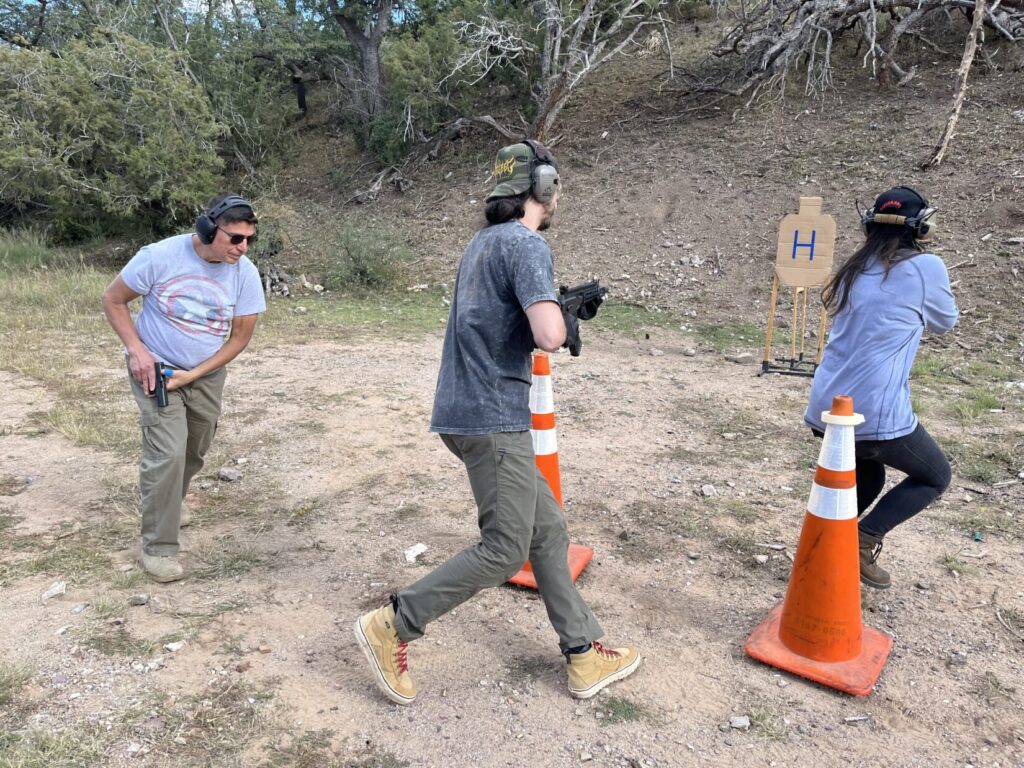
If they stack outside the door to the right, #1 buttonhooks.
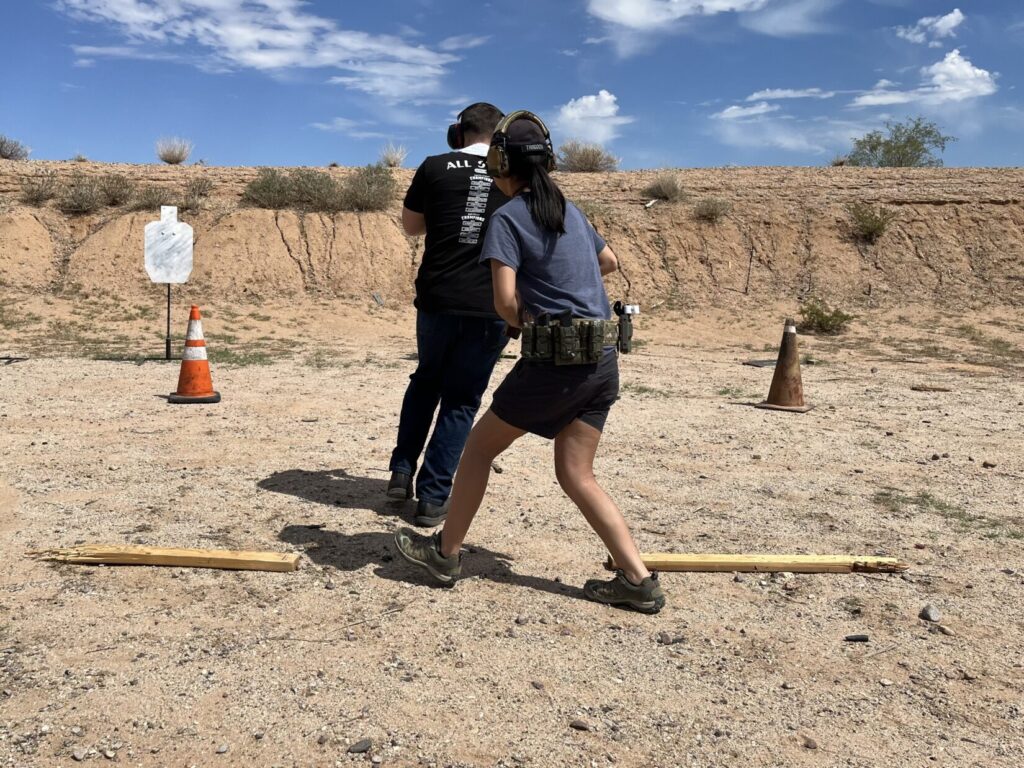
Whatever direction #1 goes, #2 goes the opposite way. Keep alternating directions, if you have three or four rescuers.
Movement in the Room
In the real world, movement in the room will be channeled by furniture.
In training, and in a room without much furniture, rescuer movement should look like a V from above. Both rescuers move on forward obliques till the hostage taker is in the 90-degree apex of a right triangle formed by both rescuers and the target. That’s right: the L.
With newer trainees who don’t yet position themselves in an L by habit, mark forward limits of advance to keep the rescuers from getting even close to being on opposite sides of the hostage taker target.
Verbalization Practice
#1 is the “contact” rescuer. #1 does all the talking, telling the hostage taker to drop the weapon, let the hostage go, etc. It can be as simple as “I’m coming for you,” a double-entendre that tells the hostage the cavalry has arrived.
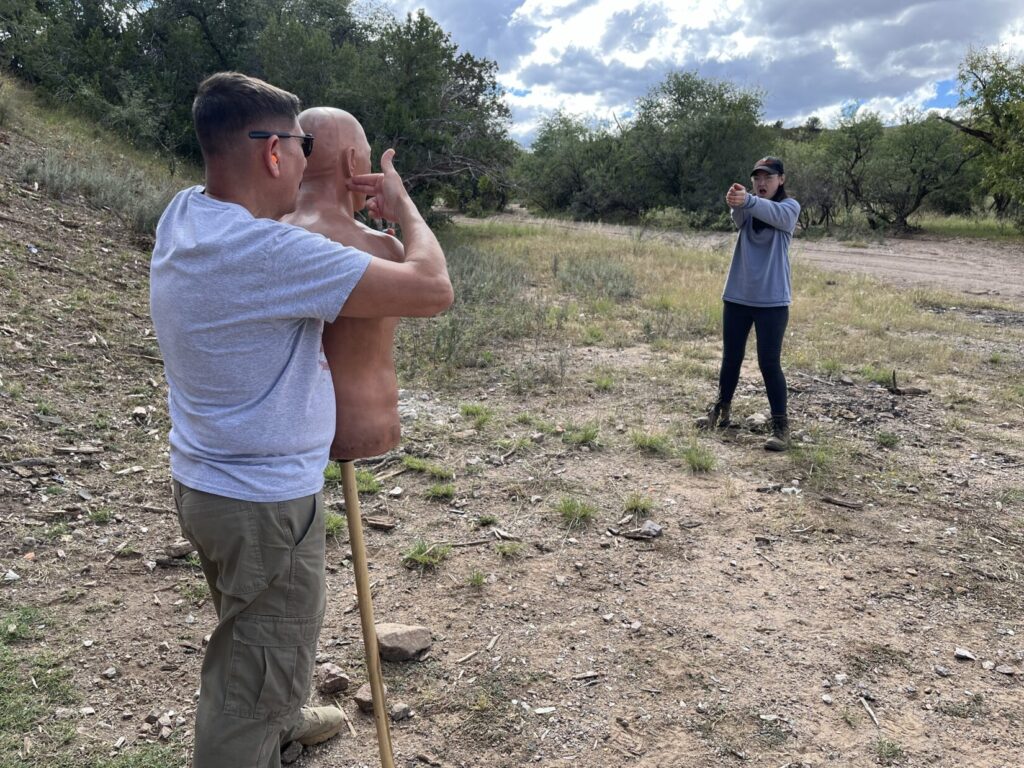
“I’m coming for you” also tells the kidnapper that the rescuer is a threat to them. It’s the opposite of de-escalation. We would only be doing this if the circumstances were so dire that de-escalation was no longer an option.
Hopefully, perceiving the threat posed by rescuer #1, the hostage taker fixates even more on #1. As soon as the hostage taker’s knife or gun starts to move off the hostage, and in the direction of #1, whoever has a shot takes it (see Does the Direction of a Hostage Taker’s Weapon Matter? below).
TAKING THE SHOT — OR NOT
My eyes aren’t as clear, and my reflexes not as sharp, as they once were. I used to be an above-average shot, even among above-average shooters. For example, I was:
- The top gun in my Security Police Academy class
- Chosen, after half a year of rigorous daily selection training, to represent the 1100 troops in my security police group on a 12-man team in the Strategic Air Command’s Olympic Arena rifle and tactics competitions, for a few years in a row
- In the top three on the range at my Peace Officer basic
- Winner of the shootoff in my API 250 class at Gunsite
- The top pistolero in my Border Patrol Academy class
- A Bronze medalist in relay team Biathlon (running & shooting) at the Texas Police Olympics
- Among the top marksmen, in classes of candidates selected for their marksmanship, at various military and law enforcement firearms instructor schools I attended
Any skill I had was not the result of innate talent so much as it was from having excellent coaching and access to far more ammo and range time than the average officer. I was paid, not merely to qualify, but to train up to my potential with the tools of my trade, privileges that not every military rifleman or law enforcement officer enjoys.
The Point Is?
This isn’t about how swell I was in my glory days. I list those shooting accomplishments here to make a specific point about kinetic hostage rescue.
You may be a great shot on paper, too. Maybe you do head shots on “hostage taker” targets in USPSA or IDPA competition every weekend. That’s a huge bonus if you do.
But even when I was at the top of my game, shooting-wise, I would have been very reluctant to attempt shooting a real hostage taker near a real hostage.
Even if they are not moving.
Even at close range.
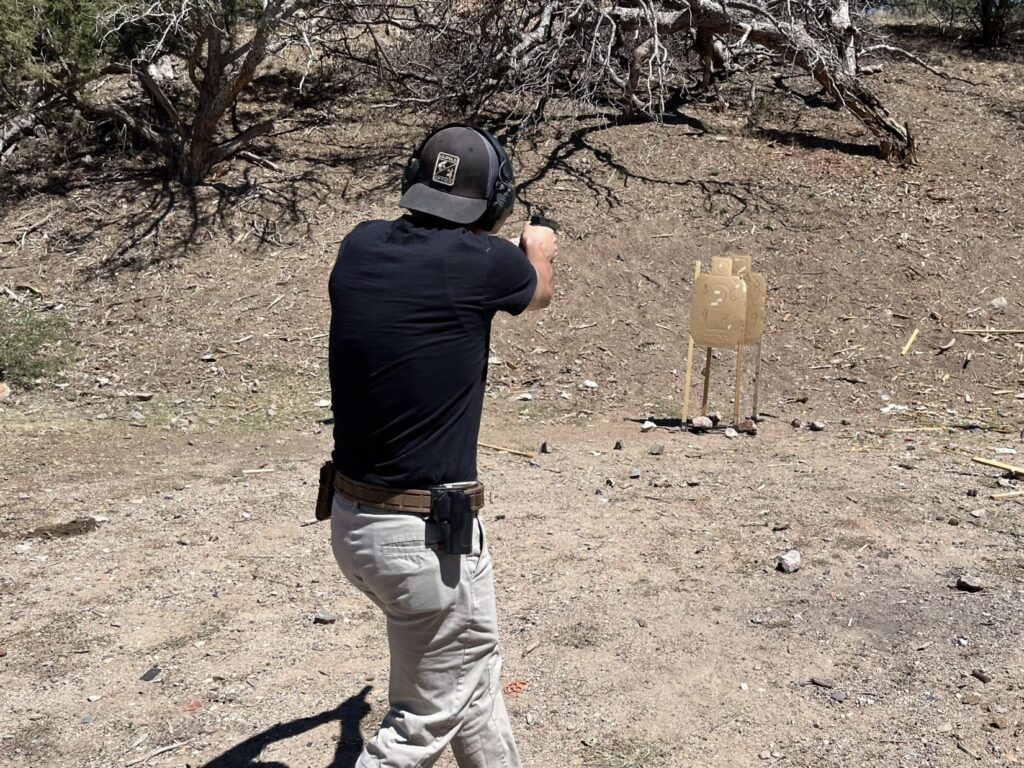
Let’s assume, for the sake of argument, that despite the multiple variables, you hit exactly where you are aiming. Keyboard commandos take it as gospel that a suspect shot anywhere in the head will suddenly cease all activity, simply relaxing all their muscles as they slump dramatically to the floor.
There is no such guarantee.
Know this: the hostage taker may convulsively pull the trigger, even as you transect their medulla oblongata. Accordingly, during the transition from pointing it at the hostage to pointing it at you is the optimal time for your partner to take the shot.
Does the Direction of a Hostage Taker’s Weapon Matter?
Absolutely. From a Use of Force perspective, it may seem that the hostage taker’s weapon moving off the hostage means they no longer constitute a deadly force threat. The practical reality is completely the opposite.
As long as the hostage taker has control of a weapon, where it points can change in a fraction of a second. They are a threat to the hostage and to you. The moment to take the shot is as the gun comes off the hostage
You may not get another chance. If you wait, he might kill the hostage, or you, or somebody else in the room.
“An armed man, especially if he is armed with a firearm, is dangerous as long as he is conscious. Take no chances. Put him out.”
—From Jeff Cooper’s sixth Principle of Personal Defense
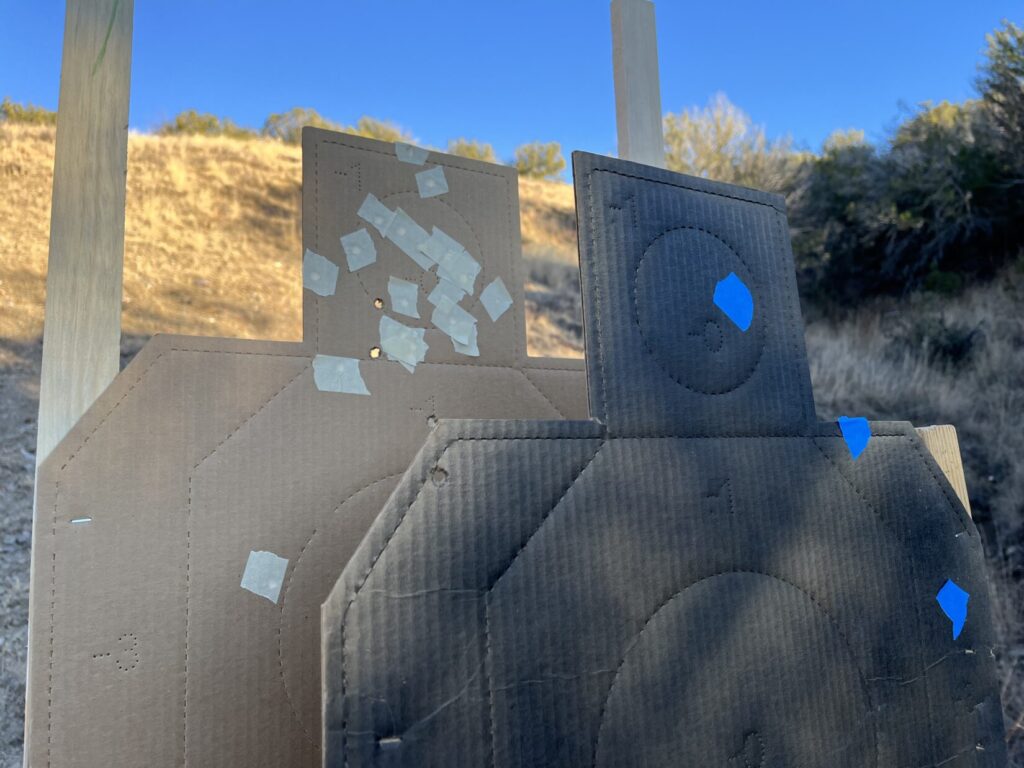
On the range, when the instructor yells, “The gun’s coming off the hostage!” #2 takes the shot. Ideally, they’ll hit the head with only one shot. But if they don’t hit in the middle of the head zone, shoot over until they do.
Increasing Complexity to Match Students’ Increasing Ability
During the first runs of this drill, #1 always goes right, and #2 always takes the shot. Swap roles (#1 becomes #2, and vice-versa) till everybody has this down cold and doesn’t miss that head shot on the back target. Also swap sides of the door you start on.
“Amateurs practice till they get it right. Professionals practice till they can’t get it wrong.”
—Jeff Gonzales, Navy SEAL
Since some hostage takers are left-handed, or just different, increase the complexity once the trainees have had sufficient practice the original way. As #1 goes in the door, the coach calls out what the first rescuer sees: “Hostage is right!” or “Hostage is left!”
If the hostage is on the left side of the hostage taker (from the rescuers’ perspective), #1 goes left. #2 always goes whichever way #1 did not go. #2 still takes the shot, from the right side instead.
Kinetic Hostage Rescue Is a Last Resort
Hostage rescue is not typically, safely, nor best accomplished kinetically.
If someone in a public venue is being held hostage, the best thing you can do is back off and tell the police. I did exactly that when a disgruntled man with a bleeding, circular defect in his forehead (that turned out to have been caused by a hammer) was holding a Circle-K clerk hostage. The cops’ general plan for hostage situations is to call a negotiator, order pizza, and bore the hostage taker into surrendering without bloodshed.
Jefferson County Regional SWAT went dynamic at Platte Canyon High School in Bailey, Colorado because the hostage taker’s deadline was approaching. One of the two remaining hostages lived.
At the Amish schoolhouse in West Nickel Mines, Pennsylvania, on-scene officers (not a SWAT team) ripped their fingernails out tearing at barricades with their bare hands, while taking fire, because the hostage taker had already started killing the hostages. It was too late.
There is a time and place for kinetic hostage rescue, but reading about these drills in a blog will not make anybody into FBI HRT. That’s not the intent here. The goal is that you consider these challenging drills as an option for developing fire discipline.
Testing Fire Discipline
After your trainees have the movement down, so they don’t look like Keystone Cops when you suddenly say “Hostage is left!” as they go through the door, you can add another twist. It gets to the very root of what we’re actually trying to accomplish.
Initially, #2 always took the shot, regardless of what side they wound up on. #1 should not have. Theoretically, if #2 has a clear shot, #1’s view of the hostage taker’s head is obscured by the hostage.
But things don’t always go as planned. The hostage taker may notice #2, and turn their human shield that way instead. He may swing the hostage back and forth.
The longer it goes on, the longer the hostage is exposed to danger. Whoever gets a clear shot first should take it.
As they approach the apex of their forward movement, the coach can yell: “#1 has the shot!”
When #1 gets an opening and takes the shot, #2 should have the fire discipline to NOT shoot.
With Three or Four Rescuers
If you have a third rescuer, their job is to clear the hard corners (the angles not visible from outside the room). If the room is corner-fed (the door is on the far right or left side of the room it’s in), #3 turns to clear the only hard corner.
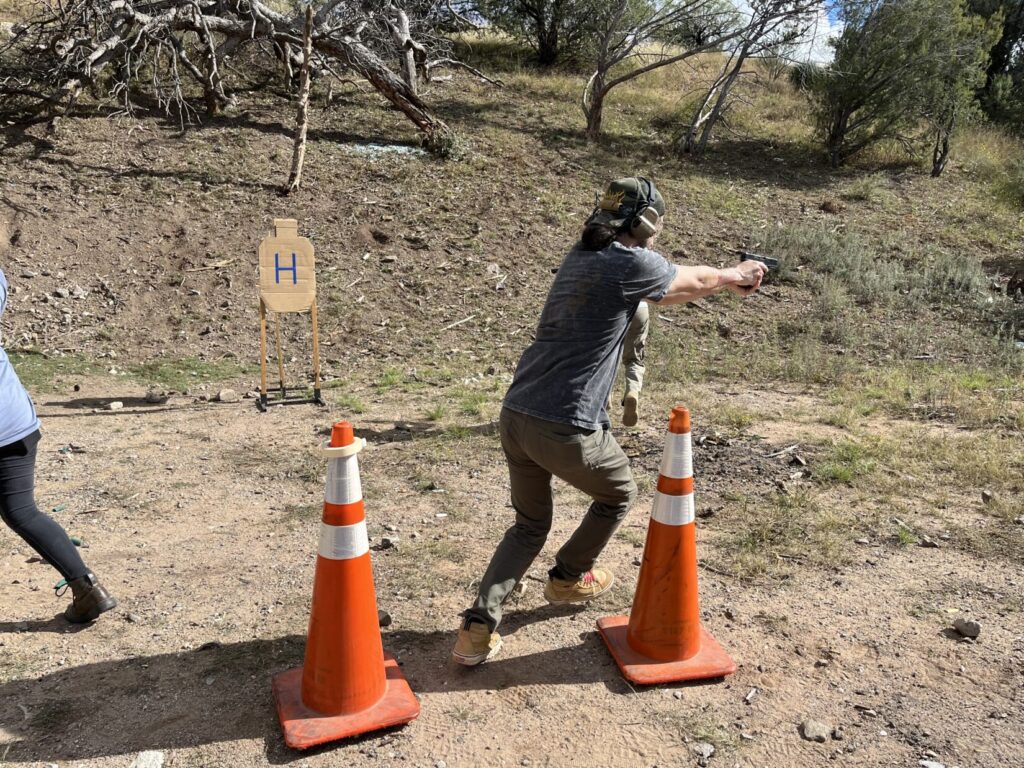
With center-fed rooms, the door is somewhere near the middle of the wall it’s in. Center fed rooms are not common in houses. With a center-fed room, it helps to have a fourth rescuer to clear the other hard corner.
As a general rule, rescuers should go the opposite direction of the person through the door ahead of them. After clearing the hard corners, the third (and fourth, if any) rescuers in the door can join #1 in distracting the hostage taker, and waiting for a clear shot.
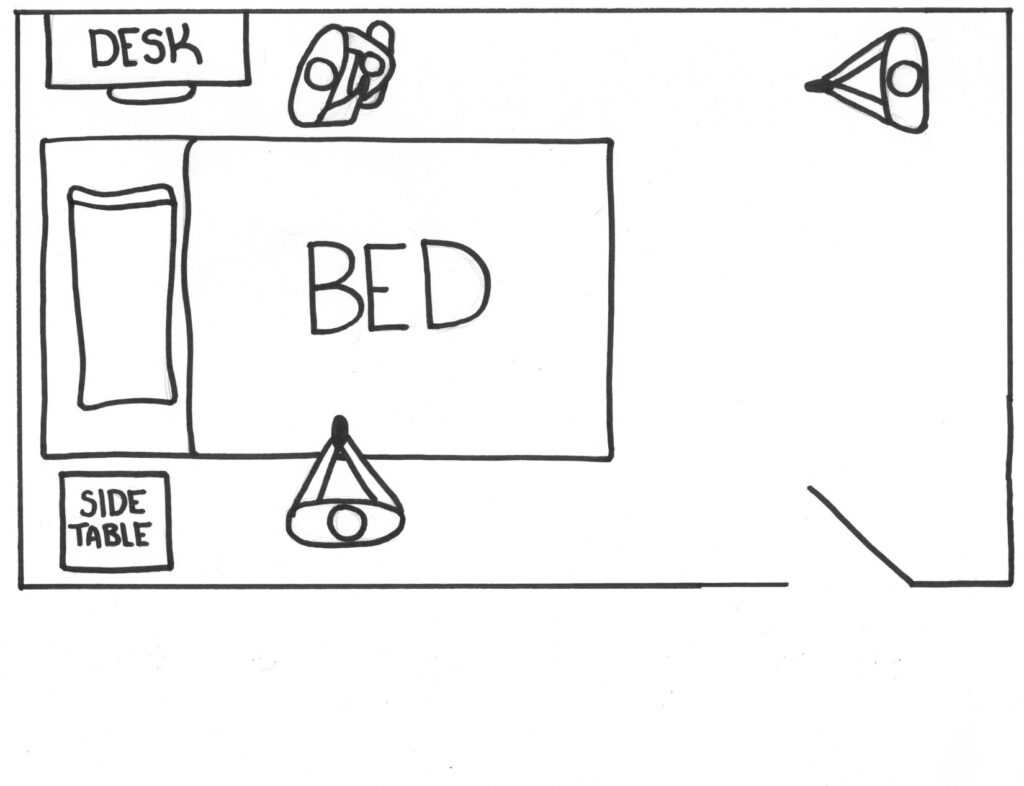
If it’s just you, or you two, one would ideally at least glance at the hard corners as you go through the door, to ensure you aren’t taken by surprise from behind. But in reality, the home invader with the knife to your loved one’s throat will probably have your undivided attention. Hopefully, he won’t have a friend hiding in there with him.
Dealing With Dead Space
Spare bedrooms tend to be smaller than master bedrooms. More often than not, rooms in houses are corner fed off a central hallway.
Channeled by the bed, desk, and dressers, #1 and #2 will likely move to opposite corners of the room, clearing those corners by default as they move into them. Third and fourth rescuers can check dead space behind the door, beside dressers, under the desk, or in closets that #1 and #2 didn’t have the bandwidth to clear, when they were focused on the threat.
A Stash House Near the Border
When I served on a BEST (Border Enforcement Security Taskforce—who makes up these acronyms?) we rolled up on yet another stash house in a high drug trafficking area. Two squirters bolted from the trailer as we pulled up. Since they couldn’t outrun the Black Hawk, we left the squirters for Air Support to chase down, and went in.
There were bundles of dope stacked to the ceiling in the kitchen, but no bodies to the left. We hooked right down the hall.
I stopped at a threshold on my left and called for support. One squeezed up behind me, and we went in.
There was a closet with an open door on the left and a bed on the right. My instinct was to not turn my back on that closet before clearing it.
But there were two people in the bed, and a long gun against the far wall, within arm’s reach of the head of the bed (if I recall correctly, it was a Marlin .45 Camp Carbine). I had to trust that some partner behind me would cover the closet as I crossed the room, pinned the carbine up against the wall with my hip, and covered the people in the bed with the stock of my M4 over my shoulder.
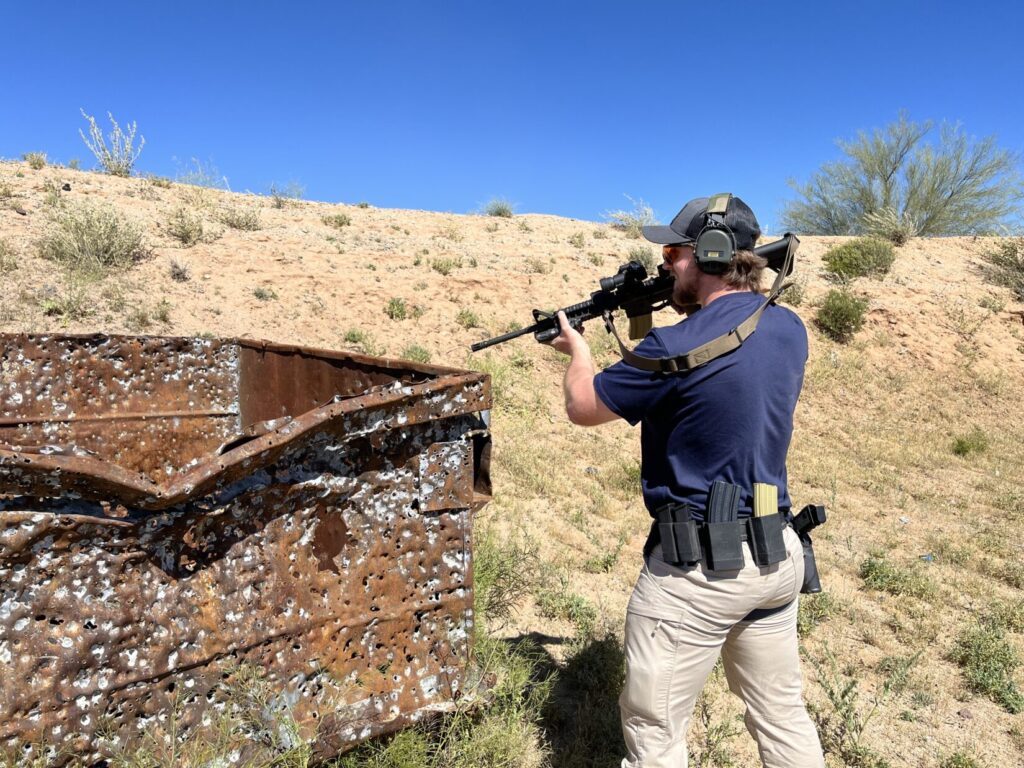
“Nadie se mueva,” I barked at the couple in the bed. “Déjame ver las manos!”
“English, please,” the young lady in the bed replied, as she and the mule stuck their open hands out from under the sheets. “I don’t speak Spanish.”
areas of responsibIlity
In “Call the Ball,” Part IV of this series, we talked about AORs, Areas of Responsibility. When selecting an AOR, look for potential threats to cover in this descending order of importance:
- People you can see
- Open doors
- Dead space
- Closed doors
Since there were two people in the bed, they were a more clear and present danger to us and to one another than any bogeymen who might’ve been hiding in the closet. My partner had to go right across the foot of the bed in case one of them pulled a gun, or put a knife to the other’s throat. We needed to ask for some more support, a third agent to enter the room, to clear the closet while we kept the couple on the bed covered.
That was not a hostage situation. Had she been chemically restrained (drugged) or tied up, that would’ve been de facto evidence of a kidnapping. It turned out the young lady in the bed, who was alert and oriented, was there willingly.
In a hostage situation, third and fourth rescuers are not just there to make sure the first and second don’t get bushwhacked from behind. They’re also there to search for additional hostages who might be hiding somewhere in the room.
The Inverted-T in the Dark
If your students have the requisite skills down safely in the daytime, you can practice this in the dark.
There’s a reason horror movie ads talk about “forces of darkness.” Criminals, as a general rule, prefer to work in the dark. Turning on the lights, on the other hand, tends to favor the good guys, especially when it comes to figuring out who is where, doing what, and with whom.
—But (and it’s a big but)—
If it’s dark in your house and you have a flashlight, either hand-held or a weapon-mounted light, the first rescuer in the door shining that light in the kidnapper’s eyes can really keep the hostage taker from even noticing the second rescuer.
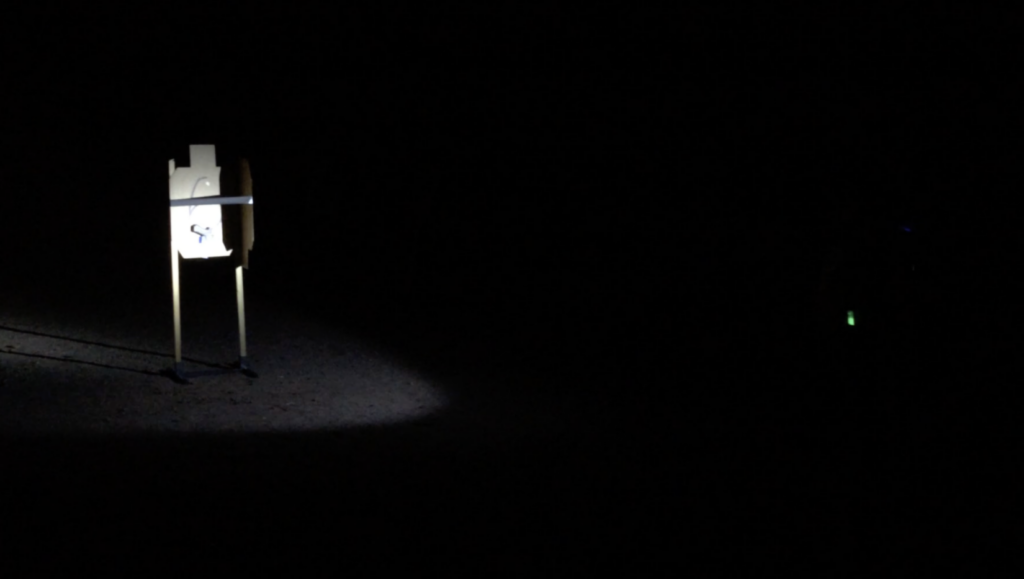
In this photo, the green glowstick shows where the trainee with the flashlight is standing. Chemlights can help instructors and RSOs track where students are, but not where their muzzles are pointing.
These hostage rescue methods are highly effective in the dark, but due to all the moving parts, they should not even be attempted by those who have not demonstrated well-developed, reflexive, subconscious muzzle discipline in the light.
To Strobe, or Not to Strobe? — that is the question
This scenario is about the only time I would ever strobe with my light. I prefer a simple white handheld flashlight, with a tailcap switch that must be twisted to lock on, like the original SureFire 6P’s. The more lock-on, lock-off, strobe, green light, or other whiz-bang features your flashlight has, the greater the likelihood that the wrong feature will suddenly happen when you’re trying to select some other mode.
With an old-style, off-unless-manually-pressed flashlight switch, you can strobe manually by pushing the button repeatedly. Even manually strobing, if done with alacrity, will effectively blind the hostage taker.
About one percent of the population has epilepsy. Strobing light can trigger a seizure in about 4 percent of that 1 percent (.0004) of potential hostage takers. In other words, there’s a .0006 chance that strobing will induce a seizure in the hostage taker or the hostage.
Don’t count on it happening, as some tactical gurus and flashlight salesmen do, but don’t discount the remote possibility, either.
Seizures are rarely fatal, but some SWAT policies prohibit strobes because we don’t want to introduce even more instability into an already chaotic, fraught situation. And because we live in a litigious society. You could save a hostage’s life, and they could still sue you for causing them to have a seizure—even if they have seizures on a weekly basis without you there.
If I simply must go dynamic on a hostage taker, I’m going to strobe if I can. Not to take me back to Disco days, even though I did “The Hustle” back when it was on the charts.
Strobing light is far more likely to keep the hostage taker from seeing the second rescuer than it is to trigger a seizure. Again, we would not be going dynamic on a hostage taker unless the situation was already dire.
Safety in the Inverted-T
Again, it should be obvious that these drills are NOT for people who don’t have well-established, subconscious muzzle discipline. This is especially important for a third rescuer who, lacking a fourth partner, turns to clear both corners.
Trainees tend to be very muzzle conscious in the stack outside the door, and while “squeezing up” to let the teammate in front of them know they are ready.
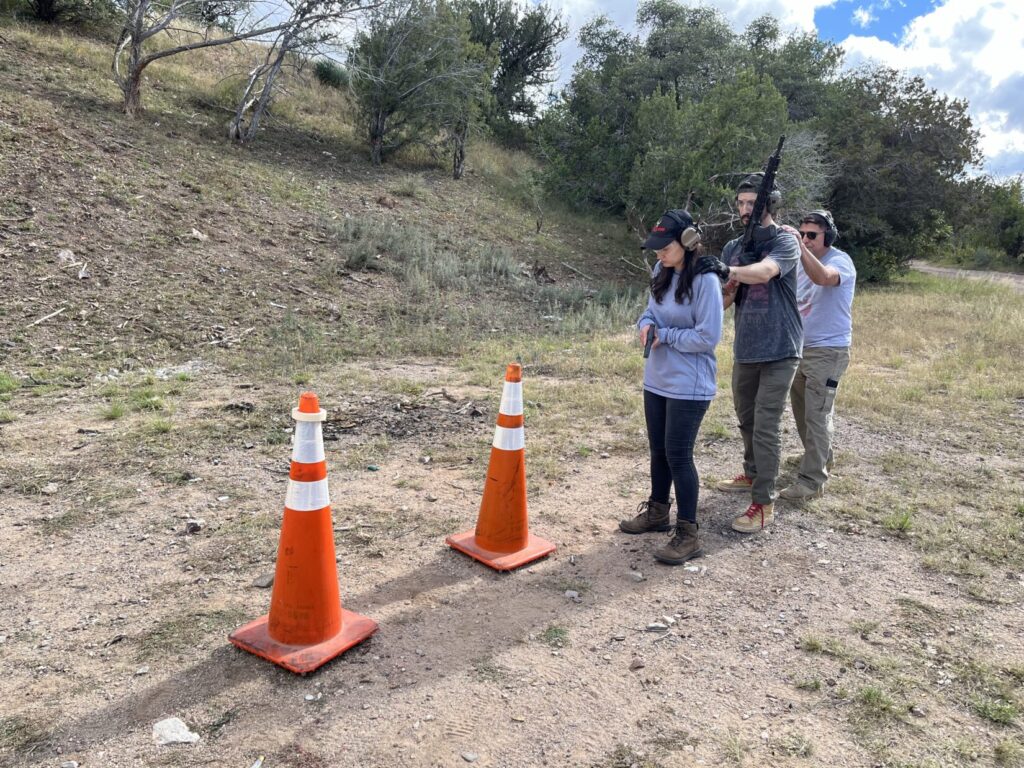
Muzzles tend to flag the person in front of them as, or just after, they transition through the door. Coaches should keep an especially careful eye on muzzle discipline. Do plenty of dry runs before doing this live fire. Slow is smooth, and smooth is safe.
Avoid alcohol abuse
SWAT candidates in training are sometimes given martini glasses full of a clear liquid to carry in front of them, in lieu of weapons, as they clear a structure. They are told it’s vodka or gin (spoiler alert: it’s usually water with an olive). Spilling the liquid would be deemed “alcohol abuse,” with resultant chastisement, perhaps even the positive reinforcement of pushups.
Students learning these skills are tempted to sprint. Resist that urge. Smooth is fast enough.
We don’t want rescuers to dilly-dally going through the door, but after they’re clear of that fatal funnel, moving along divergent vectors, they should ease off the gas.
Don’t hesitate to remediate with dry runs if people get sloppy with their muzzles as they become more accustomed to the exercises.
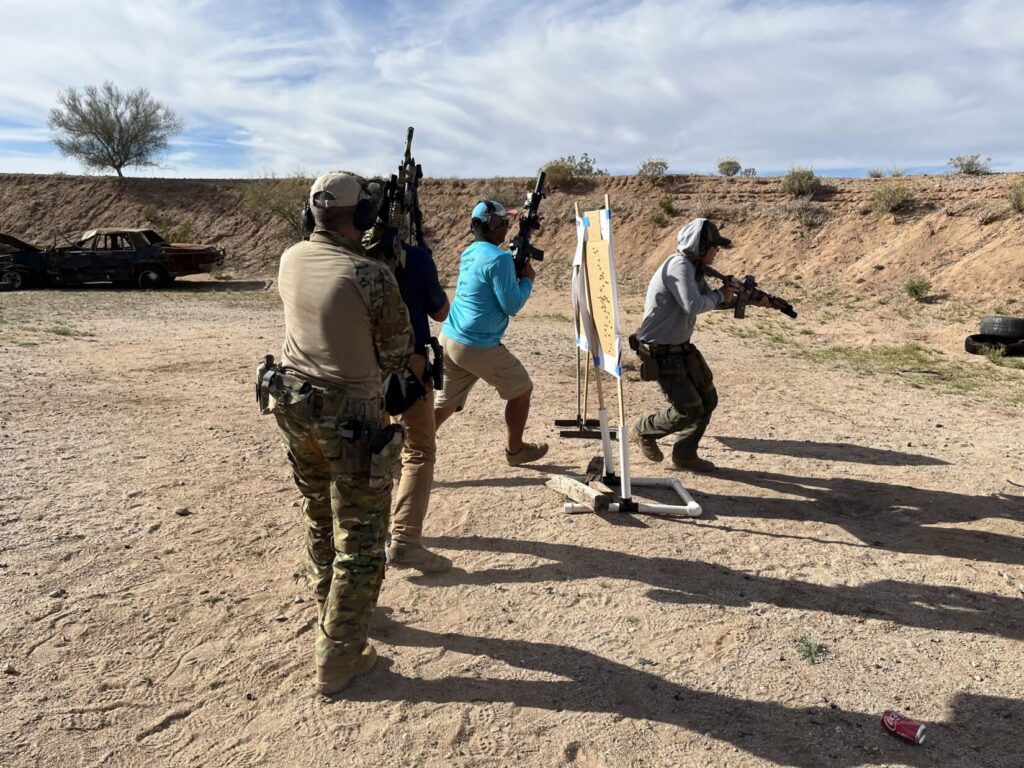
Clearly mark forward limits of advance, so crossfire on opposite sides of the hostage taker target does not become an issue.
Since they will be farther from the coach than they were at the door, noise-cancelling, electronic earmuffs should help students to hear the instructor calling out who has the shot.
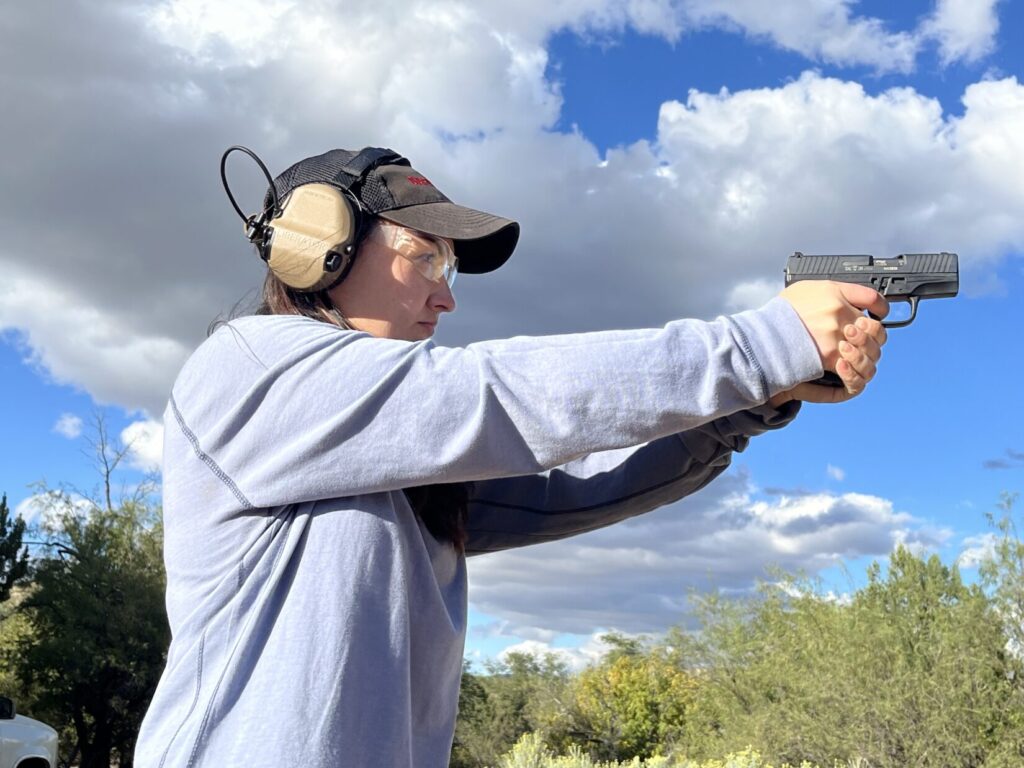
team building
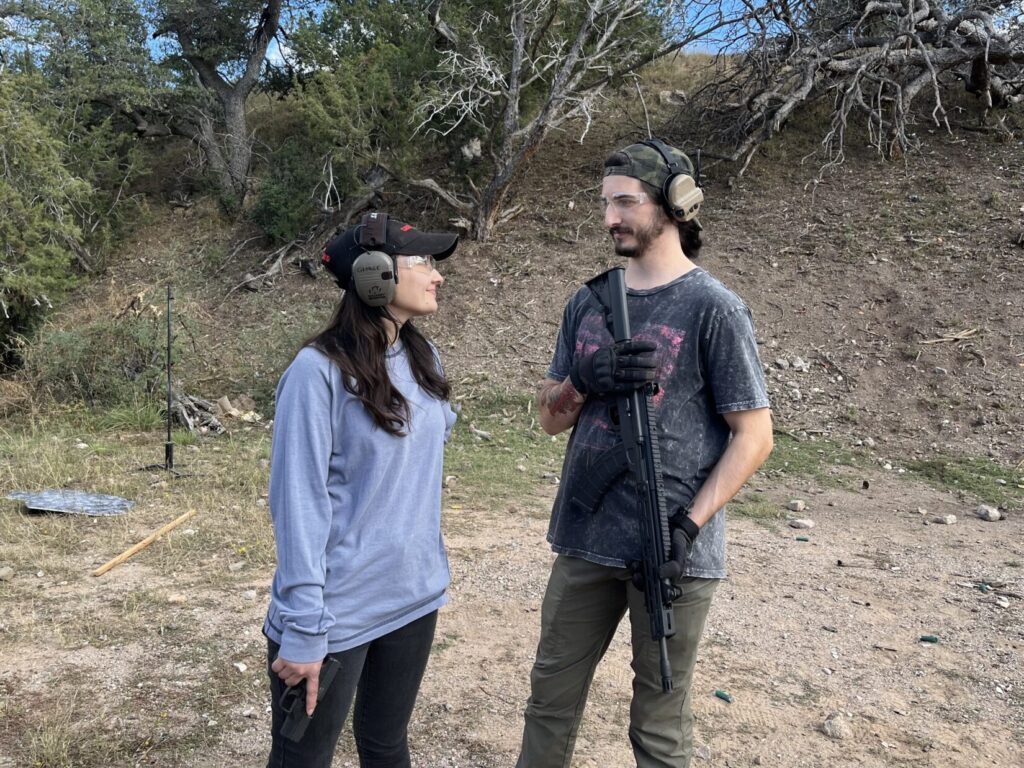
As I mentioned in “The Two-Deep Drill,” it’s good to set up team training situations where one partner calls out “I’ve got no shot!” and lets the other partner handle it.
It’s still OK to practice team drills where everyone is shooting at once. But also try to create conditions where some shooters hold their fire, even if the other person is shooting.
In a real home invasion, you will be lucky to have a second rescuer with you, much less three or four, although “the family that practices tactics together, stays together.”
Ammo efficiency
As live-fire range training goes, ammunition expenditure doing inverted-T drills is minimal, almost miserly.
You can train fire discipline in up to three people per run. Each time, all but one of the participants practices not shooting, even when they have a designated threat target in their sights.
All get to practice muzzle discipline while moving.
Each run, one participant gets to practice their head shots.
Ideally, you can train up to four people through 49 reps of these simple, easy to replicate but challenging exercises with less than one box of ammo expended. That’s a very high training-to-expenditure ratio.
Never Give Up Your Gun
This article was about training fire discipline. We used a hostage rescue drill, but this was not a treatise on hostage rescue. There’s so much more to hostage rescue than we can cover here. But this one aspect of successful hostage rescue is vitally important to remember:
Never, ever, EVER give up your gun.
They do it in movies and TV shows all the time. The hostage taker is just misunderstood and in emotional pain. It always works out well by the final scene.
In the real world, officers who set down or even reholster their gun in the open, while trying to talk a hostage taker down, often get shot. Sometimes with their own gun. The hostage gets kidnapped, assaulted, and/or killed anyway.
Because of our TV programming, because we will be desperate to do anything and take any risk that will save the hostage (especially if he or she is our loved one), and because reasonable people erroneously subconsciously assume that other people, even kidnappers, will behave reasonably, you will desperately want to believe that giving up your gun will save the hostage.
Don’t believe it.
He is lying.
It will not.
Did I mention this? Never, ever, EVER give up your gun. Oh, and also, don’t give up your gun.
Don’t.
Never.
If you decide that in your heart of hearts beforehand, it will be much easier to sound decisive when the hostage taker demands that you drop your gun and kick it over to him, and you tell the hostage taker that is never going to happen.
Disclaimer
The author taught CWST, Criminal Warrant Service Techniques, and CQC, Close-Quarters Clearing, for his federal agency. The techniques outlined in this article are tactically sound, but they require serious attention to risk management. Again, they are not for those who do not already have reflexive, subconscious muzzle discipline. Do not attempt to replicate these drills with students who are brand-new to guns, nor without trained, qualified range supervision.
In subsequent posts, look for the Vertical L, a case study of Amadou Diallo, a victim of contagious fire, and how responsibly armed citizens can avoid becoming victims of mistaken IFF, like Johnny Hurley was.