Many backcountry emergencies occur because outdoorsmen do not understand the basics of land navigation. If you lose your way and panic, you create a compound emergency when you can’t stay found.
Compared to some equipment we purchase, land navigation gear is relatively inexpensive, but it also isn’t as exciting as things that go boom. I am never surprised when hunters and outdoorsmen scoff at the price of a GPS unit or global needle compass but won’t hesitate to spend many hundreds or thousands of dollars more on firearms, fishing gear, or vehicle accessories.
Knowledge costs nothing, and even with a basic button compass, you can build in some good habits to help “lost proof” yourself.
Map Recon: Planning Before You Depart
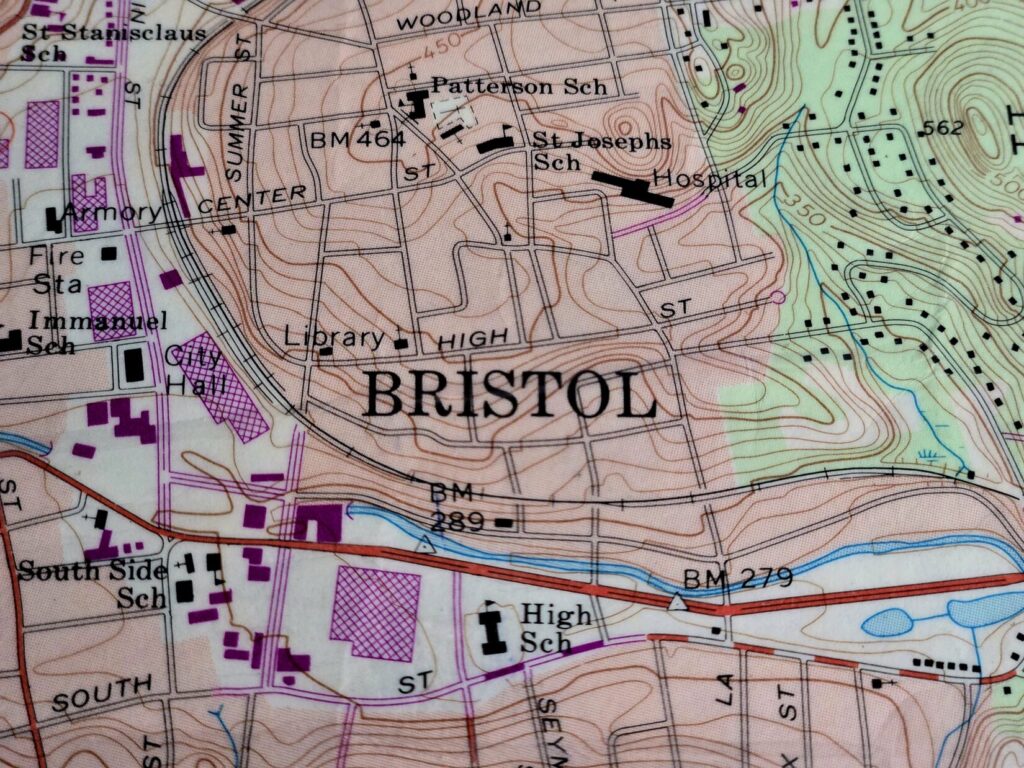
Long before you travel into the backcountry, you can examine physical maps and satellite images to help you understand the lay of the land.
The process of examining maps to determine what the emergency azimuth (which direction you would travel to self-rescue in an emergency)is and where the nearest water, roads, and most populated areas are is called “map recon.”
It is a universal concept that applies to wilderness settings as well as unfamiliar urban settings if you’re traveling. You should track the locations of assets as well as danger areas that could include swamps, cliffs, and private property. All of these can be logged in a small notebook and carried into the field.
The availability of Google Earth imaging and private-label satellite image companies can help the traveler gain a bird’s-eye view of where they are traveling before they set foot on the ground there.
Google Earth can toggle in and out of 2D and 3D imaging, and terrain can be zoomed into. Programs like On-X Hunt not only provide satellite images and topography but also private property lines, if you must avoid crossing them during hunting season.
Pace Counting: Measuring Distance On Foot
One of the important elements of lost-proofing is understanding how far you have traveled. If we are in our vehicles, we have the odometer to help us, but on foot, we can either use time traveled or paces walked.

Pacing is a complete stride with both left and right feet. Think of it as two steps left and right or right and left. Your pace will vary from the next person based on your height, footwear, weight carried, flexibility, etc. It will also change in your lifetime as you age.
If you are interested in determining how far you travel with each pace, set up a 100-foot-long course. Walk this course and divide 100 by the number of paces you walked. For instance, if you took 18 paces, 100 feet divided by 18 is 5.5, representing five feet six inches. This can be tested on a 100-yard football field by walking the 300 feet. If you count 54.5 paces, you know your factor is correct.
Pacing can be understood in miles and meters. Hiking trails in the United States are posted in miles, and understanding how far you’ve traveled and how far you need to travel can be useful. The military teaches pacing in meters, and this works well with plotting courses on maps since position (described later) will also be determined in meters.
Both feet and meters work as long as you understand how they work with maps and marked measurements.
Terrain Association: Bridging the 2D-3D Gap
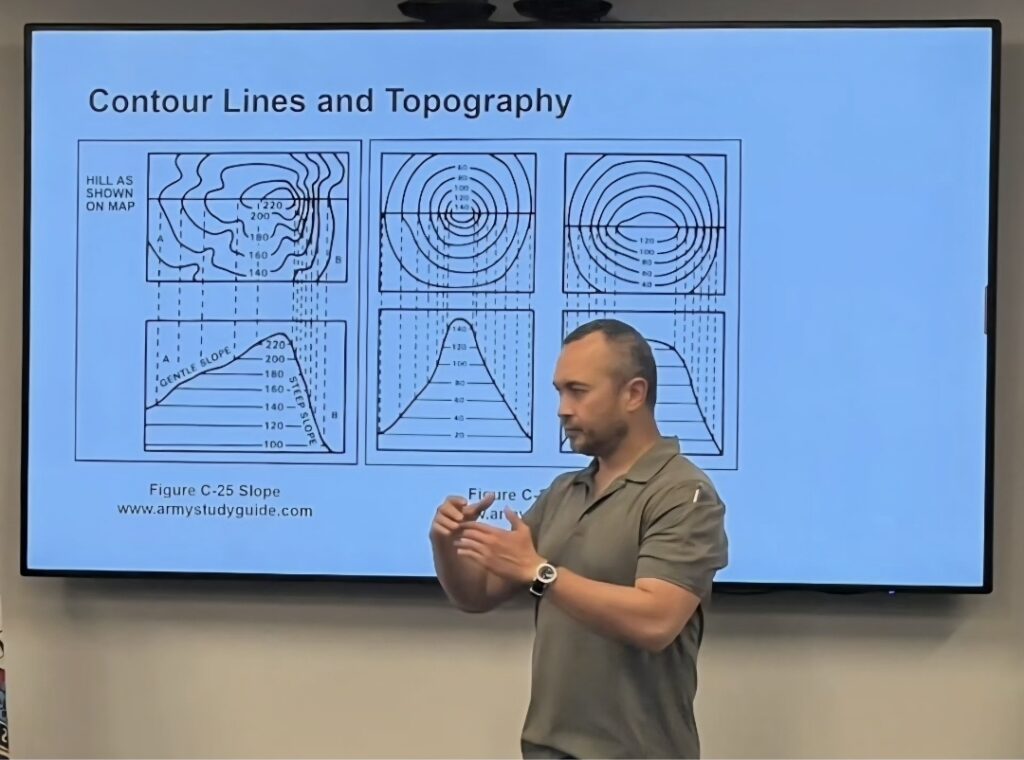
Terrain association is the process of learning what the real-world 3D landscape looks like, represented on a 2D map and vice versa.
There are many ways to accomplish this, but my top recommendation is to pick up a map of your hometown or where you currently live and get to a high point. From this vantage point, you can look at the landscape and look at the map in front of you, lining up features with topographic lines.
A common way to show a small-scale version of what terrain features look like is the “military fist” method.
By simply making a fist, your hand becomes a topographic model: your knuckles represent Hills, the dips between them are Saddles, and the length of your fingers extending out are Ridges. The grooves between those fingers represent Valleys, and if you cup your palm, you’ve created a Depression.
To keep the five major features straight, just remember the mnemonic: “Hidden Valley Ranch Salad Dressing.” Each first letter aligns with the features we’ve covered: Hill, Valley, Ridge, Saddle, and Depression. It’s easy to point to a spot on the map and then to a spot on your fist to explain what the terrain will look like in a small form.
Small-Scale Model
Another method that is time-intensive but a great way to bring the map to life is to create a cardboard representation of one of the 1,000-meter grid squares.
If time allows, you can create an enlarged copy of your map on a photocopier and use multiple copies of a particular square as a template to cut out the relief. Hills, valleys, ridges, saddles, and draws can be made and examined from all angles.

Direction: Navigating Bearings and the Three Norths
The direction we face is based on true north in a circle of 360°. If our compass reads “120”, that is 120° southeast. Our direction matters because it can determine where we are headed and where objects are in relation to us.
If we know prevailing winds come from the southwest, we can identify that direction and position our shelter accordingly.
Direction is important because it also helps us move in angles along a course. In other words, we can move around objects using 45° doglegs or box it with 90° corners.
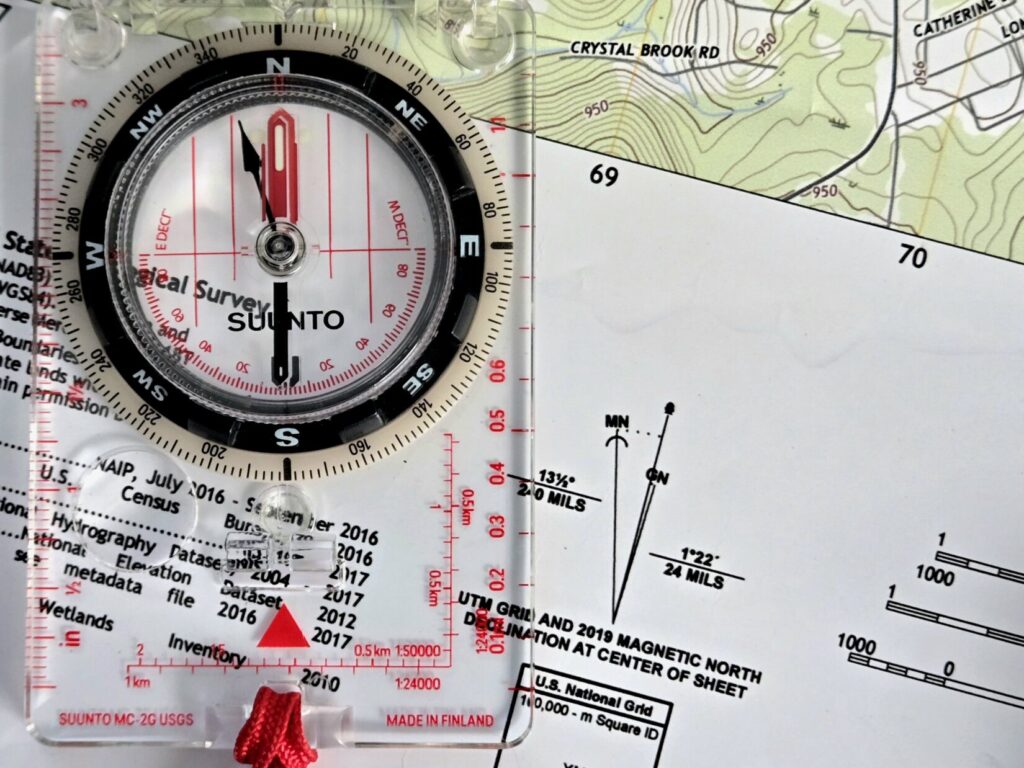
A good compass will allow the user to take bearings accurately. Some button or wrist compasses are sufficient for general orienteering, but those serious about land navigation will use a baseplate or lensatic compass.

While a slightly more advanced concept, understand that there is a true north as well as grid north and magnetic north. Grid north and true north are typically treated as the same, while magnetic north will be off by varying amounts depending on where the compass is read.
This difference between true/grid north and magnetic north is often referred to as the “GM angle,” and the numerical value of that angle is either added or subtracted from the magnetic reading. Without going too deep in the weeds, remember the acronym “L.A.R.S” for “Left Add, Right Subtract” if this skillset is one you intend to develop further.
Position: From Grid Coordinates to Macro Placement
Land navigation comes down to understanding distances between objects, direction, description of terrain, and position.
Position is usually understood through a grid system referred to as Universal Transverse Mercator (UTM) or Military Grid Reference System (MGRS). This system can be plotted on a map with a map protractor, providing a grid coordinate in numbers.
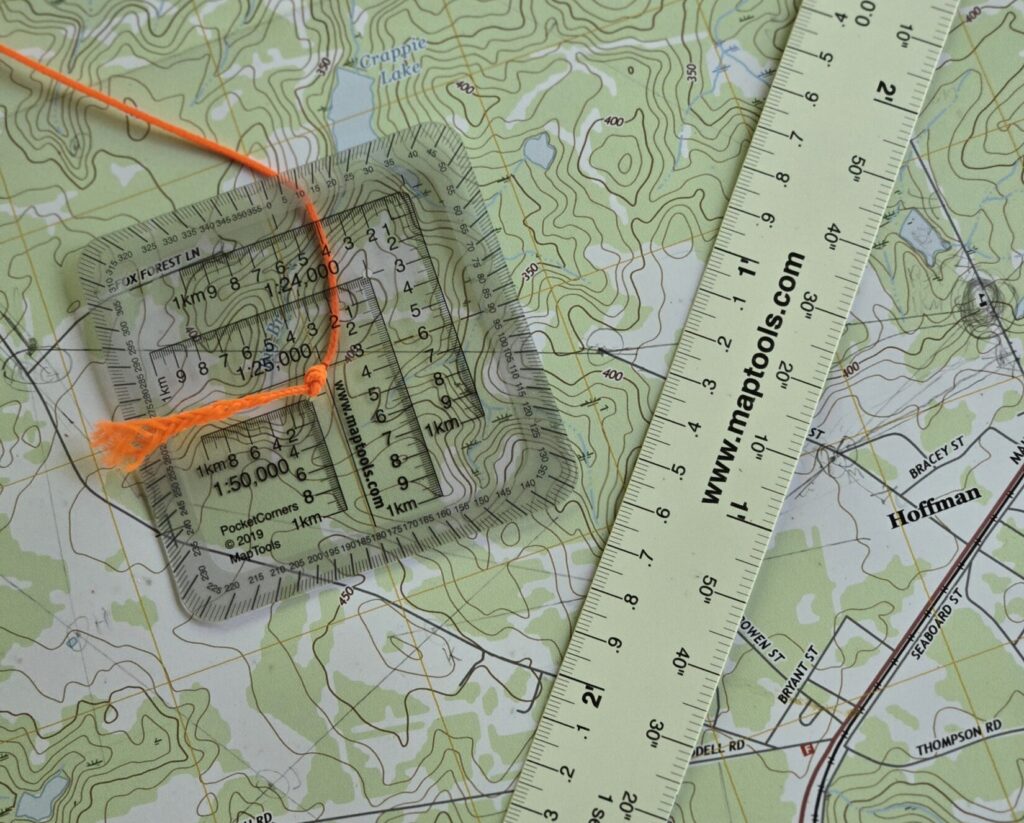
While I recommend anyone venturing outdoors to have knowledge of plotting positions on maps, I understand not everyone will take their land navigation skills to this level.
As a compromise, an outdoorsman can work on macro positioning, such as knowing if they are on the south-facing side of a peak or three-quarters up a ravine or between one trail junction and another.
Basic understanding of position can be used with a map as long as you can read the features on a map.
Leveling Up Your Land Nav Skills
Learning land navigation can seem overwhelming, but it is very attainable when properly guided by a competent instructor.
Land navigation skills will help keep you found and likely prevent emergencies from happening on account of being lost. Even learning the fundamentals will give you an edge outdoors compared to the layman. Level up by learning the basics of map and compass skills.