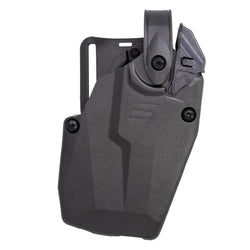
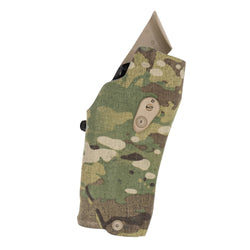

The famed quick draw is a massive part of American gun culture. Heck, it’s a part of American pop culture since the Western films of yesteryear glorified the prowess of the quick-draw cowboy.
Getting your gun out of the holster and on target quickly is always the goal, but how do we do it?
Well, we need a trained and efficient draw stroke. It isn’t hard. It just takes lots and lots of practice. I can’t tell you how much practice is required for a quick and efficient draw, but I can help you break down your draw into manageable bits.
It’s a bit like eating an elephant: take one bite at a time.
Quick Answer: What Are the Core Holster Draw Stroke Steps?
The core holster draw stroke steps break down into 4 main phases:
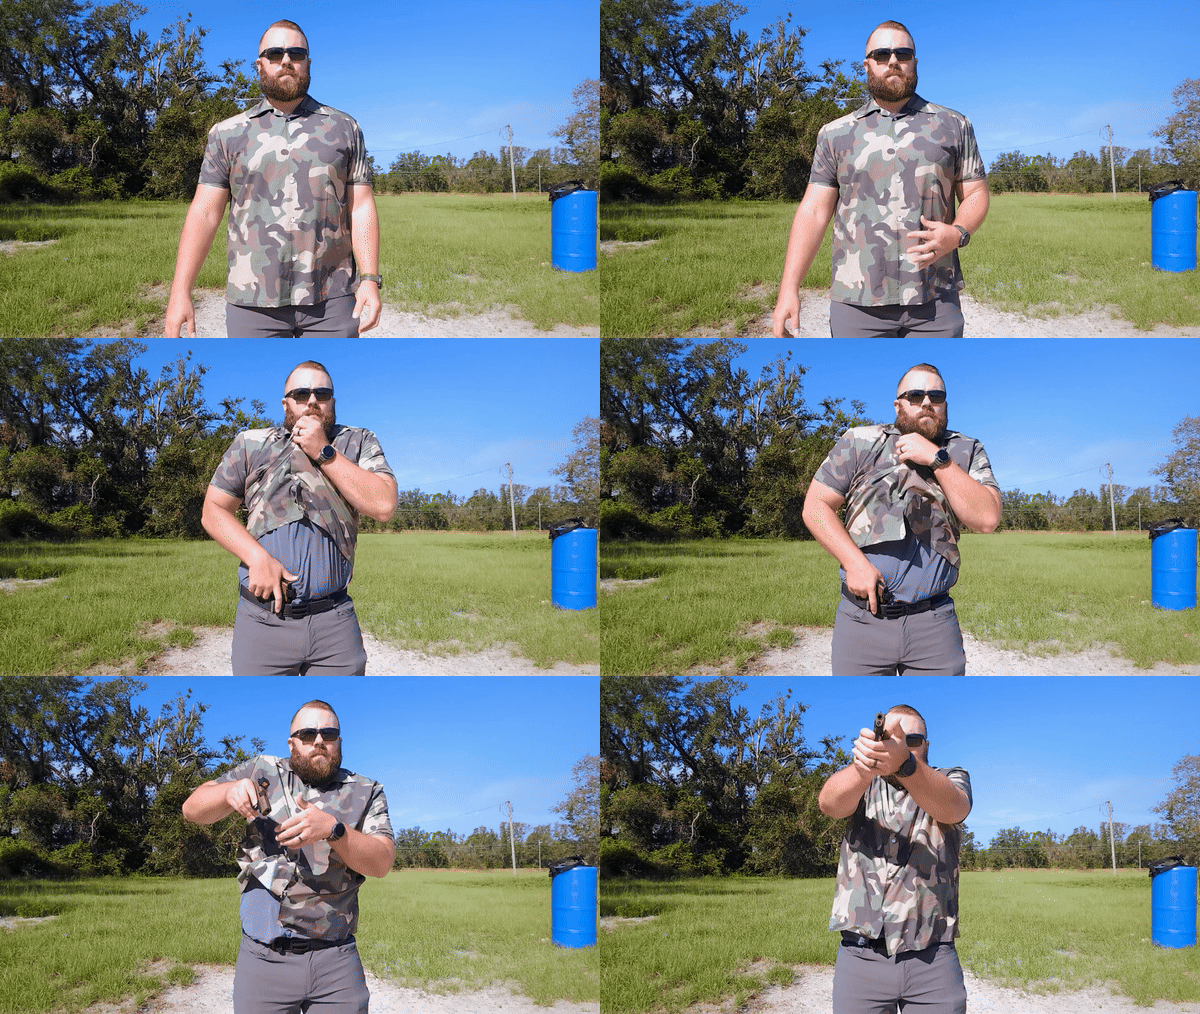
- Establish Master Grip: Fly your dominant hand to the gun to get a solid firing grip while your support hand moves to your centerline (or clears your shirt).
- Defeat Retention & Clear Holster: Disengage active retention devices (such as Safariland ALS or SLS) and draw the firearm vertically until the muzzle clears the holster body.
- Meet at Midline: Rotate the muzzle toward the target and bring your support hand to join your firing hand at chest height, establishing a proper two-handed grip.
- Press Out & Engage: Drive the gun forward toward the target while picking up your iron sights or red dot reticle.
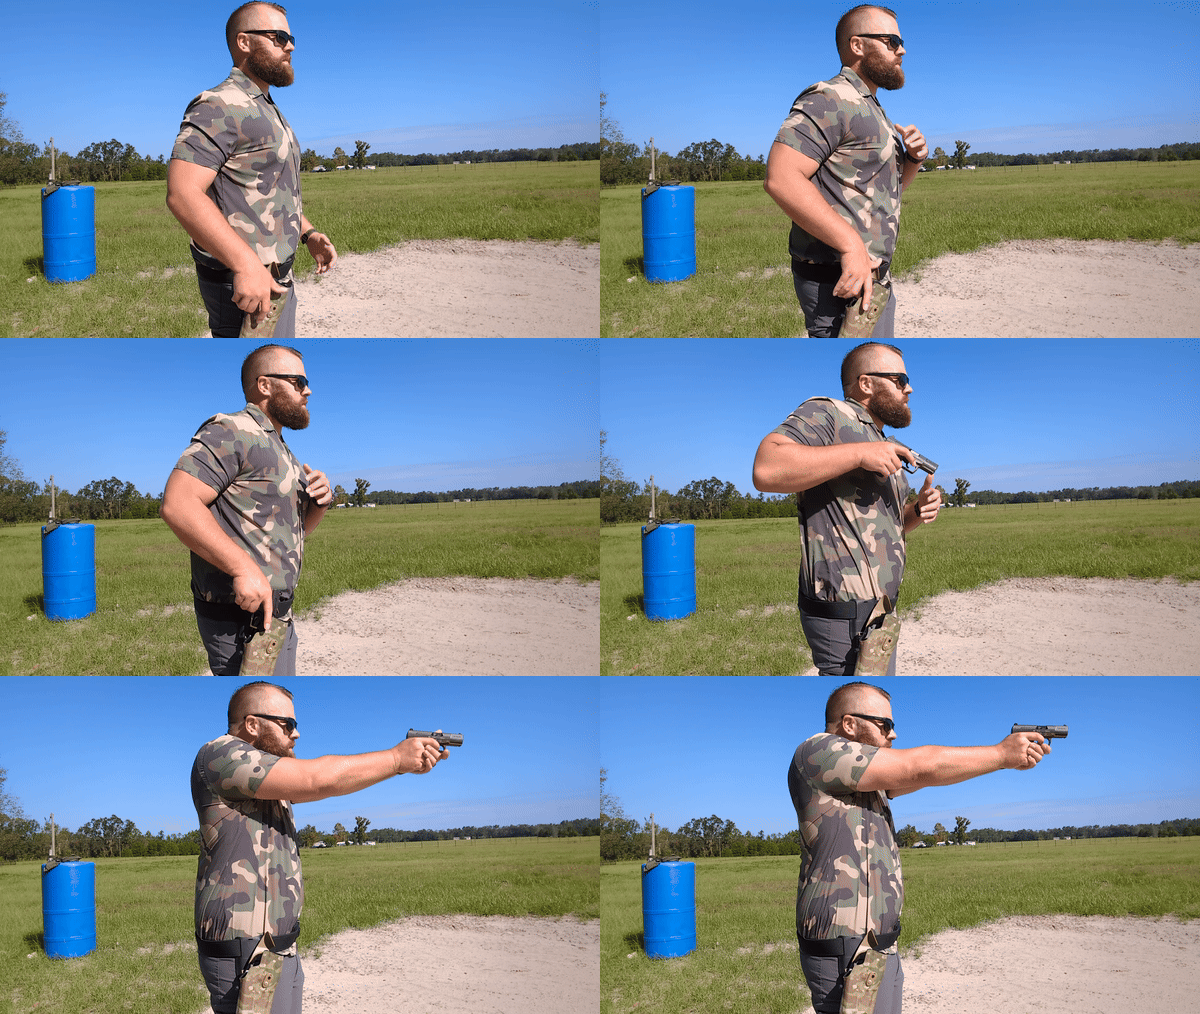
Drawing Your Handgun 101: Breaking Down the Steps
Let’s cover the down-and-dirty steps to drawing a handgun. You can break it down to just a few steps, assuming your hands are at your side, the threat is in front of you, and your gun is on your waistline. (Drawing from an ankle, shoulder, or pocket is a bit different.)
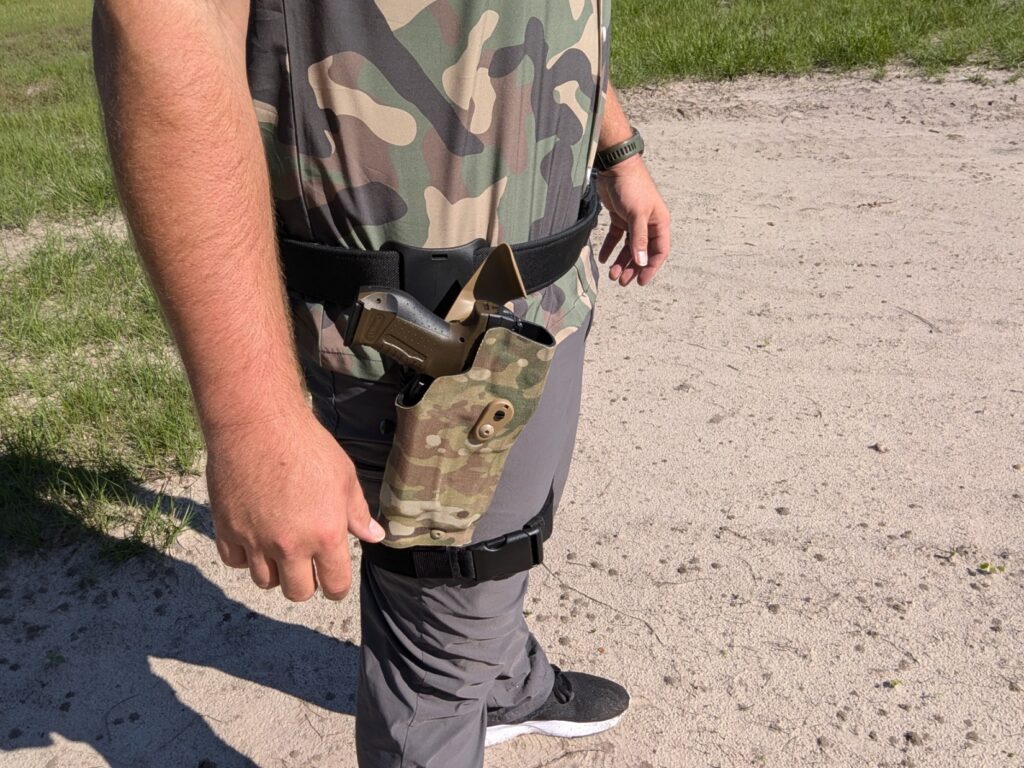
Step 1: Hand Off Gun & Establish Your Master Grip
Start with your hand in any position, except on the gun. At the signal, fly your dominant hand to your firearm and establish a firm, high master grip right away.
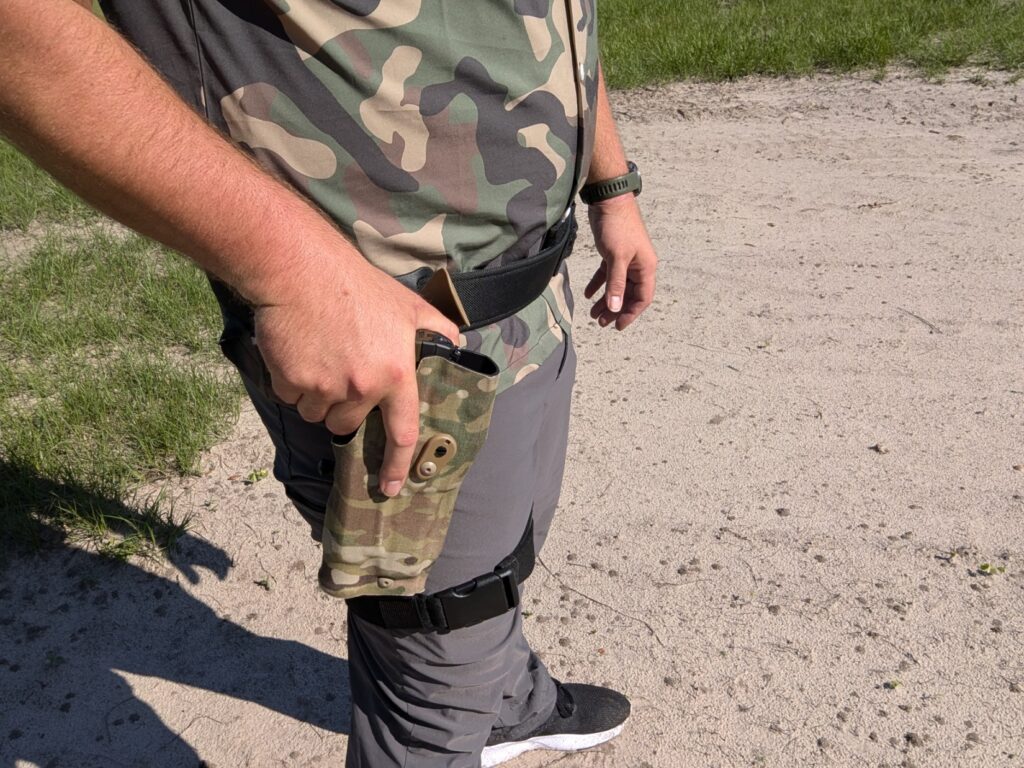
Duty Rigs & Open Carry: If it’s a duty or competition rig, your support hand moves straight to your midline, right below your pectoral muscles, while your dominant hand gets in position to establish a solid grip and work the retention controls.
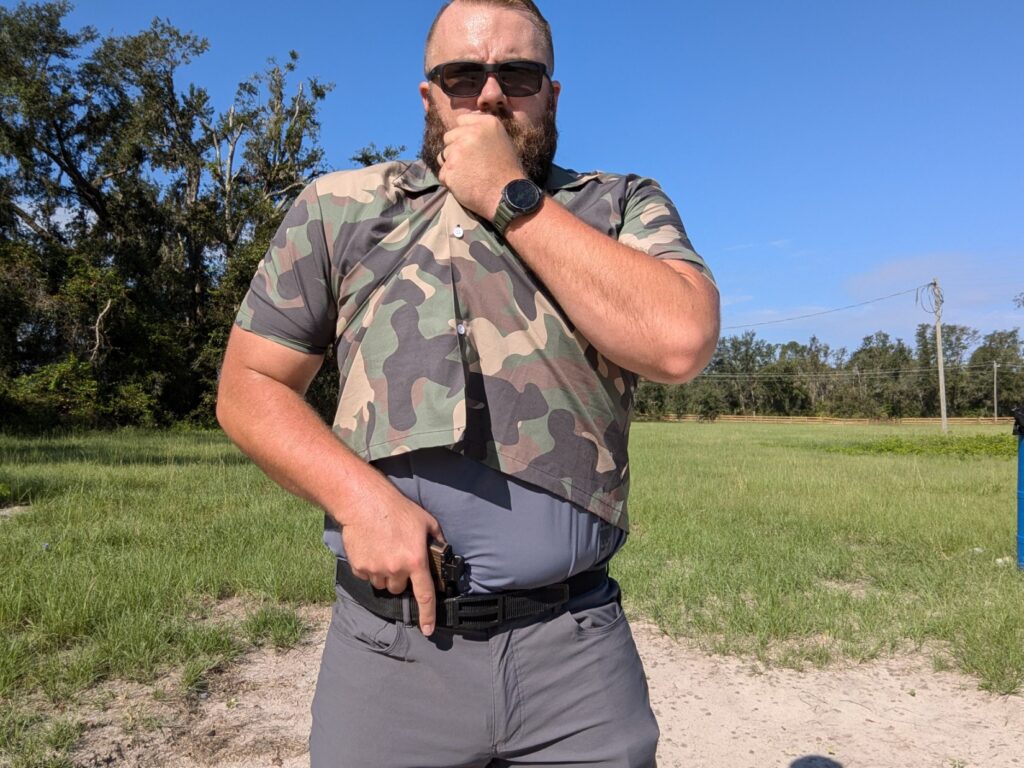
Concealed Carry (IWB/AIWB): If you’re carrying concealed using something like the Incog X IWB Holster, your support hand has a specific job: grab your shirt or cover garment and yank it high and out of the way.
Step 2: Defeat Retention Devices & Clear the Holster
Next, defeat any necessary retention devices with your firing hand. (If you’re running a slick concealed carry setup with no active retention, you skip right to pulling the gun up.)
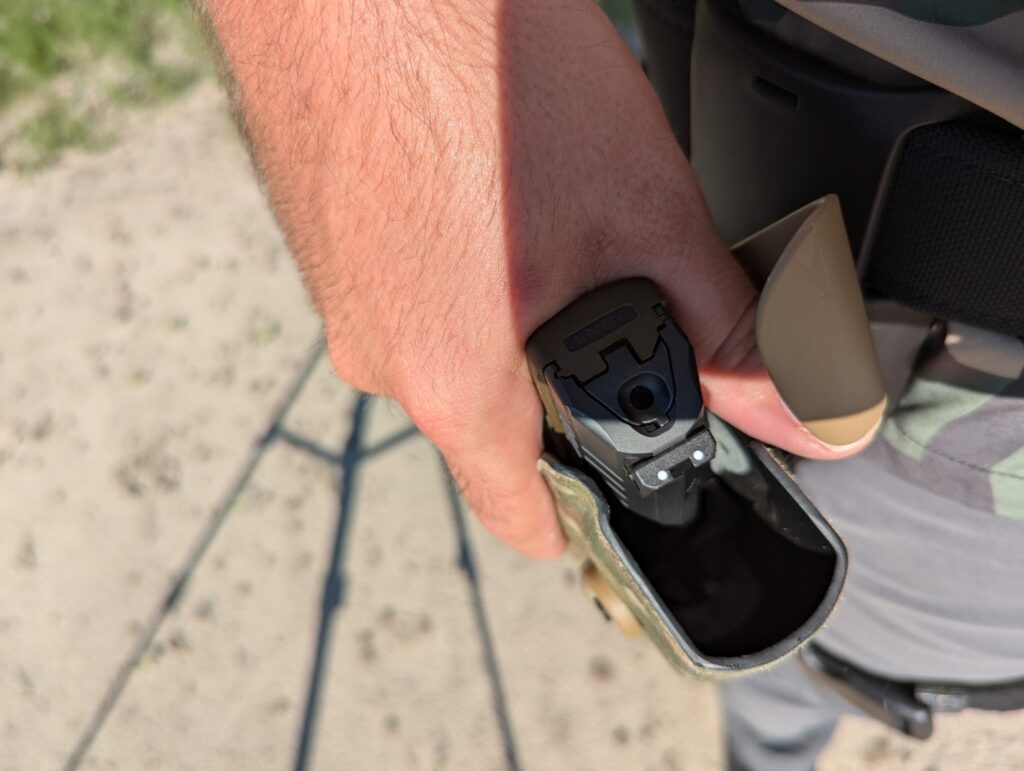
Mastering Safariland ALS and SLS: For a Level 3 duty rig like the SafariVault or 6354RDSO, create a smooth rhythm. Push down and forward on the SLS hood with your thumb, then sweep rearward to defeat the ALS. Mastering these devices makes you realize how little they actually slow you down.
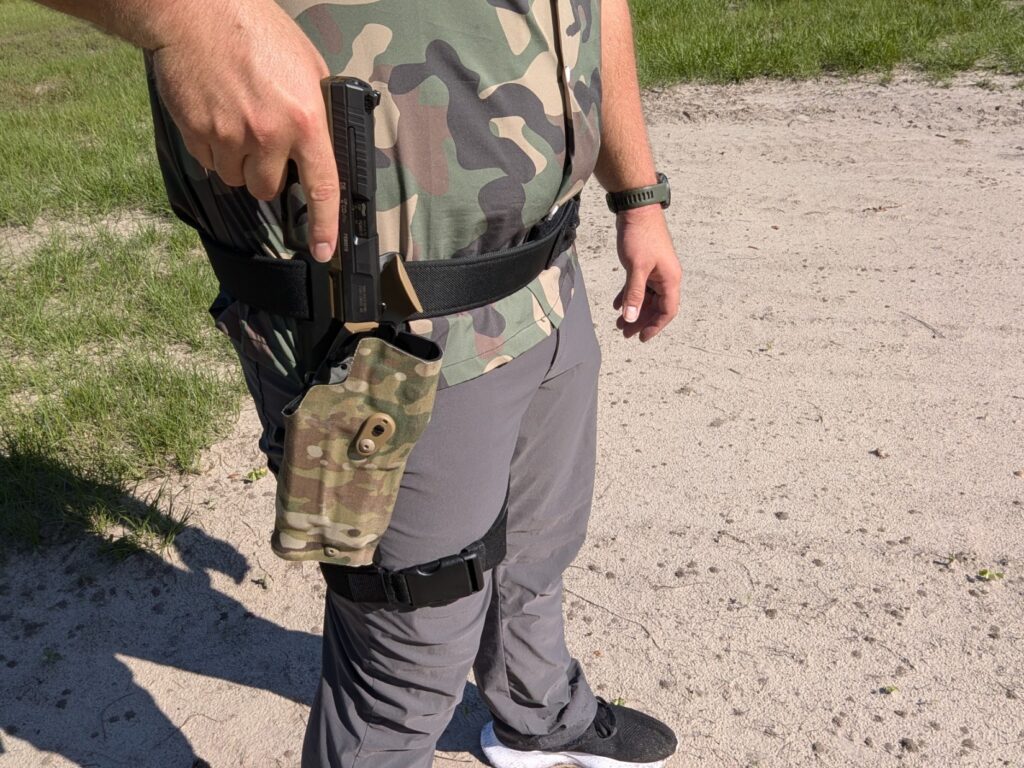
The Vertical Clear: After defeating retention, pull your firearm upward until the muzzle completely clears the top mouth of the holster. Don’t start pushing forward early or you’ll drag against the holster body.
Step 3: Orient the Gun & Meet at Midline
From there, drive your dominant elbow down, which orients the gun straight towards the target. In some close-quarters situations, you’d even be ready to fire from this indexed position if necessary. Make the movement fast and firm, but you aren’t trying to break a board like Johnny Karate—don’t exaggerate it to the point of being a detriment.
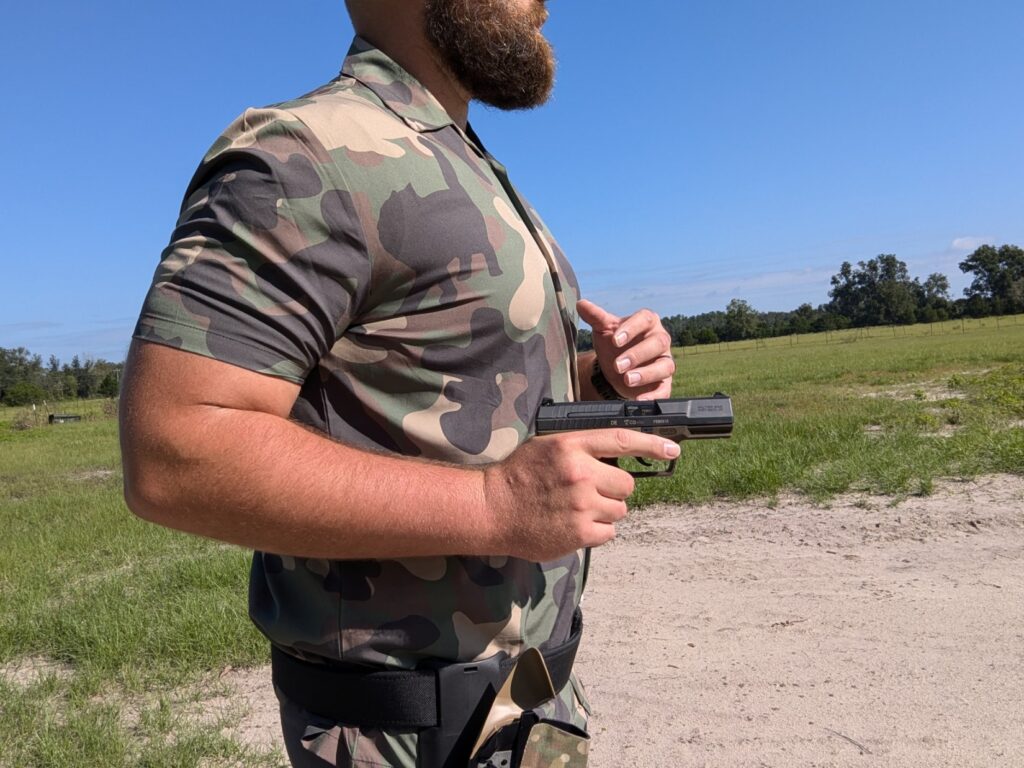
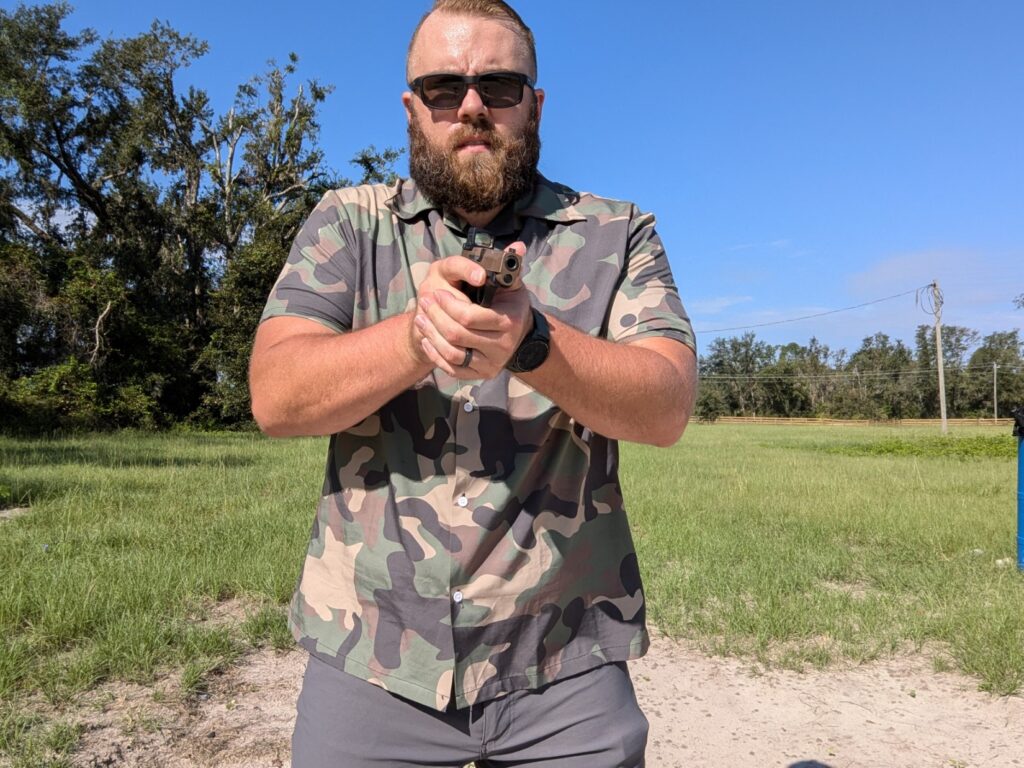
Bring the gun up along your chest line as your support hand meets your dominant hand to establish a solid, two-handed firing grip. The two hands should flow together smoothly and efficiently right in the center of your chest.
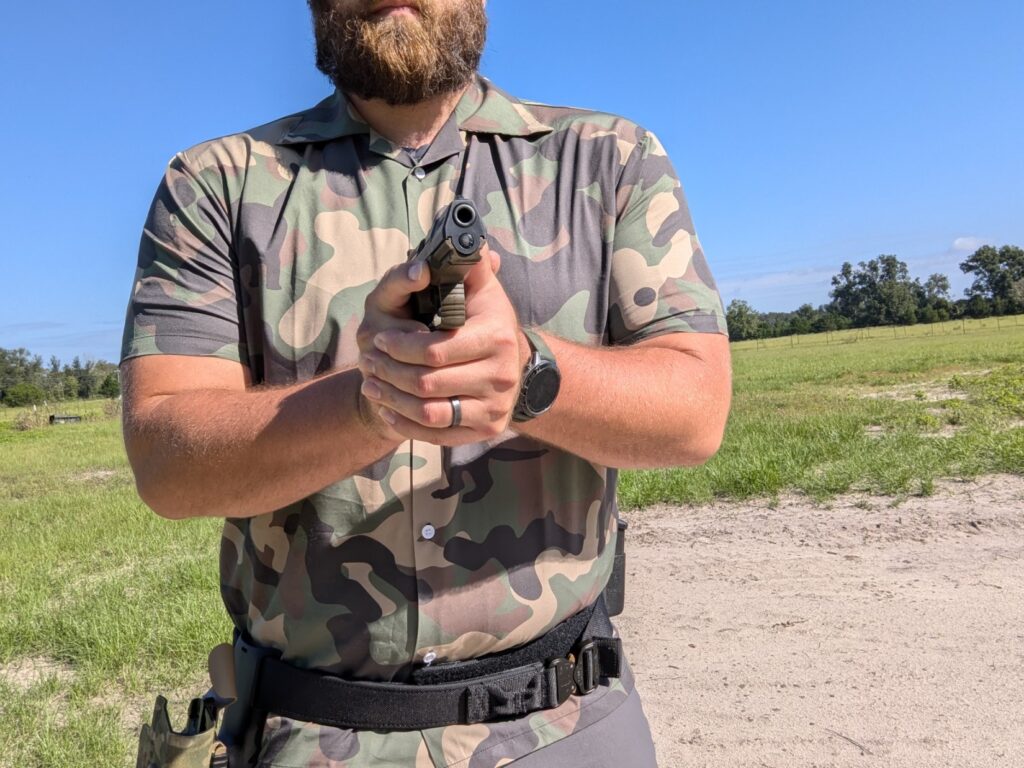
Step 4: Press Out, Find Sights, and Engage
Now, drive the gun forward toward the target. As the gun moves forward, focus on acquiring your sights or red dot reticle so they align cleanly with your target.
Red Dots vs. Iron Sights: If you’re running an optic-ready setup, focus on the target threat and let the dot enter your field of view as you extend. Avoid dipping your sights or turning them too far upward during the press out. Once your sights align, the draw is complete, and you’re ready for the final step: pressing the trigger.
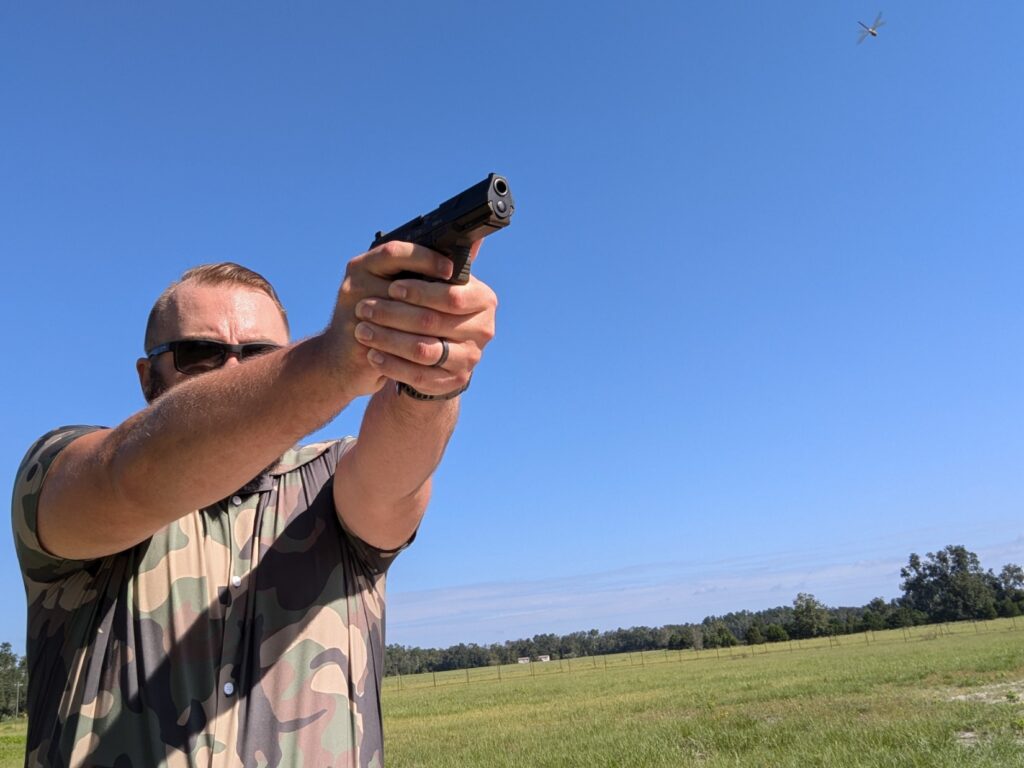
You’ll need to practice. Practice an absolute ton, and practice efficiently.
How To Get Faster At the Draw: 3 Dry Fire Drills
There are lots of easy ways to improve your handgun draw, and I’m going to teach you the method that works best for me.
A long time ago, for a very brief time period, I took some informal boxing lessons. The instructor taught us to build a combination by practicing each movement to the point of boring repetition. That’s what we’ll do with our draw.
Safety Pre-Check for Dry Fire: All of this practice will be dry. Remove the magazine, clear the chamber, and store all live ammo in another room. Let’s do it safely and efficiently with a clear gun and a safe target backstop.
Drill 1: The Isolated Grip & Retention Reps
For our first drill, we are going to focus purely on building lightning-fast hand speed to the gun without ever pulling it out of the holster.
Set your smartphone app or regular shot timer for a random go signal, and when you hear that loud beep, fly your dominant hand straight to the gun to lock in your master grip while your support hand clears your shirt or moves to your midline.
If you’re running a retention rig, disengage those mechanisms right as your grip locks in, but stop right there and don’t draw the gun up.
You want to repeat this exact, isolated movement at least 100 times in a single session—it’s going to get boring, but the more reps you put in, the faster and smoother your grip acquisition becomes.
Drill 2: The Pyramid Build (Step-by-Step Chain Drill)
Once your grip acquisition feels smooth, you’re going to put the full draw stroke together like a pyramid by adding one bite of the elephant at a time.
Start off by doing 10 reps where you simply grab the gun and move your support hand to your chest centerline, then move on to 10 reps of grabbing the gun and defeating retention.
For a Level 3 holster, you’ll create a rhythm. Push down and forward to defeat the SLS device. Pull rearward to defeat the ALS. Mastering these devices makes you realize how little they actually slow you down.
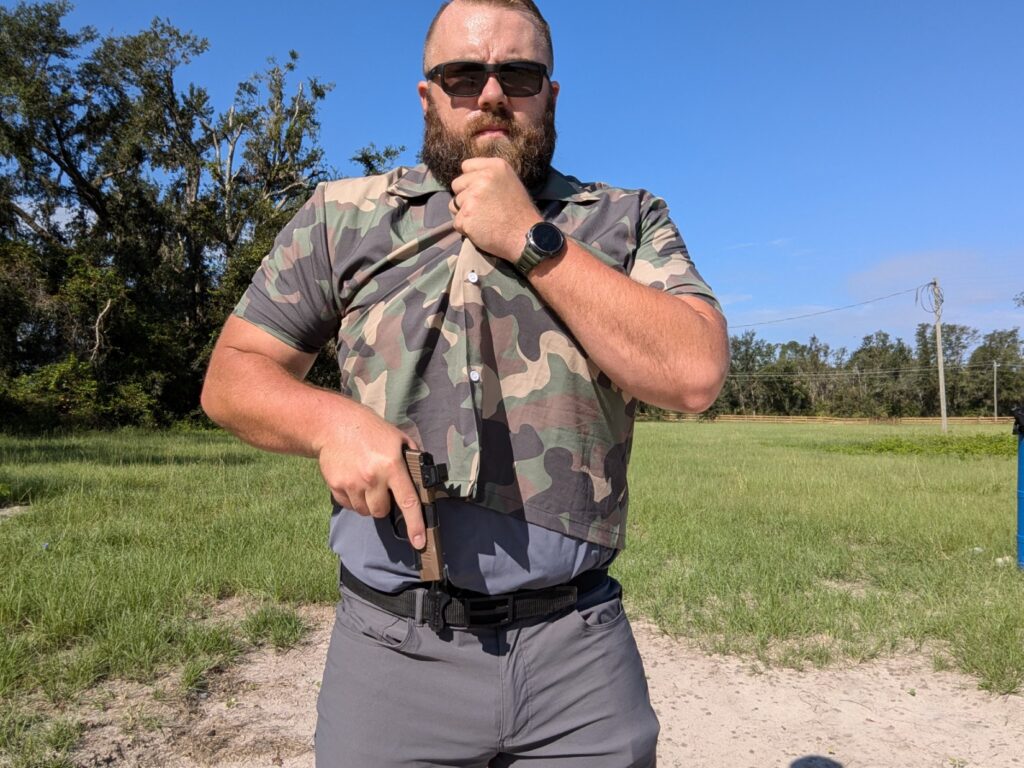
Next, do 10 reps where you grab, defeat retention, and pull the muzzle clear of the holster, followed by 10 reps where you clear the holster and drive your elbow down to orient the gun downrange.
Finally, finish it out with 10 full reps putting the whole chain together—grabbing, defeating retention, clearing, bringing your hands together at your midline, and pressing straight out into your sight picture.
Drill 3: The Shot Timer Par-Time Challenge
After you’ve built up that smooth movement chain, it’s time to start pushing your speed boundaries using a shot timer with a par time setting.
Set the timer beep for a realistic goal—something like 1.5 seconds—and at the start beep, execute your full draw stroke and get a clean dry fire trigger click before that second beep sounds.
Focus on staying relaxed rather than tensing up, because tension actually slows you down, and once you can comfortably hit 10 clean, perfect reps in a row under 1.5 seconds, start dialing that par time down to 1.4 or 1.3 seconds to keep pushing your limits.
Put it together one step at a time. Remember, you can eat an elephant. It just takes one bite at a time.
Common Draw Stroke Mistakes (And How to Fix Them)
Muzzling Your Support Hand: Don’t let your support hand drift out in front of the gun before the muzzle is pointing downrange. Keep that support hand anchored to your chest midline until the gun comes up to meet it.
The Scoop Draw: Lifting the gun up in a big swinging arc from your hip (like you’re fishing) makes finding your sights way harder. Pull straight up, orient at chest height, and push straight out.
Rushing the Grip: Yanking on the gun before establishing a high, firm master grip ruins your hand position and hurts your recoil control later. Master the grip first, then pull.
Common Holster Draw Questions Answered
What are the four main holster draw stroke steps?
Establish Master Grip: Fly your dominant hand to get a full grip while your support hand moves to your chest midline (or clears your shirt).
Defeat Retention & Clear: Disengage retention mechanisms (like ALS® or SLS™) and pull the gun straight up out of the holster.
Meet at Midline: Drive your elbow down to point the gun downrange and bring both hands together at chest height.
Press Out & Acquire Sights: Push the gun forward to the target, acquiring your iron sights or red dot reticle as you extend.
How do you quickly defeat Safariland ALS and SLS retention mechanisms?
Create a single thumb rhythm when you grab the gun. Push down and forward on the SLS hood with your thumb, then immediately sweep your thumb rearward to hit the ALS release lever as you pull upward. Practicing this thumb sweep in dry fire makes the retention devices feel completely seamless.
How often should you practice dry fire draw drills?
Getting fast at the draw takes effort, time, and lots of repetition. It’s also a perishable skill that requires maintenance. Short, frequent dry fire sessions (10 to 15 minutes, 3 to 4 days a week), putting in 50 to 100 smooth reps, will do way more for your draw speed than one long session a month.