
Protecting your hearing is absolutely vital. Take it from me, someone who was foolish and took my hearing for granted. I was young and made a terrible decision once to shoot an entire round of trap with no hearing protection. The first shot from my shotgun made both my ears ring, and by the time the round was over, the damage was already done. I could barely hear for a week.
The hearing in my left ear has never been the same since. I have permanent tinnitus in that ear, and that will never go away. It was preventable and unfortunately irreversible. This is why I am such a huge proponent of hearing protection and have used every type that has been available.
Foam Plugs vs. Electronic Headsets
No matter what type of ear pro you are using, the most important thing is to have some with you. Thankfully, there are a lot of options available to protect your hearing. The most basic form of ear pro would be your foam ear plugs. The pros of foam plugs are that they are small, compact, and inexpensive.
There are plenty of cons too — they block out all sounds and it is very difficult to hear conversations, making communications very difficult or impossible to accomplish while on a live shooting range. Ear plugs, whether they are foam or made of another material, only block the ear canal. Damaging sounds can still be harmful by going through the soft tissue behind the ears. They can also be dislodged and fall out of position while you are shooting, leaving you fully exposed.
There are numerous types of ear pro out there. I’ve written and reviewed many of them over the years. For this article, I will focus on electronic headsets. Electronic headsets are my personal preferred method of ear pro. They protect you from harmful noises while simultaneously enhancing and amplifying all the other non harmful noises and sounds.
This allows you to hear conversations, communicate, and have better situational awareness. They cover your ears and shield that soft tissue area behind the ear. They are very quick to put on and turn on. They do have some cons — they cost much more than most types of ear pro, and they can get hot and uncomfortable over long periods of wear.

The Liberator HP 2.0
When it comes to electronic headsets, there is a wide range of cost and quality. You definitely get what you pay for, so get a set that fits your budget for your specific needs.
Today I am going to focus on the Safariland Liberator HP 2.0 headsets. These are at the professional level of electronic headsets. They are designed for law enforcement and military professionals, so they have excellent electronics and are very durable. They have multiple modes to choose from to fit your specific needs.
From TCI to Safariland
Safariland acquired Tactical Command Industries (TCI) many years ago. TCI specialized in Tactical Communication hardware. The TCI Liberators were the go-to headset for SWAT Teams and military units for years. Now under Safariland, they continue to innovate and improve their products.
I have used many headsets from TCI and Safariland over the years. My DEHP headset is a set that I still use today. I have two sets of the latest Liberator HP 2.0s, and they have been my go-to headsets since I got them.
Key Features
The Liberator HP 2.0 is the modernized version of the legendary TCI Liberator. It has the latest digital sound processing technology with:
- Digital threat compression technology
- Digital situational awareness enhancement
- Active noise cancellation for steady-state noise
- Speech isolation
What all those features give you is a clear listening experience where you can hear all the crucial noises and sounds that you need to hear, while suppressing all the harmful noises. They are also dual fuel compatible. You open the battery door without any tools, it will accept 2 AAA batteries or 1 CR123 Lithium battery.
Lower-end headsets will interrupt the noises that you want to hear with clicking noises or lower the volume when there are harmful noises that occur. Their electronics and software are unable to process all of the different noises in the environment all at once.
Hearing is definitely believing. If you are able to, wear an entry-level headset for a minute and then put on a professional-level headset, and you can immediately hear the difference in the sound quality. Going for a test drive will help you figure out what budget you are set on when it comes to balancing the cost and sound quality of headsets.
The Old Mounting Problem
The one drawback with a lot of headsets throughout the years has been the difficulty of changing the mounting system from over-the-head, behind-the-head, and helmet-mounted. So you had to decide which mounting system you wanted to purchase, because that would be what you had.
If you wanted to switch them out, you had to use tools and painstakingly take apart your headsets, all while hoping that you wouldn’t make a mistake and render them useless in the process. For a lot of these modifications, they were then permanent, and there wasn’t much going back to the original mounting system.
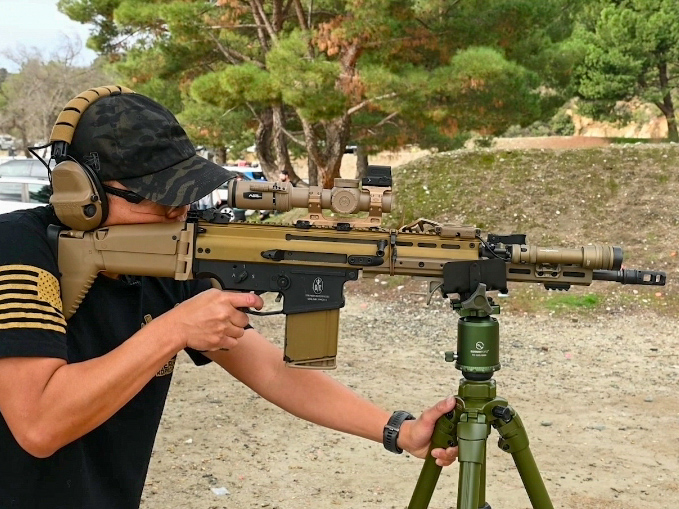
Why would one want to switch the mounting system for a headset? The answer is simple, being able to adapt to different situations is a must for ear pro. For most range use, having it over the head or behind the head is ideal.
If you are wearing a standard ball cap with a center fastener on top, an over-the-head band would sit right on top of it and make it very uncomfortable by digging that fastener into the top of your head. A behind-the-head mounted setup would work a lot better for that situation.
Over-the-head mounted sets are very unlikely to fit underneath a helmet, so a behind-the-head mount would also work better. However, the optimal setup for a helmet is a direct helmet mount. It is by far the most comfortable, even more so than a behind-the-head setup underneath the helmet.
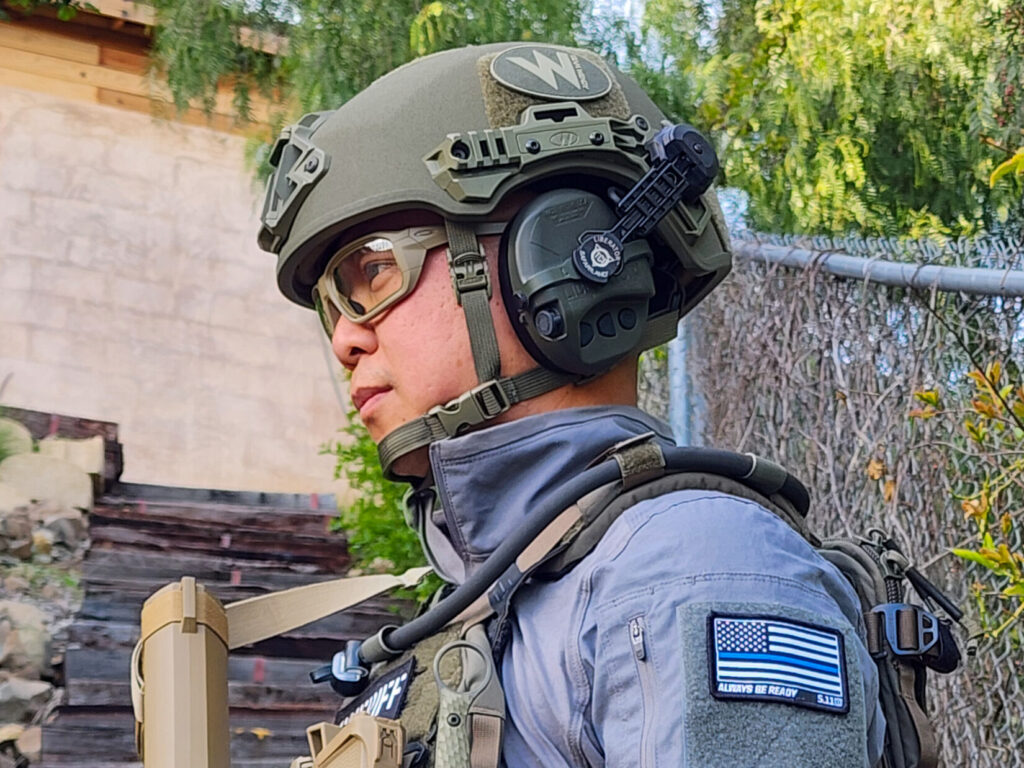
Having a dedicated helmet setup is ideal, but if it is your only electronic headset, you would be without a headset when you aren’t wearing your helmet. There are times to wear your helmet and there are plenty of times when you wouldn’t want to wear a helmet for a variety of reasons, such as going for range sessions that do not require you to be in full kit.
For this reason, most end users would end up purchasing several different sets of the same headset with the different mounting systems. Helmet-mounted headsets were dedicated to that helmet. There’s nothing wrong with having multiple sets; however, not everyone has the budget or the ability to cover that cost at several hundred dollars a set to have a few.
The Adaptive Suspension System
The Liberator HP 2.0s solve that issue rather well. It was designed with an Adaptive Suspension system. When you order your Liberator HP 2.0s, you can choose from: Behind-the-head, Over-the-head, Helmet Mount-ARC Rail, Helmet Mount-Team Wendy 2.0 & 3.0. Unlike the classic Liberators before it, the end user can swap from one suspension system to another within a matter of minutes and without any tools.
How to Swap Suspension Systems
1. Remove the wire from its current Velcro headband cover, or remove it from its placement inside the helmet.
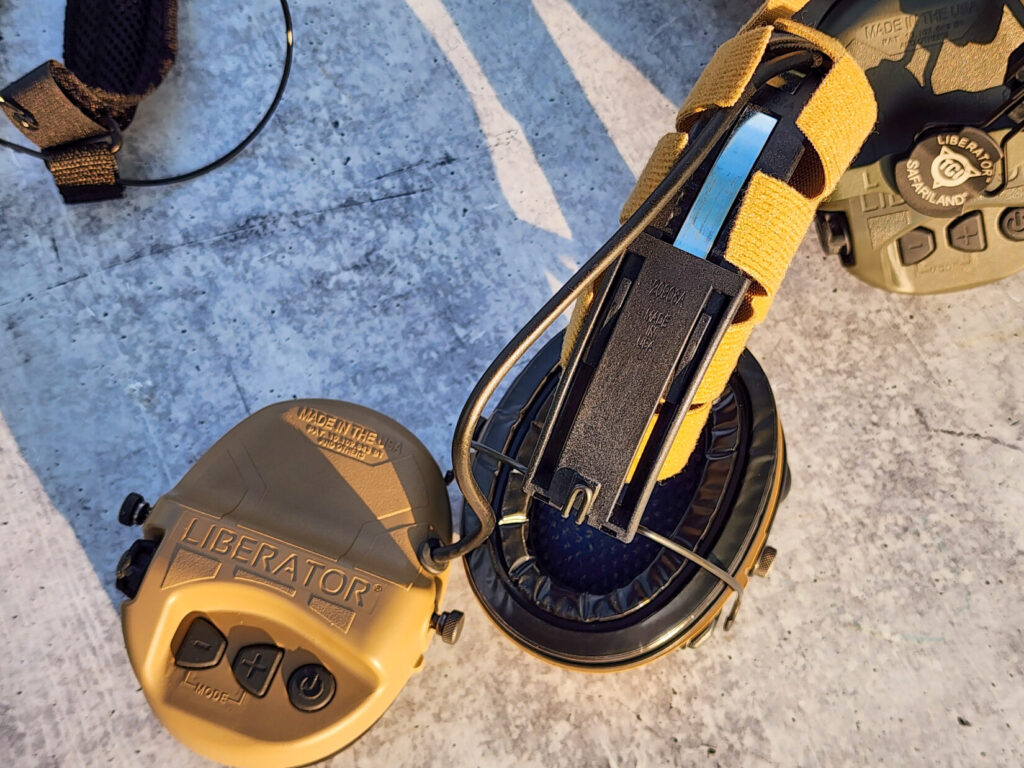
2. Pull and turn the textured steel posts outward until they stay in the locked-out position. This allows you to remove the bent wire frames of the current suspension system.
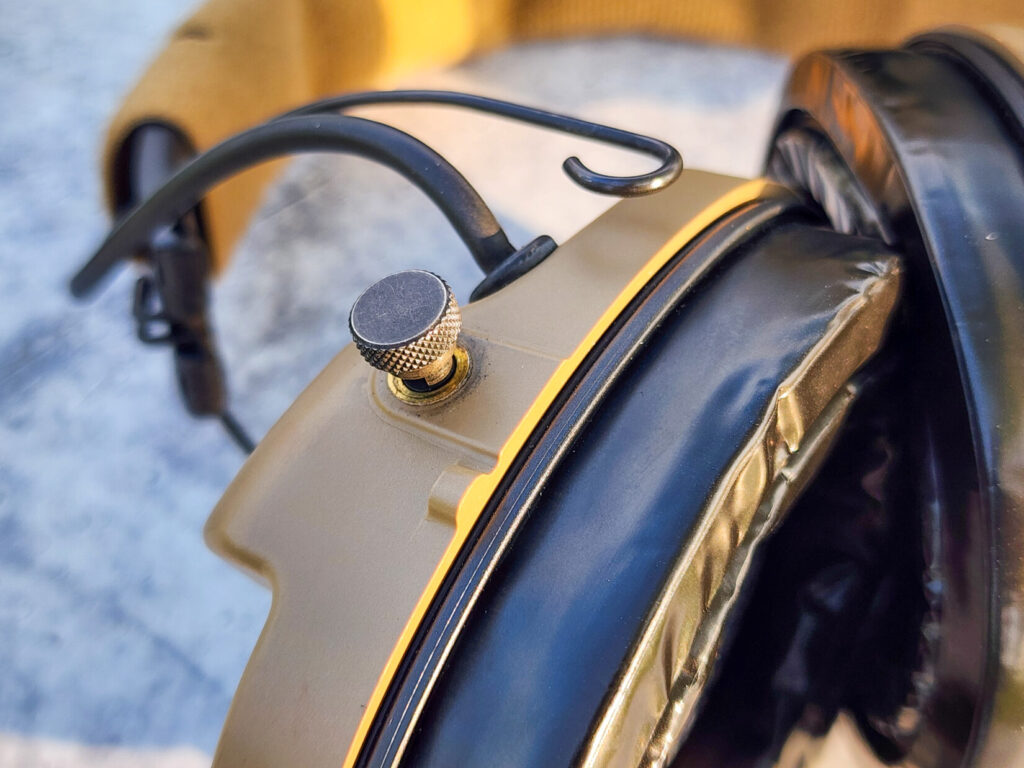
3. At this point, you’ll have just the ear cups and the wire by themselves.
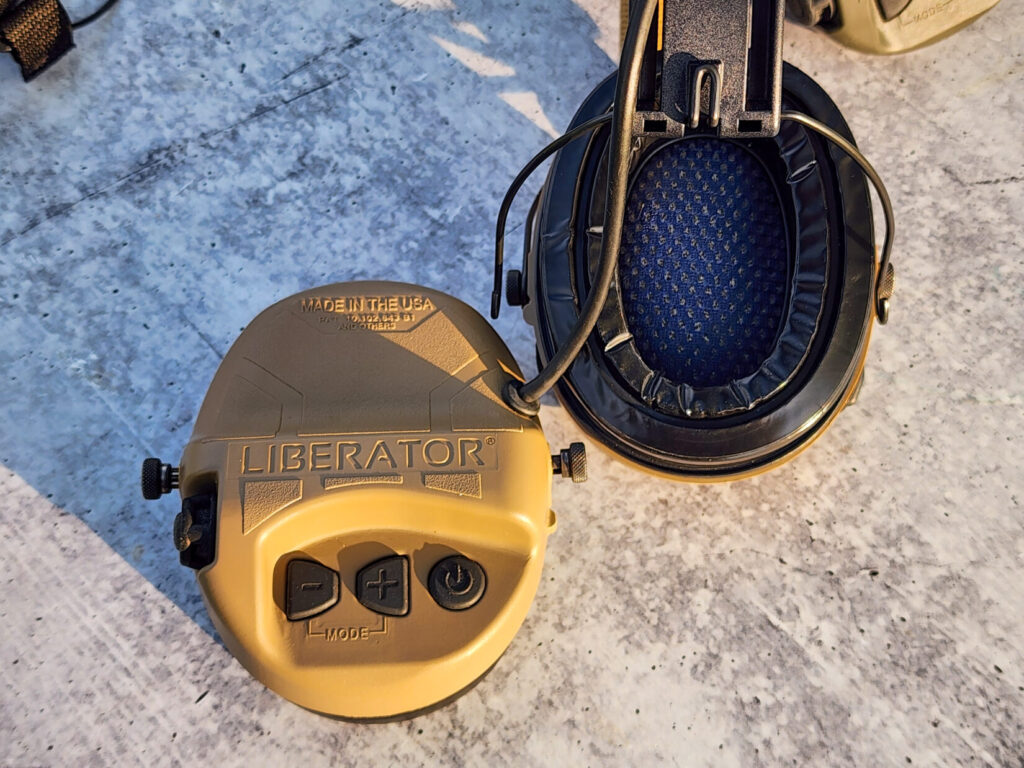
4. Place the wire frames of the new suspension system into each of the four textured steel posts, one at a time. Pull and twist until they collapse, locking the wire frame in place.
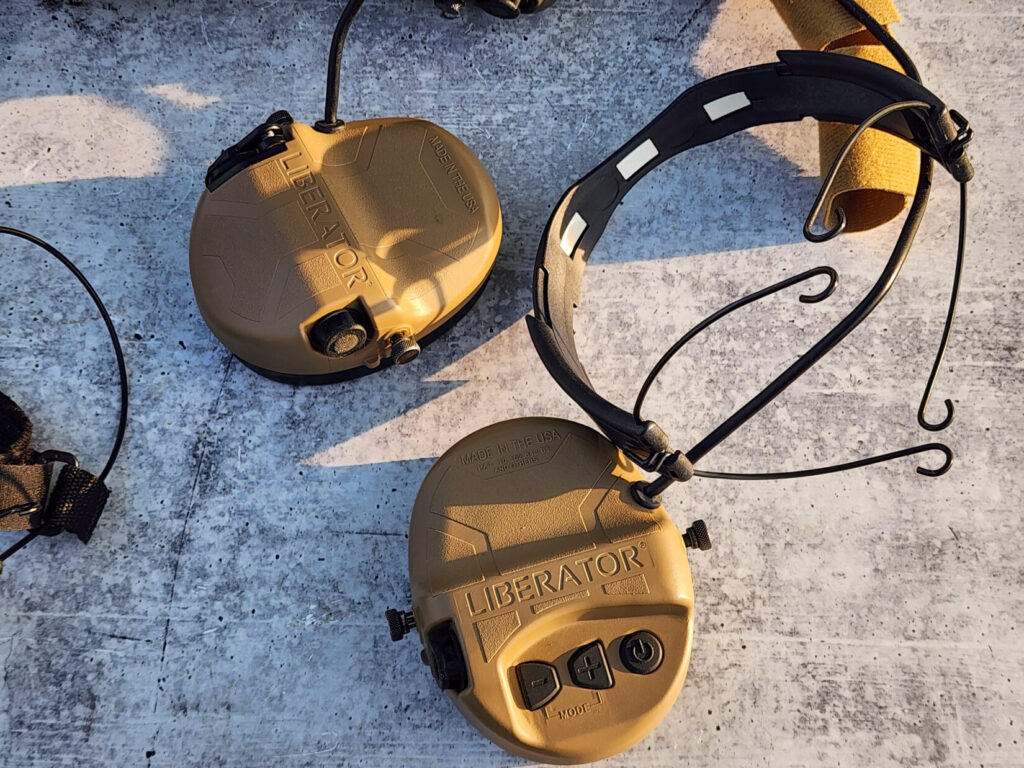
5. Manage the wires by placing them into the Velcro headband cover or in between the helmet pads inside the helmet shell. Be careful not to bend the wires too much, as that could damage the connection between the ear cups.
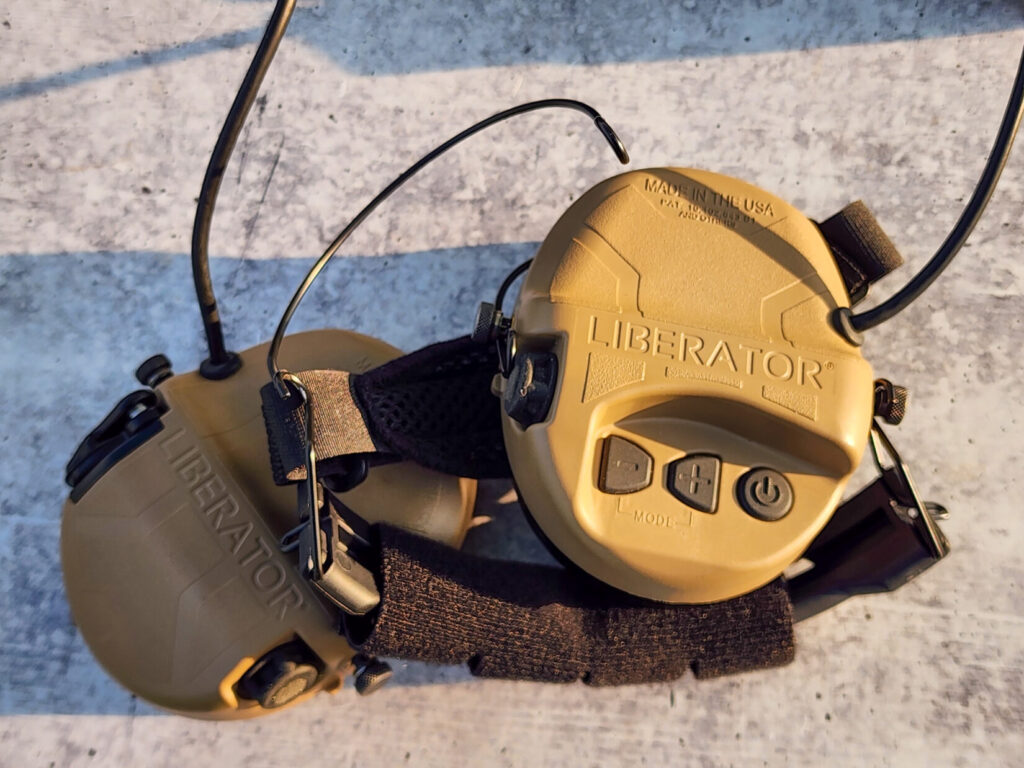
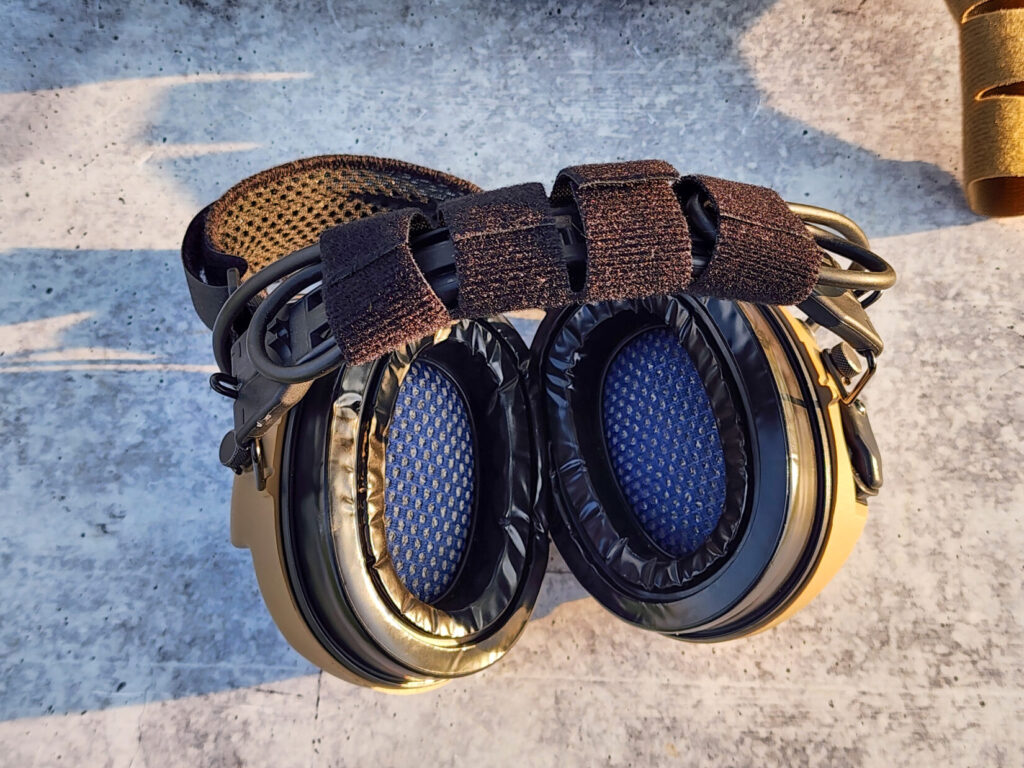
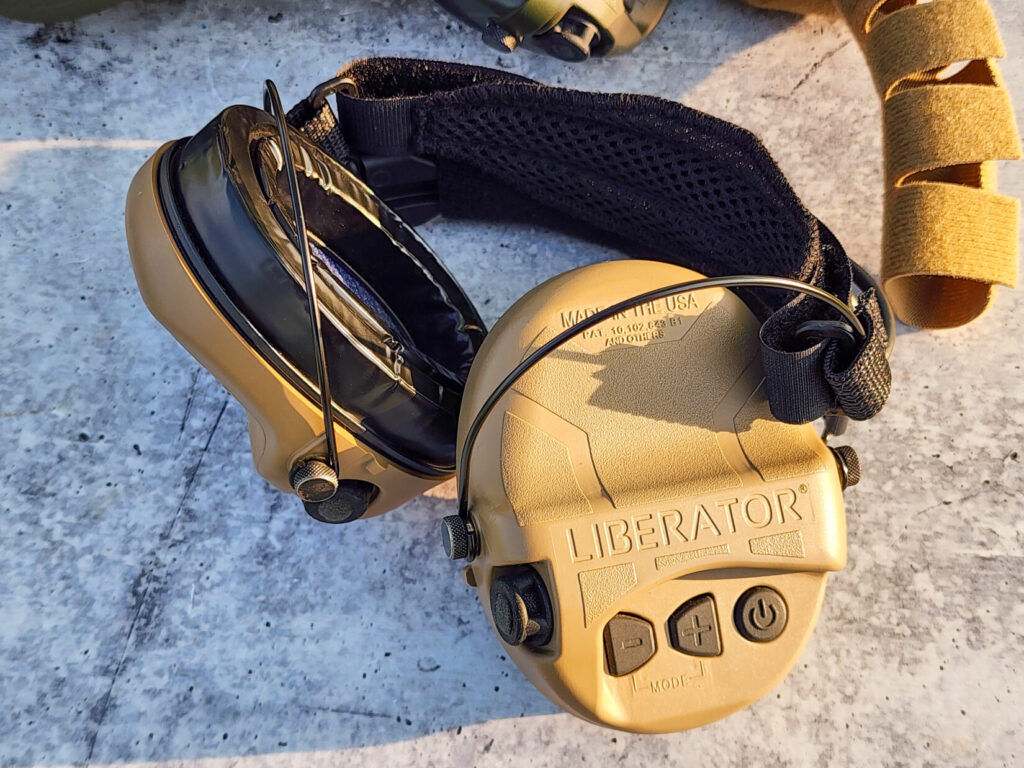
With practice, it will take less and less time to swap from one suspension or mounting system to another. When I am using my Liberator HP 2.0 off of the helmet, I prefer the behind-the-head suspension because it is much more comfortable and compatible with different types of headgear than the over-the-head system.
Mounting to a Helmet
I have the Helmet suspension system mounted to my Team Wendy Exfil Ballistic helmet equipped with the 3.0 rails onto the rear rail section.
To install the mounts, loosen the screw with a small flathead screwdriver and slide the dovetail end into the rear rail. Once at the desired height, tighten the screw until it is a little more than hand-tight.
These mounts are quick to install and remove. They have an open and closed position, so you can click them out when not in use and to take the helmet off.
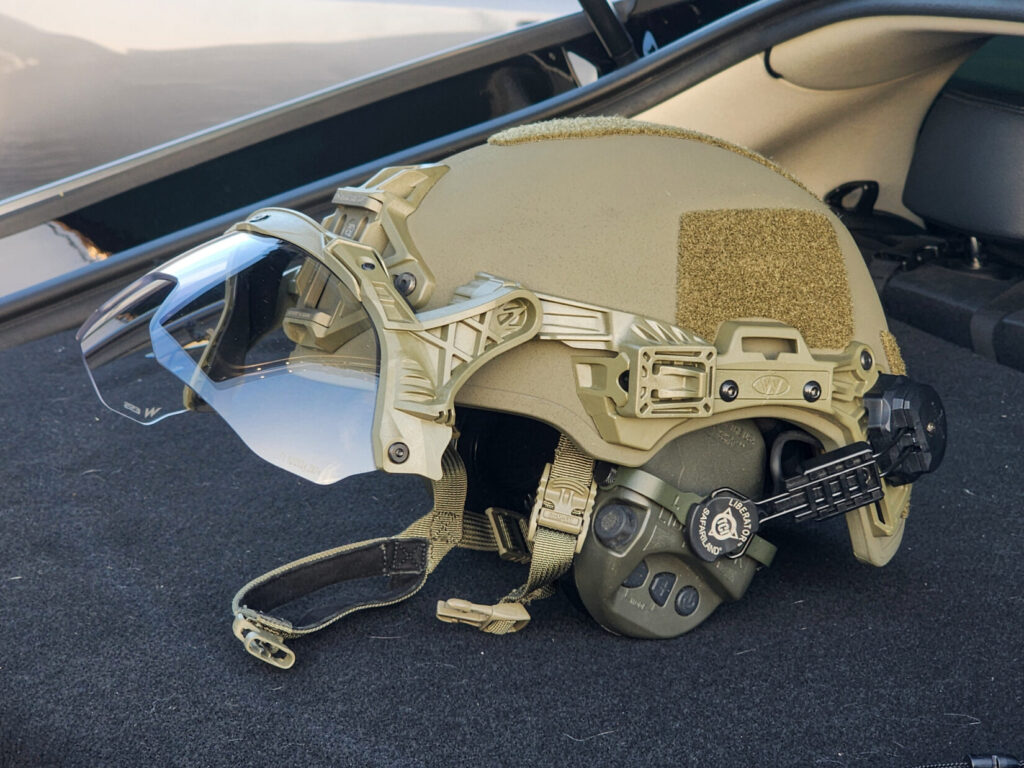
The wires on the helmet mounts are adjustable. If you are not getting a good seal, take the mounts off of the helmet and bend them with your hands at the natural bend in the wires until you achieve a good seal around your ears.
Final Verdict
I have been very satisfied with the Liberator HP 2.0s. They have made it very easy to adapt to my different needs and situations. The sound quality from the headset is excellent — everyone I let wear them is impressed with how it sounds.
The best feature is that you really only need one set for all of your range and tactical needs when it comes to your ear protection. In my personal experience and opinion, they are the best Liberators yet. They are available in many different colorways and camouflage patterns.
FAQ
Can you switch the Liberator HP 2.0’s mounting system without tools?
Yes — the Adaptive Suspension system is designed to swap between Over-the-Head, Behind-the-Head, and helmet-mount configurations in a matter of minutes, no tools required.
What batteries does the Liberator HP 2.0 use?
It’s dual-fuel compatible — 2 AAA batteries or 1 CR123 Lithium battery, swappable without tools.