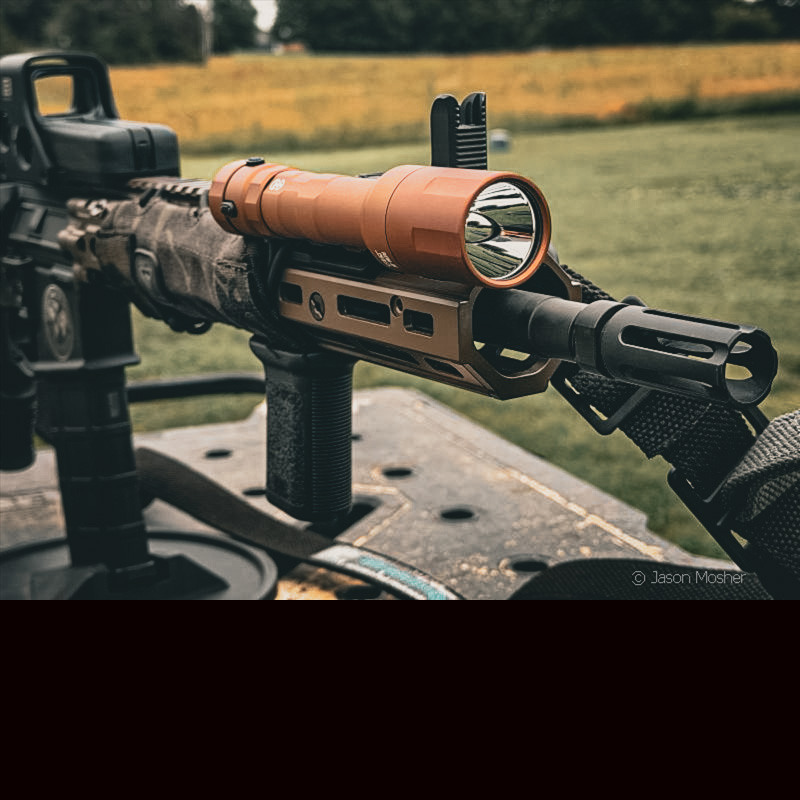
So, what is a “battle-ready light?” We hear all kinds of terms thrown around in the firearms world, but how often does it actually mean something? There are great WML’s (weapon-mounted lights) for home defense or general use, but many of those lights have distinct limitations. The Cloud Defensive REIN 3.0, however, has been engineered to provide reliability during heavy, hard-use operational cycles.
For me, a battle-ready light has one simple quality: it eliminates every known point of mechanical failure. This is done by isolating sensitive internal electronics from extreme thermal transfer, vibrational shock, and environmental ingress.
In other words, it must survive under extreme structural stress, intense heat from the barrel or suppressor, rain, and other harsh elements. Over the years, I’ve had wires pull out of remote switches, mounting brackets break off, and screws strip out. I once took a class from a Navy SEAL, and he liked to say, “Let’s see whose rifle stays together,” as we prepared to train. It was surprising how many people’s gear fell off their lights or failed to work that week.
Because of this, I’ve tested a lot of different lights over the years, and the Cloud Defensive REIN 3.0 is one I feel comfortable calling “battle ready.”
Design and Build Quality of the Cloud Defensive REIN 3.0
It won’t take long after installing the REIN 3.0 before you notice a build quality difference between it and other popular weapon lights on the market.
Type III Hardcoat Anodized Aluminum Housing
The first and most obvious is the three-piece design, which I’ll talk more about later. These pieces are made from Type III hard-coat anodized 6061-T6 aluminum. This type of aluminum is extremely light and durable, which is why it’s used so much in the firearms industry.
3mm Shockproof Glass Lens
The glass lens is 3mm thick. According to Cloud Defensive, it can withstand multiple shots of 5.56 Simunition rounds at close distance. Having a thick lens is important on a rifle WML because it’s so easy for it to get knocked around. Depending on the muzzle device, it also gets blasted with gases exiting the barrel, which is what causes that black film to form over your light after a shooting session.
Understanding the IPX-8 Waterproof Rating
Even though the housing is made up of three pieces, the Cloud Defensive REIN 3.0 carries a water resistance rating of IPX-8. If you are not familiar with this rating, it’s more stringent than the common IPX-7 rating you often see on lights. To claim an IPX-8 rating, a product must meet several parameters, which include:
- Sustained Depth: Submersion capability must exceed 1 meter.
- Duration: The device is tested for continuous immersion. While consumer electronics often utilize a 30-minute standard at greater depths, tactical or marine equipment is typically tested for prolonged or continuous exposure.
- Harmful Ingress Protections: The core requirement is that water cannot enter the enclosure in a volume that causes harmful effects to the sensitive internal electronics or mechanisms.
twist-Free tail-switch design
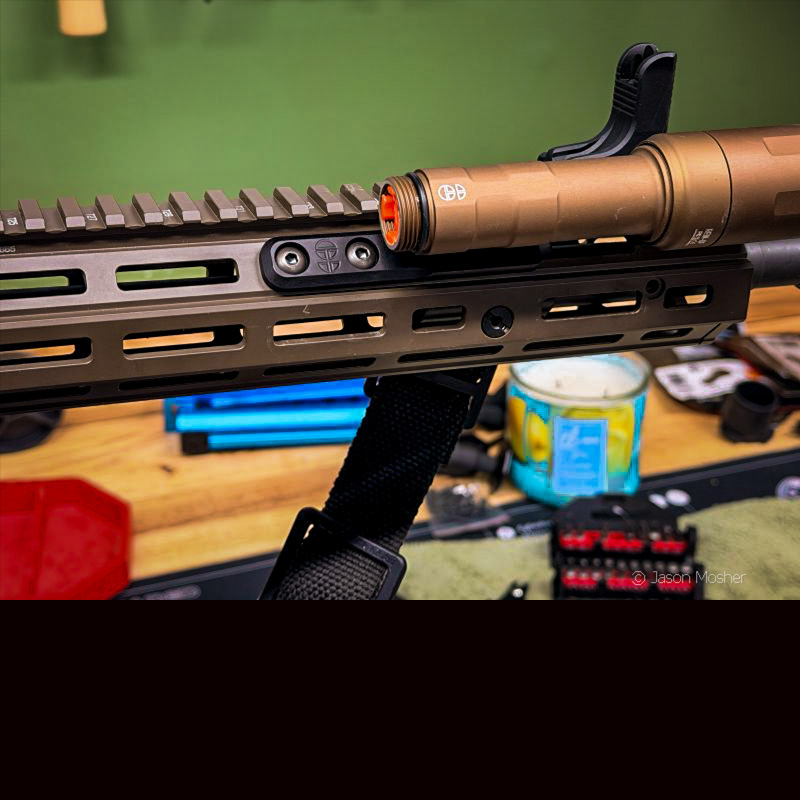
Another unique thing about the REIN 3.0 is the way the tail cap connects to the frame. On most traditional rifle lights, the tail cap screws onto the back of the light body, and the remote switch wire runs through the center. To keep the wire from twisting as you tighten the tail cap, the center wire turns within the tail cap. This leaves a weak point for water to enter over time.

On the REIN 3.0, the frame has cut-out slots for the tail-cap switch to slide into (see photo above). Because the wire runs out of one side, you can adjust where the wire exits the frame by rotating the tail cap. Once you position it where you want it, an aluminum collar screws down over the end of the tail cap switch to hold it in place.
This design eliminates “battery bounce” caused by heavy rifle recoil. If you haven’t experienced battery bounce before, it is an issue that causes your light to flicker when you fire your gun.
Additionally, you will also notice that the tail-cap switch has a dedicated power button on the rear, as well as a wire that runs to a remote switch. This provides a redundant system with two access points.
Cloud Defensive REIN 3.0 Specifications
- Output Performance: 1,250 lumens
- Peak Beam Intensity: 100,000 candela
- Power Source: Both 18650 batteries or CR123As. It will also accept all protected and unprotected 18650 batteries, both button-top and flat-top batteries. Fully tested to ANSI/PLATO-FL1 standards. (Note: Expect performance degradation with CR123A batteries)
- Operational Run-Time: 65 minutes
- Physical Dimensions: 6.17 inches with a bezel diameter of 1.3 inches
- System Weight: 6.91 ounces, including the battery and remote switch assembly.
Step-by-Step Guide: Installing the REIN 3.0 WML
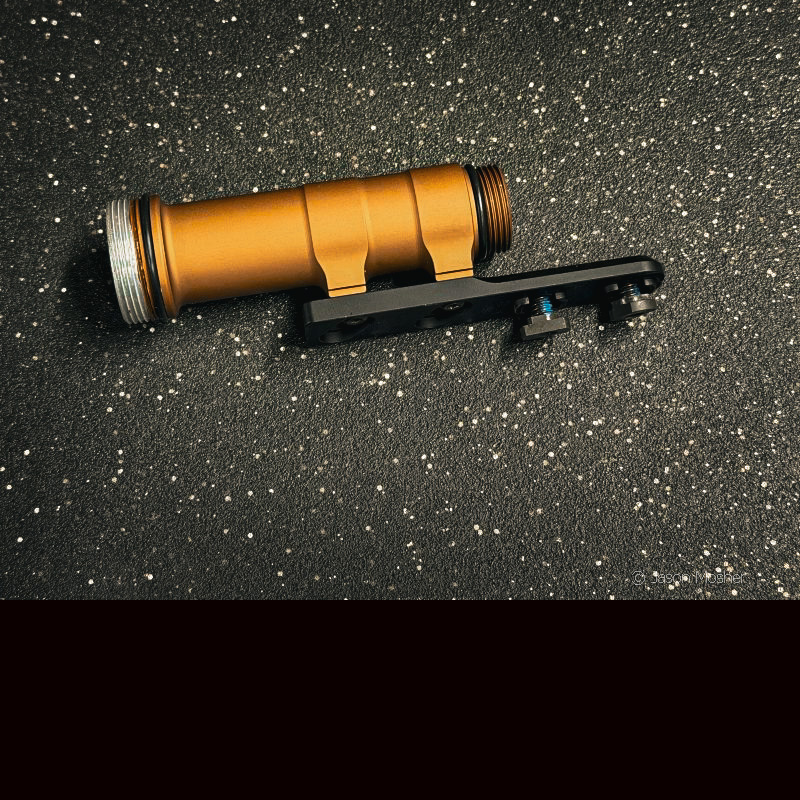
The easiest way to install the REIN 3.0 is to first take it apart. Don’t worry, this is a straightforward process.
Remove the bezel head of the light, then unscrew the collar that holds in the tail switch housing. After that, unscrew the third, shorter portion of the lights’ frame from the center section.
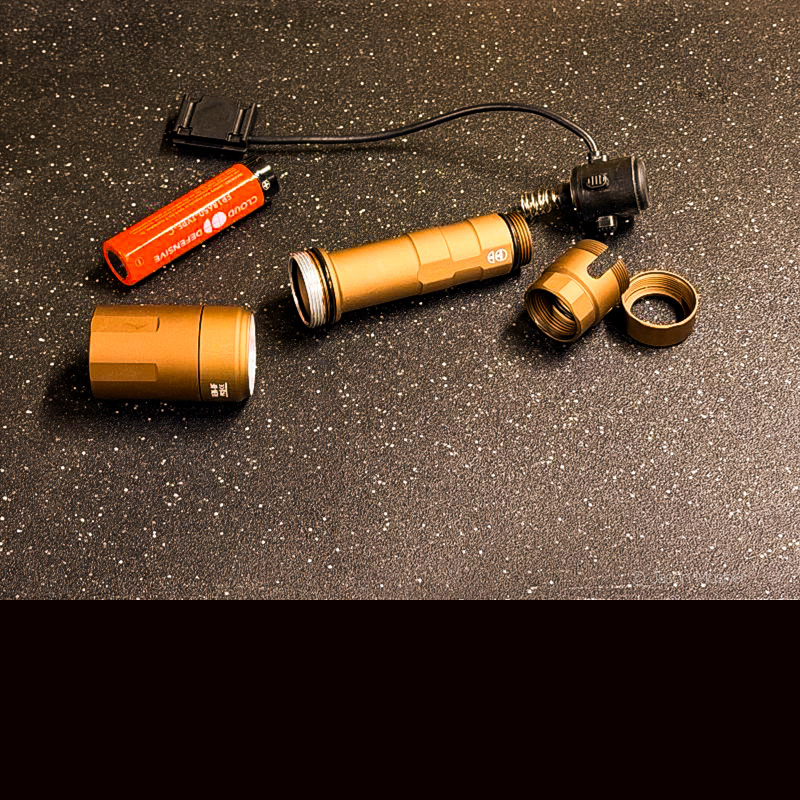
Next, you can install the rail mount that comes with the light. This piece screws to the center piece with the M-LOK portion of the bracket extending out past the light’s frame (see photo below). If you accidentally mount this piece backwards, the screws will not sit flush in the bracket. When it’s on correctly, the rounded portion of the bracket should be facing upward toward the frame of the light.
Mounting the Light to Your Rifle Handguard
Now you are ready to install the bracket and center part of the frame to your rifle’s handguard. The head of the REIN 3.0 is larger than the main body of the tube, so be sure to dry-fit the light to make sure it fits on the rifle correctly. When I first installed mine, the head of the light pushed against my muzzle device. If you use a suppressor, also check to see that it will clear the light head once fully mounted.
Screw the bracket onto your handguard using the M-LOK screws and brackets. Once this is on, you can install the battery and head of the light.
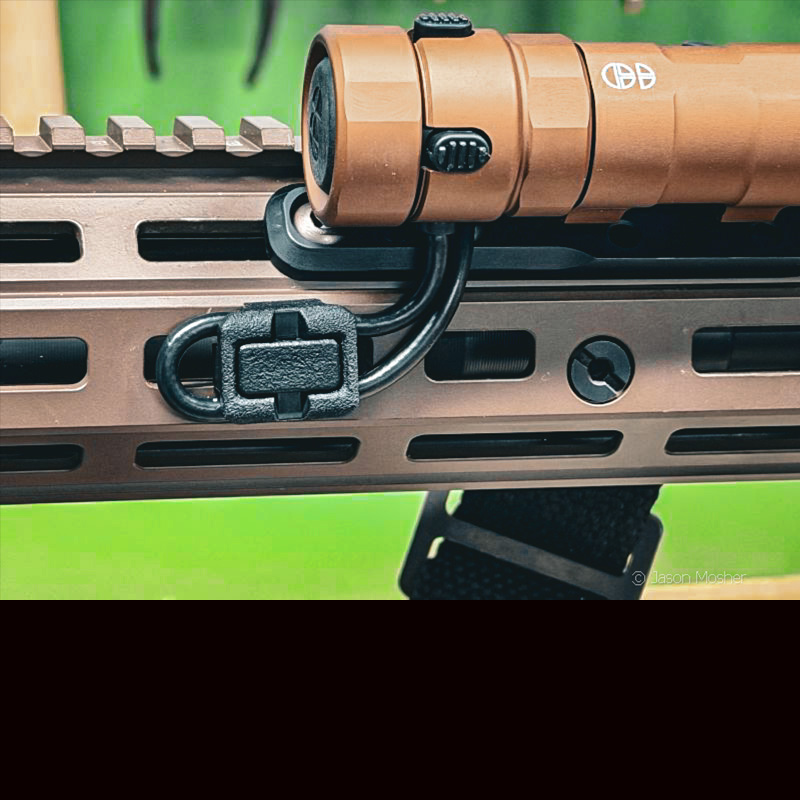
At this point, the third part of the light’s frame can be screwed on (just make sure those M-LOK screws are tightened down well first). After that, insert the tail-cap switch and then the collar. As you complete this step, think about where you want the wire to exit from the side of the light. I have mine facing downward so I can attach the wires to the rail to hold them down.
Cable Management and Final Setup
I used MagPul’s M-LOK wire management brackets to attach the wire to the rail just before it routes up to the remote switch. This keeps the wires out of the way and gives it a clean look. When I reinstalled my handguard cover, it fit over the wires and hid them from view, which is even better.
Finishing up and Function Check
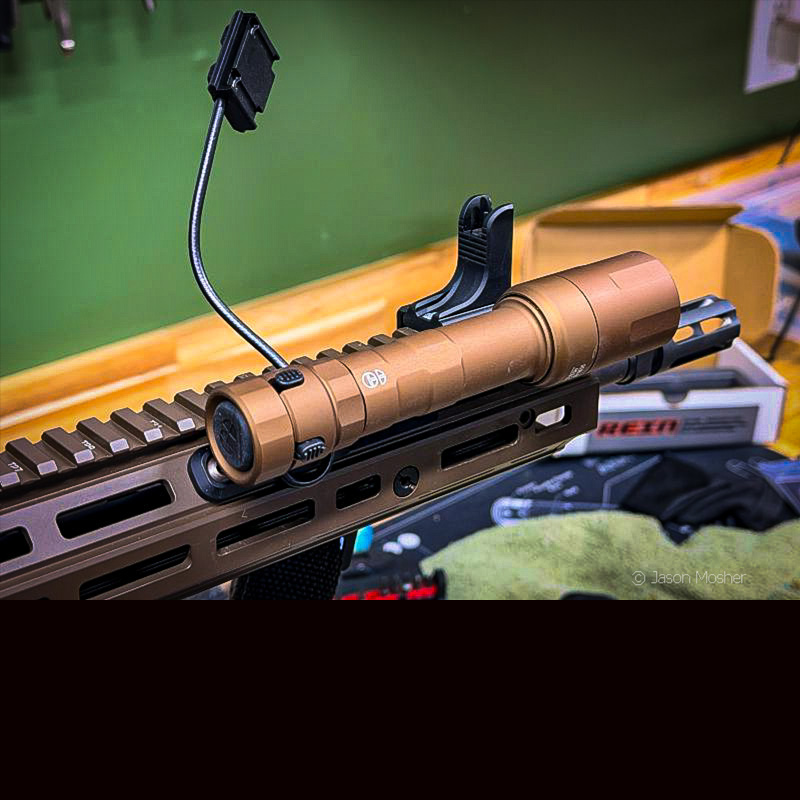
You can install the remote switch after the light is on, but looking back, I can see how it may be easier to do it before the light is attached to the gun. A small mounting bracket comes with the remote switch to attach it to your Picatinny rail.
Finally, double-check that the three pieces of the light are snug, the M-LOK screws and brackets are on correctly, and the light is functioning. You should be able to activate the light from the remote switch or tail-cap switch.
Once your installation is complete, you will have a high-quality, “battle-ready” light on your rifle. The battery can be changed by unscrewing the front of the light. Its dual-fuel capability means you can drop in two CR123 batteries in a pinch if your rechargeable 18650 runs dry.