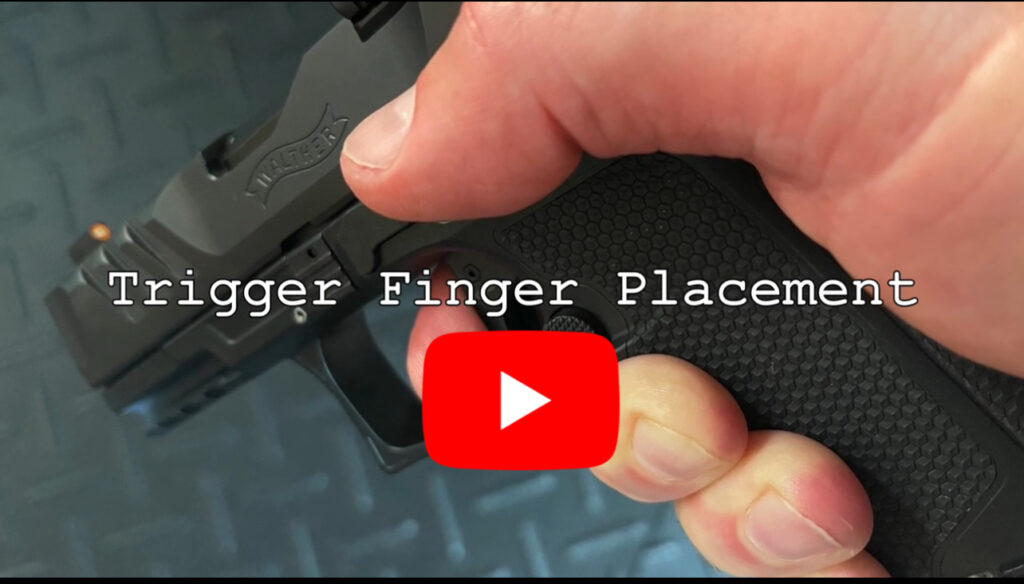
This month’s skill builder is going to discuss trigger finger placement along with some experimentation to improve your shooting skills and fundamentals of marksmanship. If you are new to War Hogg Skill Builders, go back and review these articles.
At War HOGG Tactical, we use a building block methodology of teaching. I also tell my students at the beginning of our courses, don’t be afraid to try new techniques. I tell them, “If you do what you always have done, you’re going to get what you always got.” Our special operations combat experience helps you become a more efficient and effective shooter while building a solid foundation of the fundamentals of marksmanship.
With trigger finger placement, you will hear some instructors say you should use the pad of the finger. I believe it does not matter. We don’t all have the same hand size, finger size, or pistol frame size. Let’s jump into this month’s War HOGG Skill Builder.
EQUIPMENT NEEDED
- Normal range and firearms equipment
- Live-fire range
- Dry-fire training area
- The Firearms Training Notebook – available on Amazon
- Shot Timer, we recommend the PACT Club Timer III
- Recording device and tripod/holder – this will be key to watching your footwork
- War HOGG Tactical Training Target
To set up, I am using the dot side of my War HOGG Tactical Training Target at 5 meters. The dots give you the option of 3-inch dots, B8 Bullseye, 4×6, or 3×5 target area.
How the Monthly War HOGG Skill Builder Works
This War HOGG skill builder model is simple. At the beginning of the month, head to the range and experiment with trigger finger placement. A lot of this is going to depend on your hand size and pistol frame size. Then record the data in your copy of The Firearms Training Notebook.
From there, build your dry-fire and live-fire plan around what lessons you learned from the new trigger finger placement. Later in the month, come back to the live fire range and reshoot the skill builder to see whether you figured out the best trigger finger placement for you and your pistol. The War HOGG Self Eval is a great drill for confirming your new trigger finger placement.
How to Run the War Hogg Skill Builder
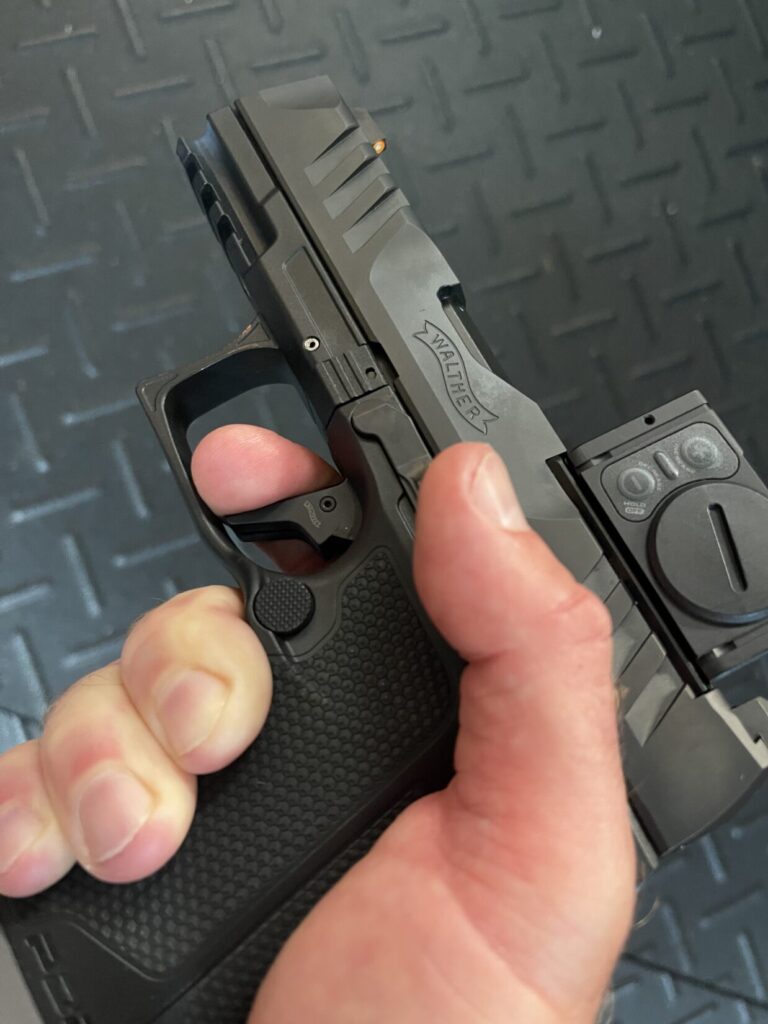
I am starting from the ready position with single-shot presentations, with the idea of putting as much trigger finger on the trigger guard as possible. I would experiment with how my shots break if my finger is at the bottom of the trigger, almost sliding on the bottom of the trigger guard. The key is you must have proper grip pressure; if you are changing your grip pressure, it is going to throw off your shot placement because you are putting unwanted input into the pistol.
Once I have that single shot good trigger finger placement, I progress to controlled pairs while using my shot timer and seeing what my split times are looking like. Do I see better splits with good shot placement with this new trigger finger placement?
I work some draw from the holster and slide lock speed magazine changes on the shot timer with the new trigger finger placement, and see how my times look. I’m using my past shooting performance data from my copy of The Firearms Training Notebook to see how my shooting performance is with the new finger placement.
Build Your Dry Fire Plan
Once you figure out your good trigger finger placement and you have good shots on your target, you can start to build a dry fire plan. Trigger finger placement and grip are the two main things I am working on with my dry fire training. I use different pistols between our On The Range Podcast episodes, “On The Range” instructional videos, or when conducting pistol overviews. My trigger finger placement is slightly different for each blaster.
Your dry fire program should consist of improving skills like pistol presentation, draw from the holster, and magazine changes while incorporating good trigger finger placement. When you start pushing your speed, you might find that your new trigger finger placement is off. This is where those tactile reference points will help keep your finger where it needs to be to work for your pistol.
The primary takeaway is that with a proper grip, you can get away with smashing that trigger using the finger placement that works best for you and your pistol.
The skill builder focuses on building and maintaining constant grip pressure, consistent proper trigger finger placement, calling your shot, and recoil/recovery management.
Check Your Work
Sometime near the end of the month, go back out and confirm your trigger finger placement. Compare the end-of-the-month shoot to the first run. If you put in the work, you should see improvement.
Build Your Shooting “CREW”
Having other like-minded shooters around will help you push to make yourself better. If you have friends, family, or co-workers who share your shooting passion, start building that shooting tribe. This way, not only do you have your own accountability, but you also have others to help you improve on your marksmanship journey. They can record you shooting, possibly give you feedback on things they see, and it’s always good to have some fun competition to help you grow.
At War HOGG Tactical, our motto is “Be 1% Better Everyday!” You can always join us in sharing your marksmanship growth.
Go to our On The Range (OTR) Patreon “CREW” members’ page and join like-minded shooters looking to get more proficient in their marksmanship skills. My co-author, Mark Kelley (Kelley Defense), and I conduct bi-monthly interactive Zoom calls where we break down each shooter’s skill builder. We have even reviewed video of “CREW’ members shooting during our Zoom call and given immediate feedback on where we see they can improve their shooting skills.
Conclusion: Don’t Be Afraid To Try New Things
This month’s War HOGG skill builder is asking something a little different from marksmanship accountability. It is OK to experiment with different techniques and see what works best for you. As shooters, we are not all built the same, and we don’t all shoot the same gun. Key points to the monthly War HOGG skill builder: shoot it cold, record the data, study the feedback, and build your dry fire plan. Then come back and check your work.
To see improvement in your marksmanship skills, you must put in the work. This means having a solid dry fire training plan throughout the month and a way to record your progress, like with The Firearms Training Notebook. Using additional tools, like a shot timer and a phone to video your training sessions, you can take your dry fire training to the next level and see increased performance during your live training.
Don’t forget to check out the War HOGG skill builder library for more shooting tips.
Train Hard, Stay Safe, and see you “On The Range” – Rick